🔗 Connect a Resource
Connecting adds a second resource to a reservation you already own, so one event covers everything it needs. The classic case is a meeting room booked for a presentation: you connect a projector to it instead of making a separate, unrelated booking.
Each resource you connect becomes its own sub-booking, linked to the original event. Only the combinations your administrator allows are offered: when defining resource types, the administrator declares which types can be mixed and matched, for example "meeting room" with "projector".
A resource can only be connected while the event has not begun yet, so plan the add-ons in advance. Once the event is running, the option is disabled.
📍 Where to find it
The Connect button sits at the bottom of the reservation card, in the card view of Your Events.
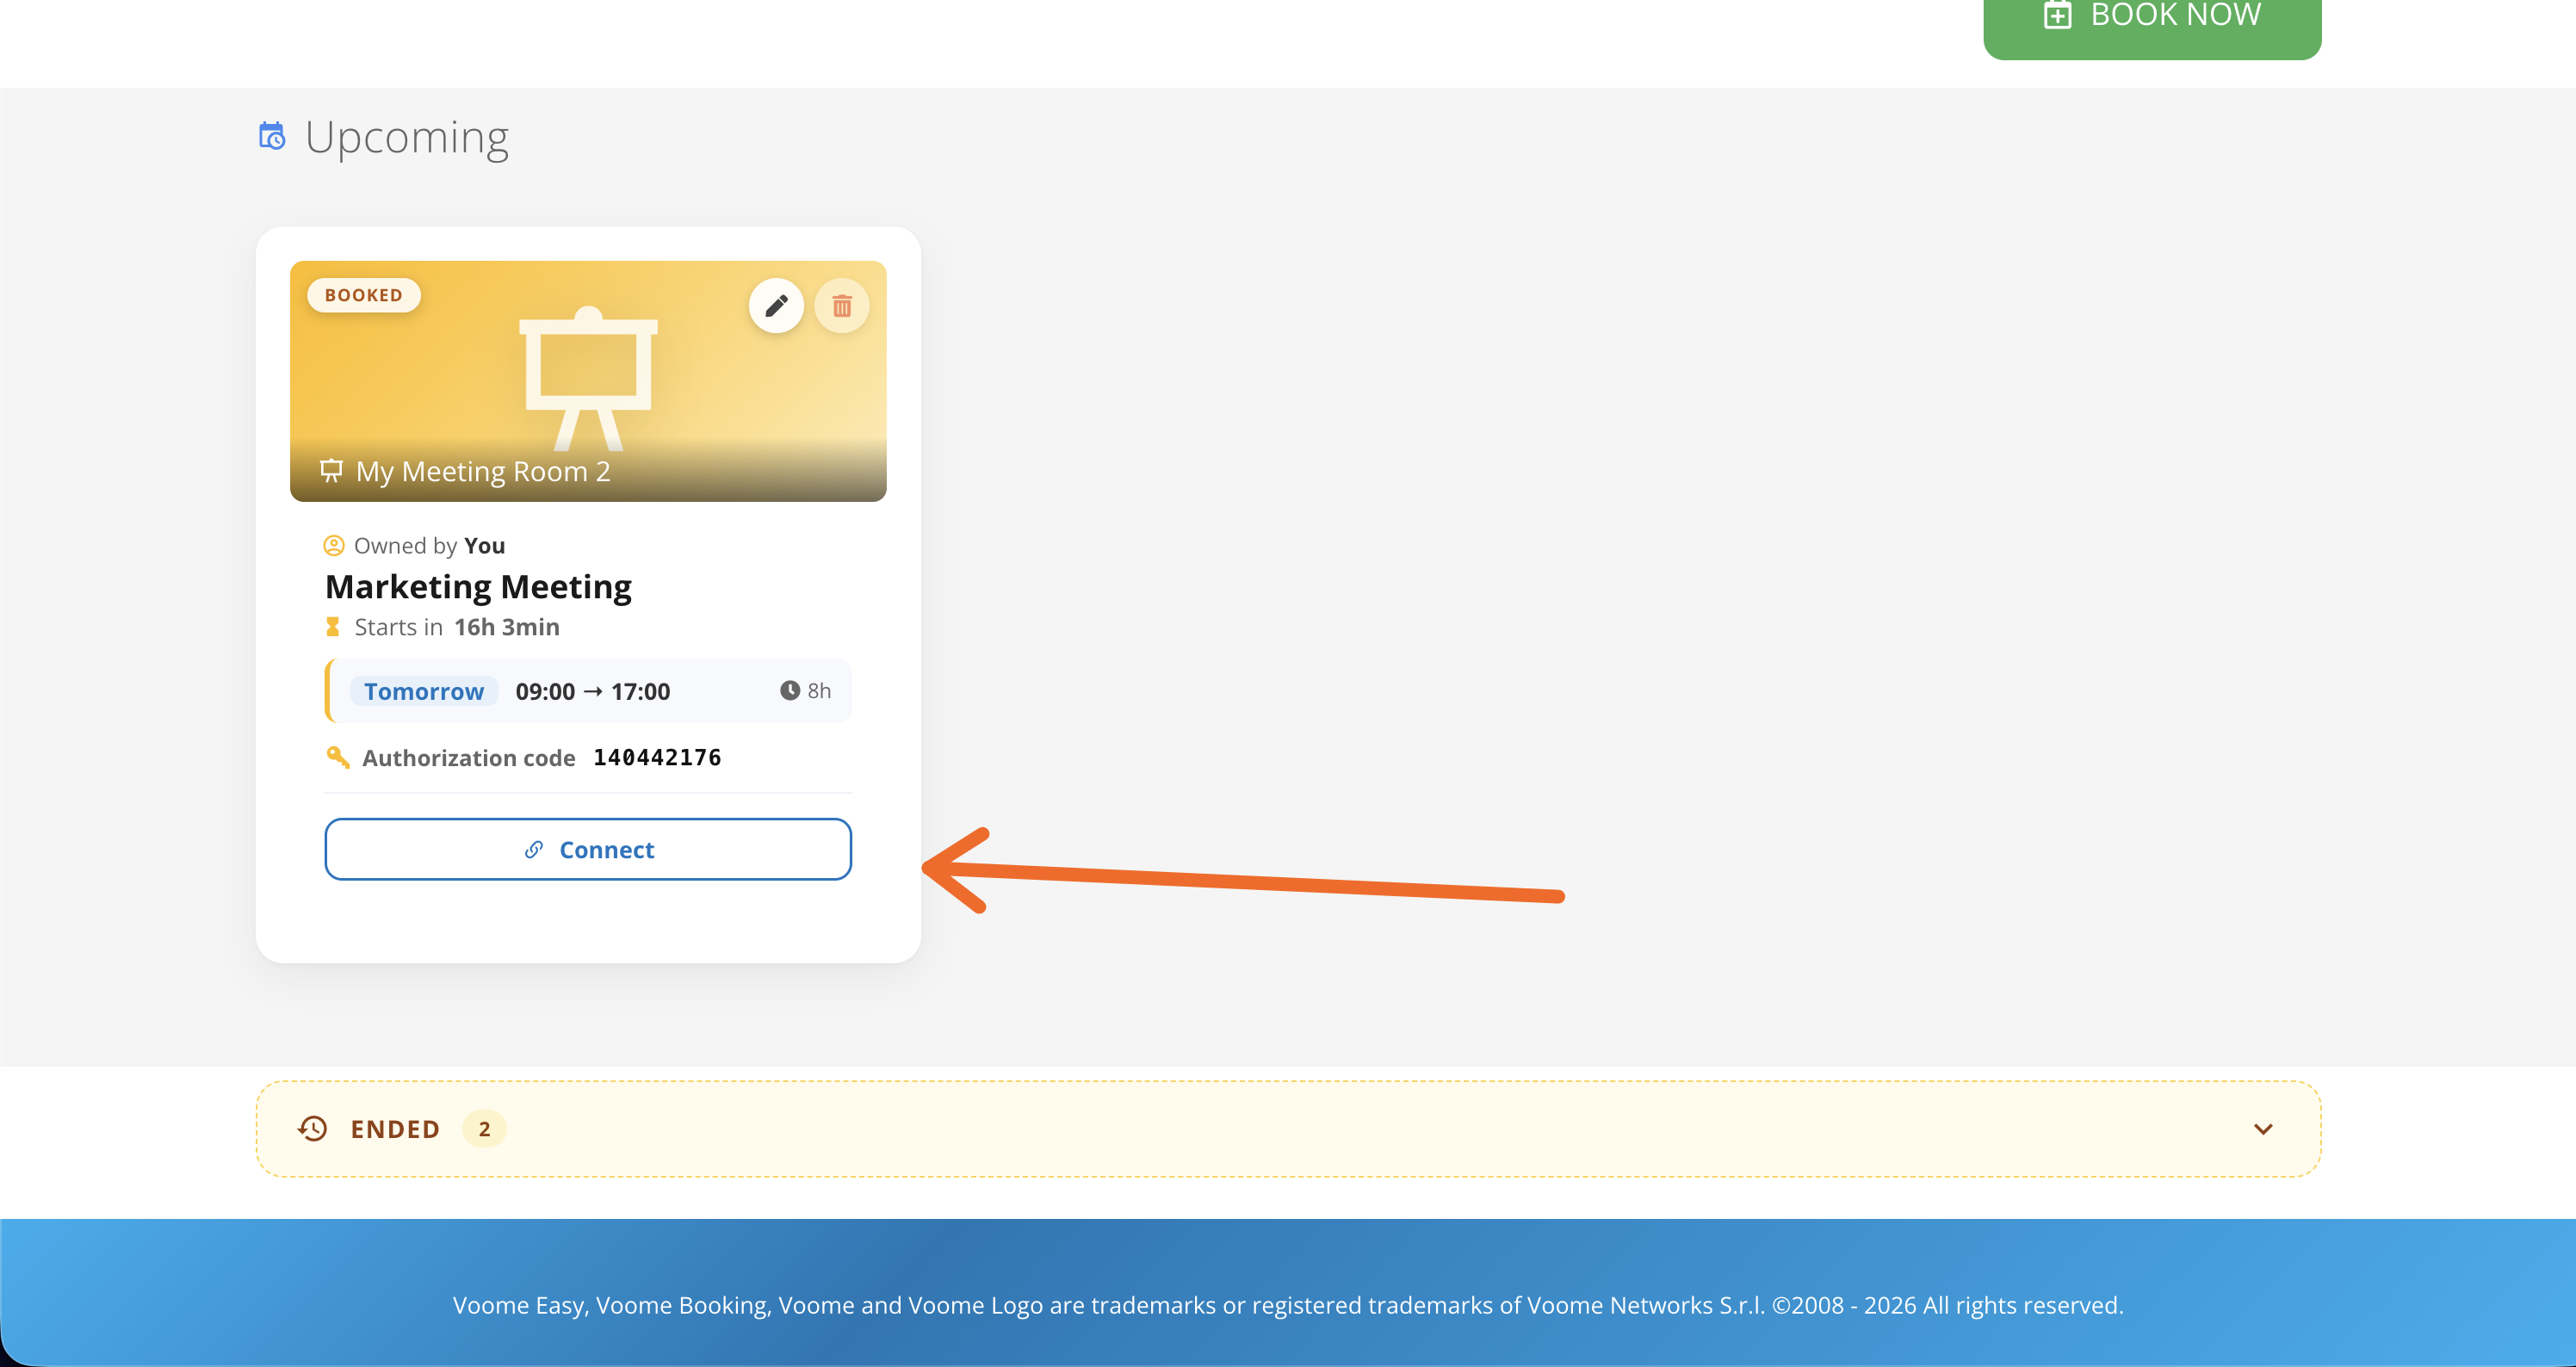
Either the event has already started, or the type you booked has no other type associated with it, so there is nothing to connect. In the second case, ask your administrator to associate the two types in Resource Types.
📆 Add a sub-booking to a day
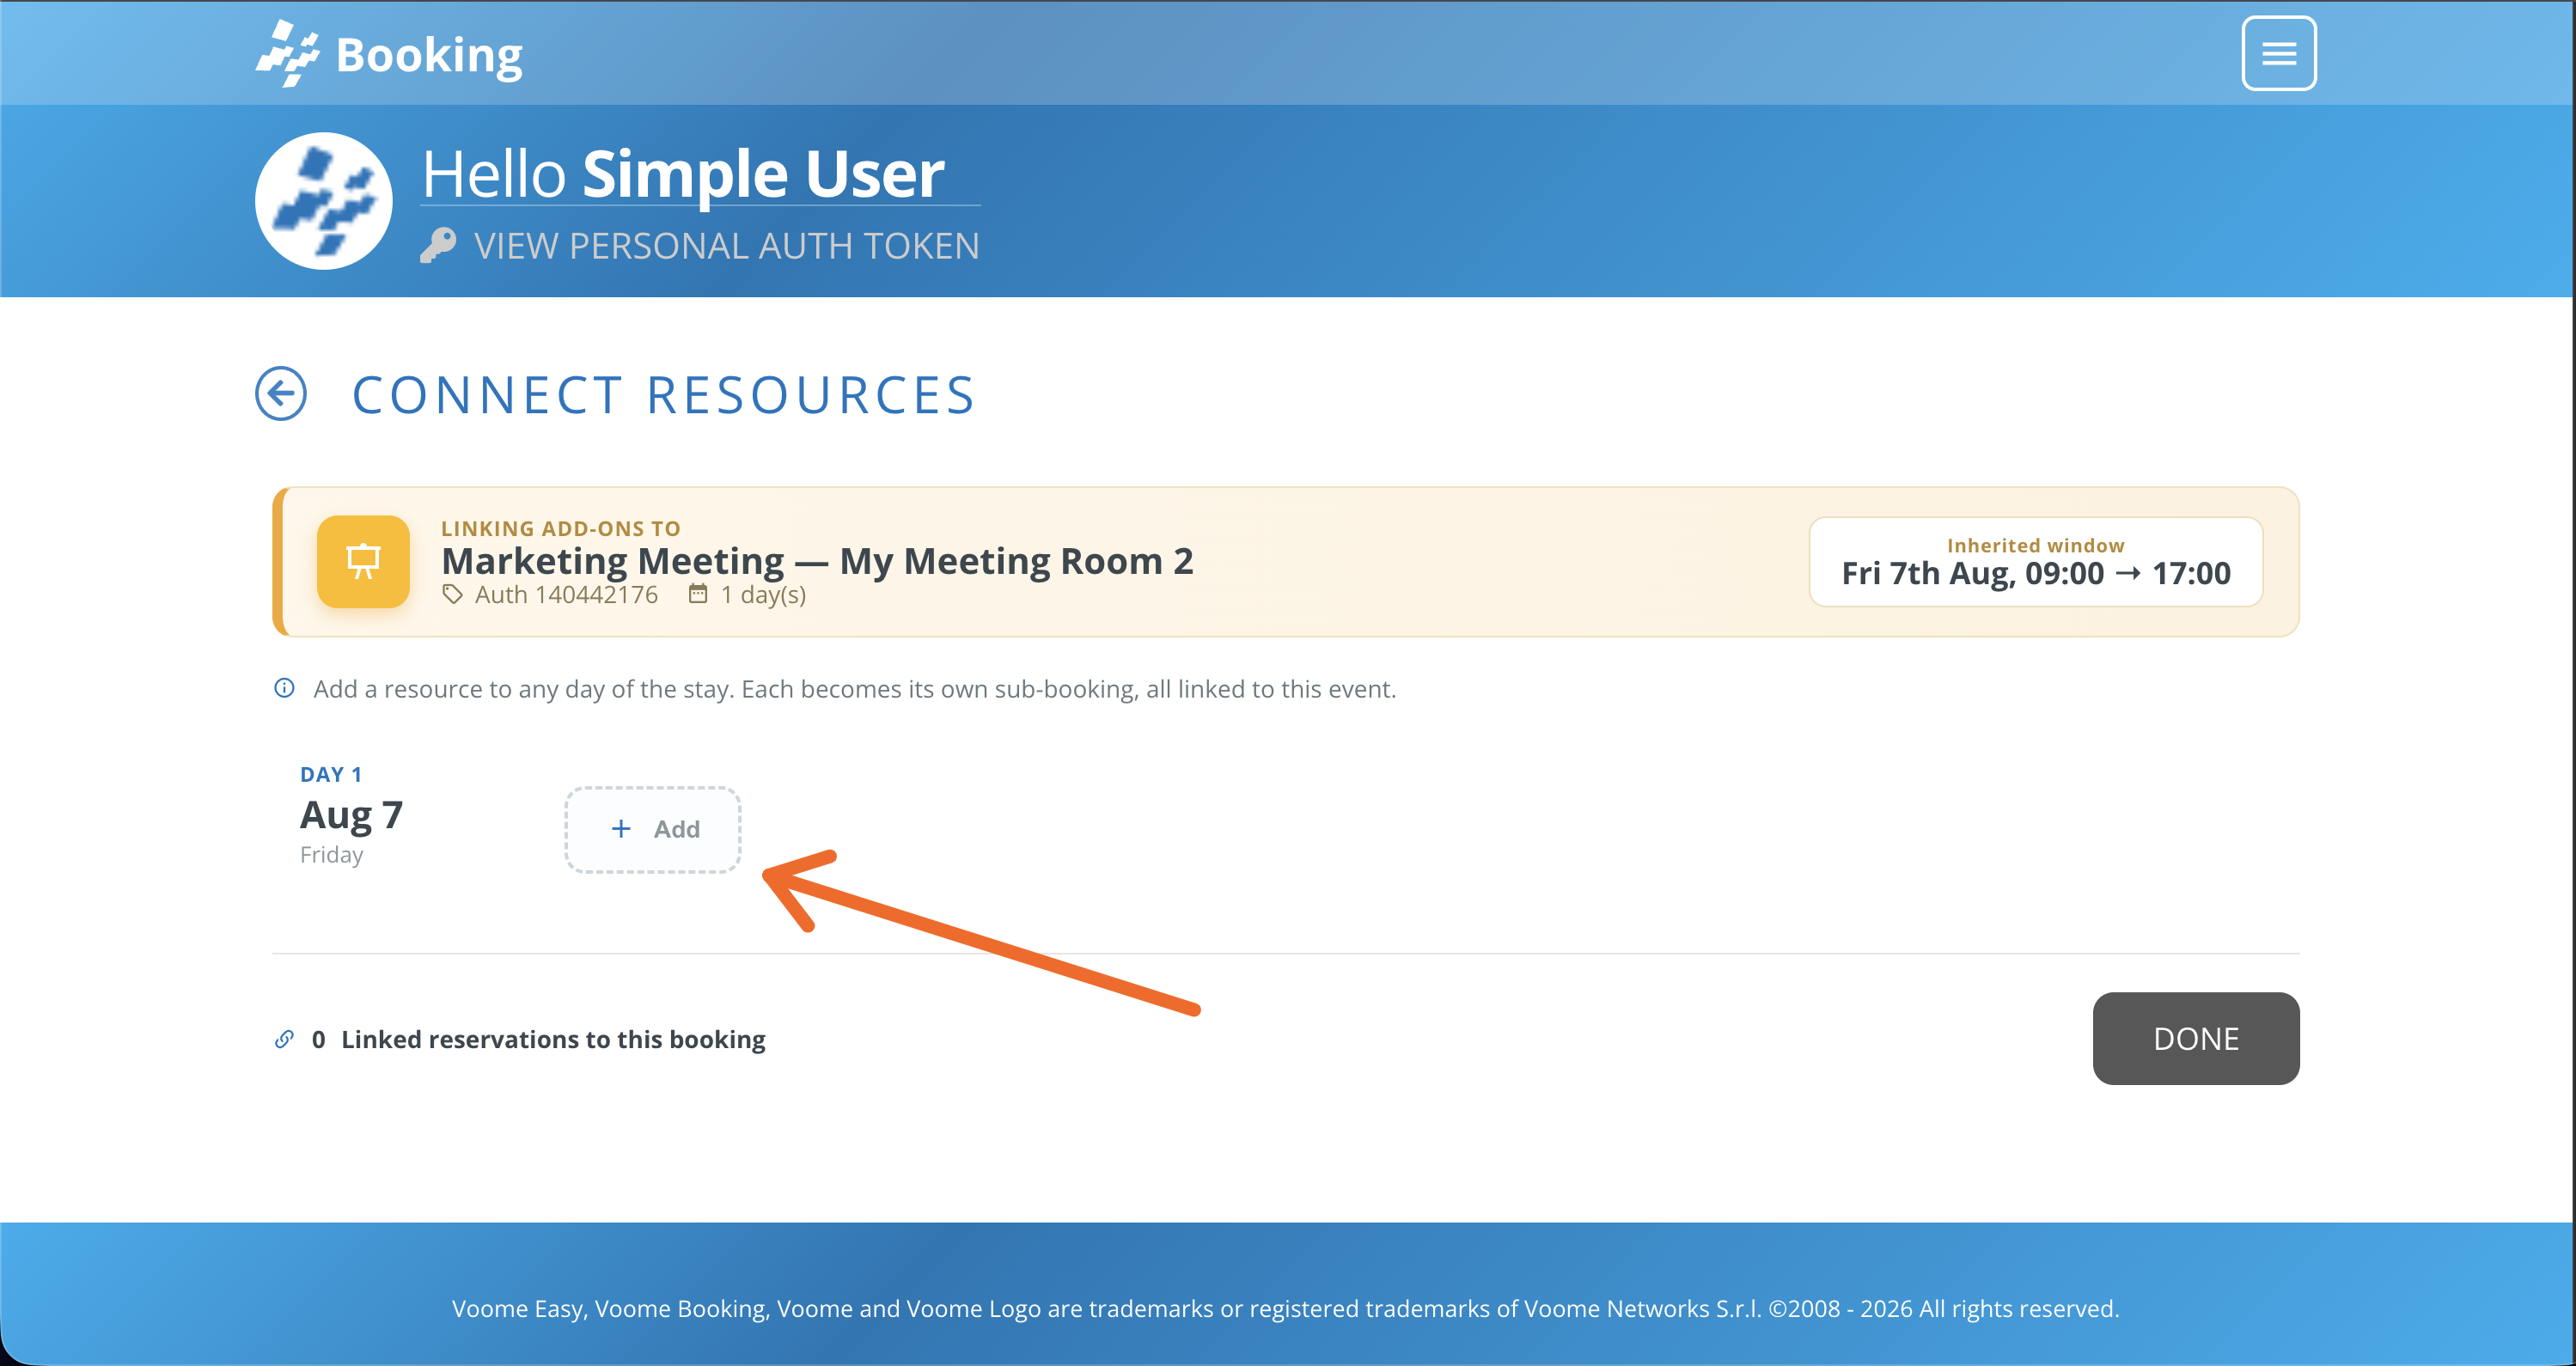
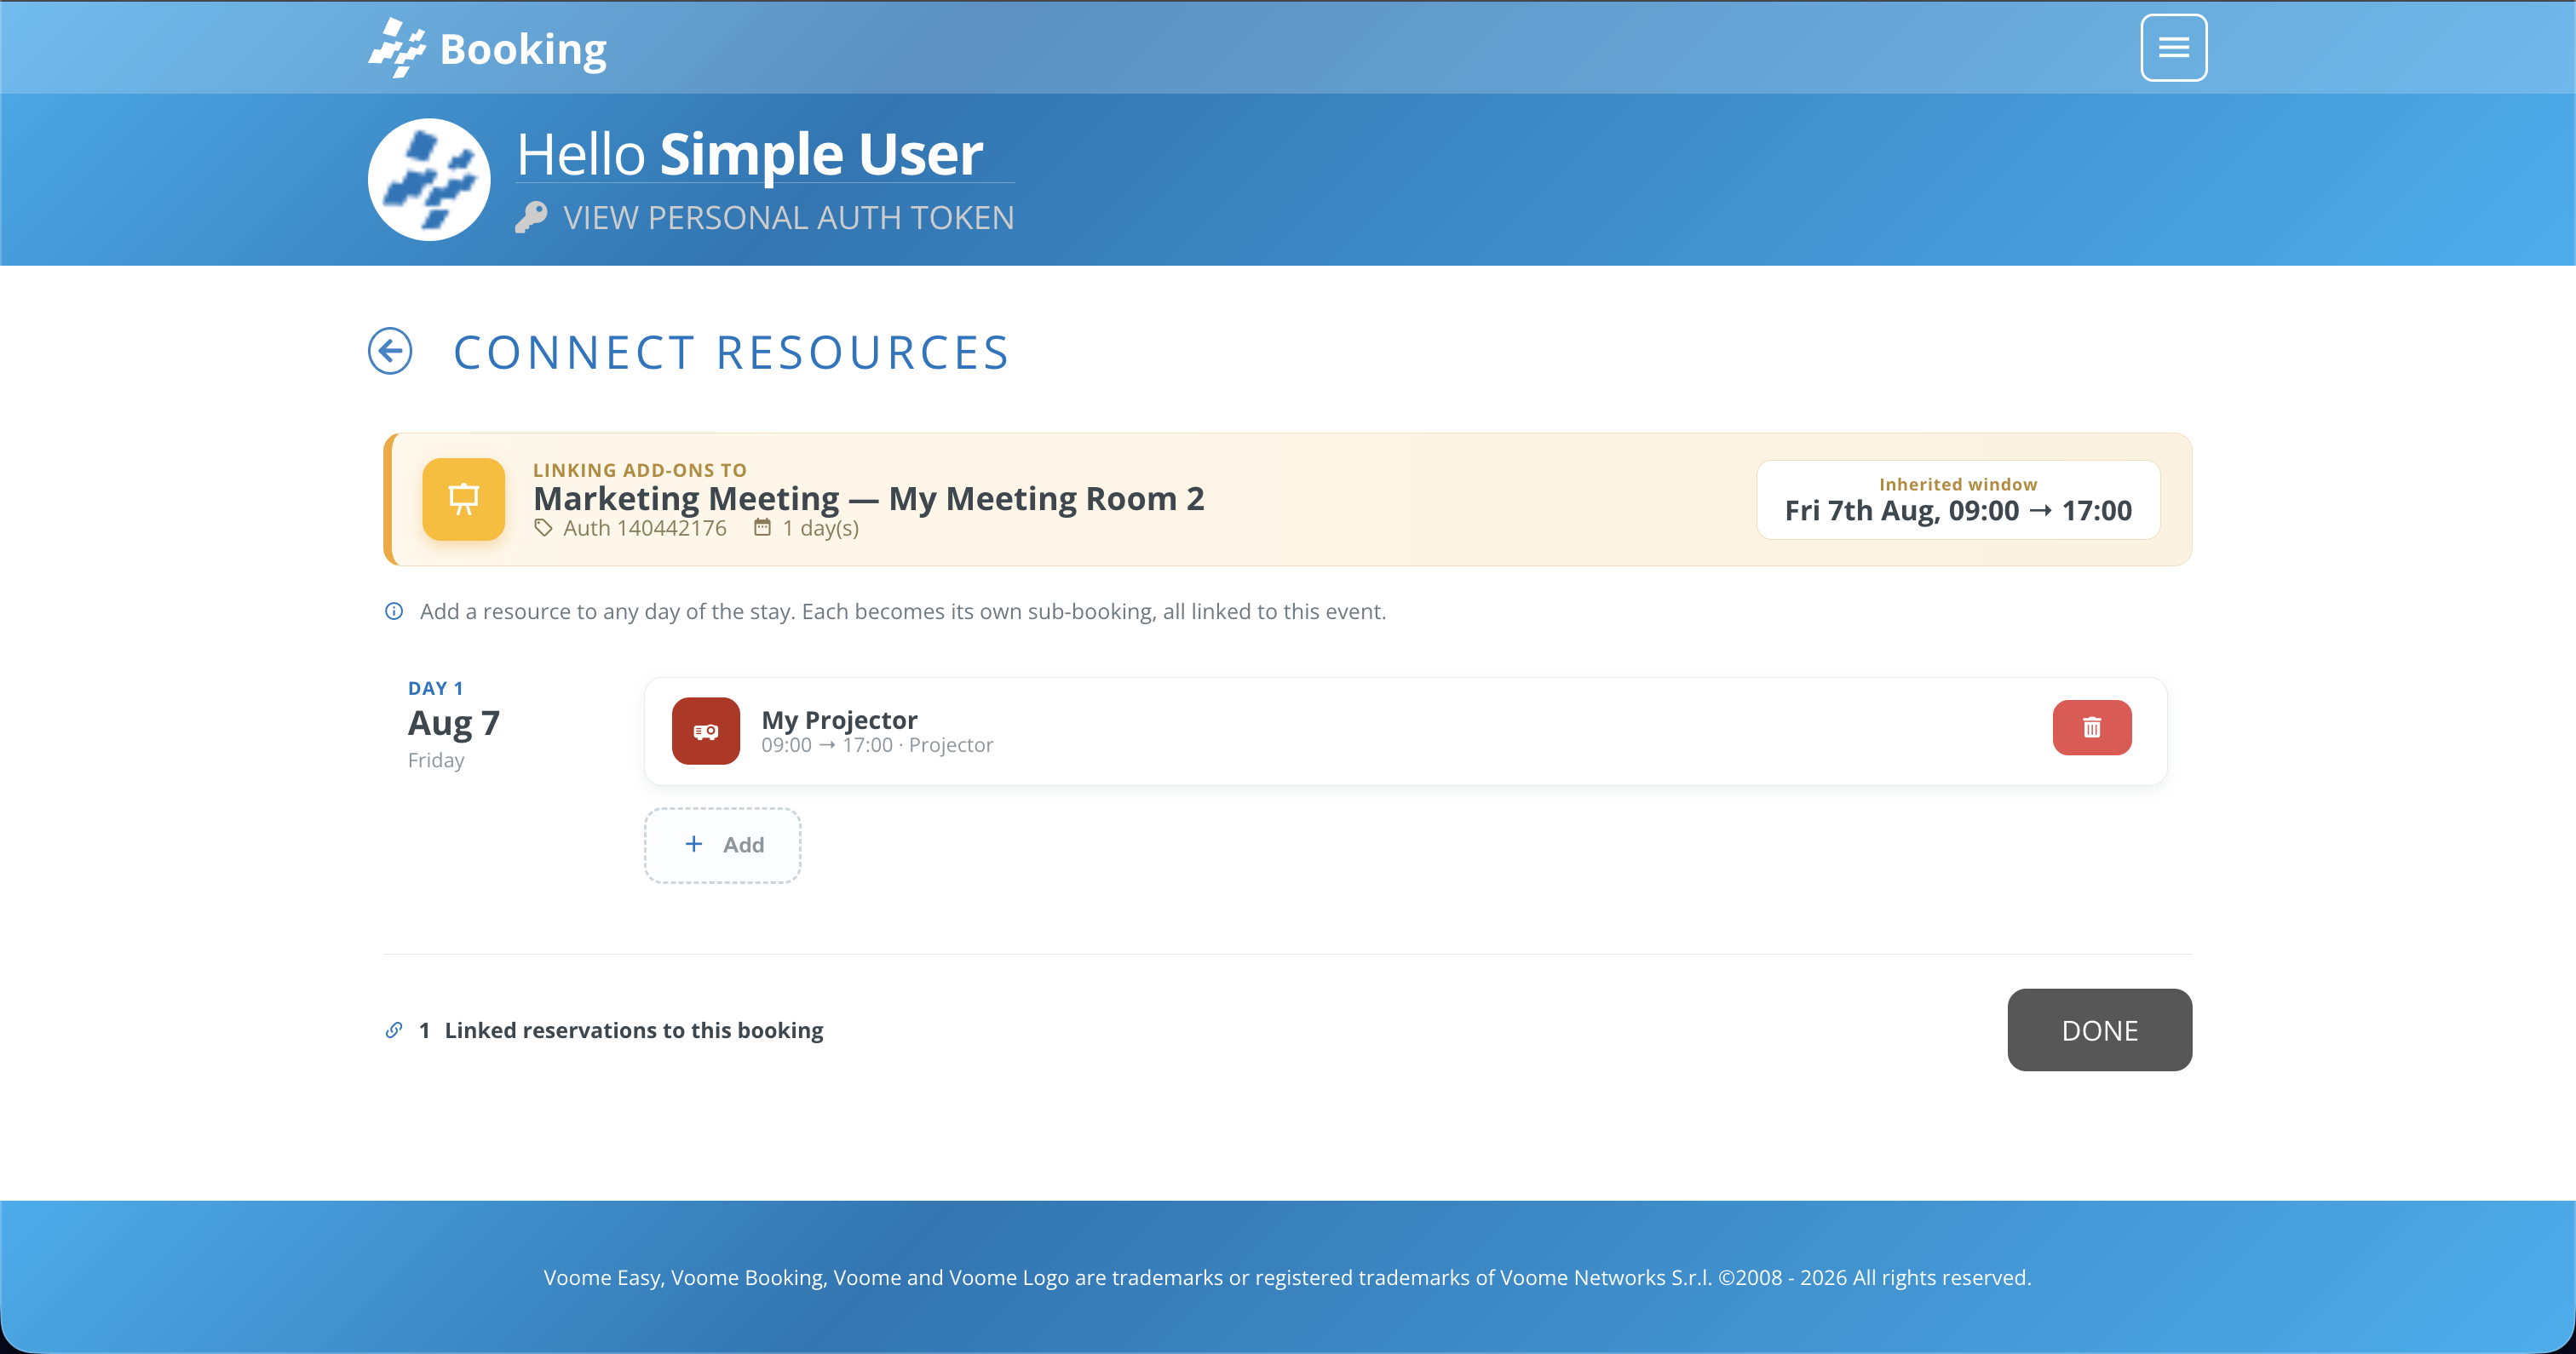
Connect opens the Connect Resources page. The banner at the top repeats what you are linking to: the event, its resource, its authorization code, how many days it covers, and the inherited window, which is the time range of the original booking.
Under the banner there is one row per day of the booking, so a three-day stay gets three rows and each day can have its own sub-bookings. Click + Add on the day you want to cover.
🔗 How to connect a resource
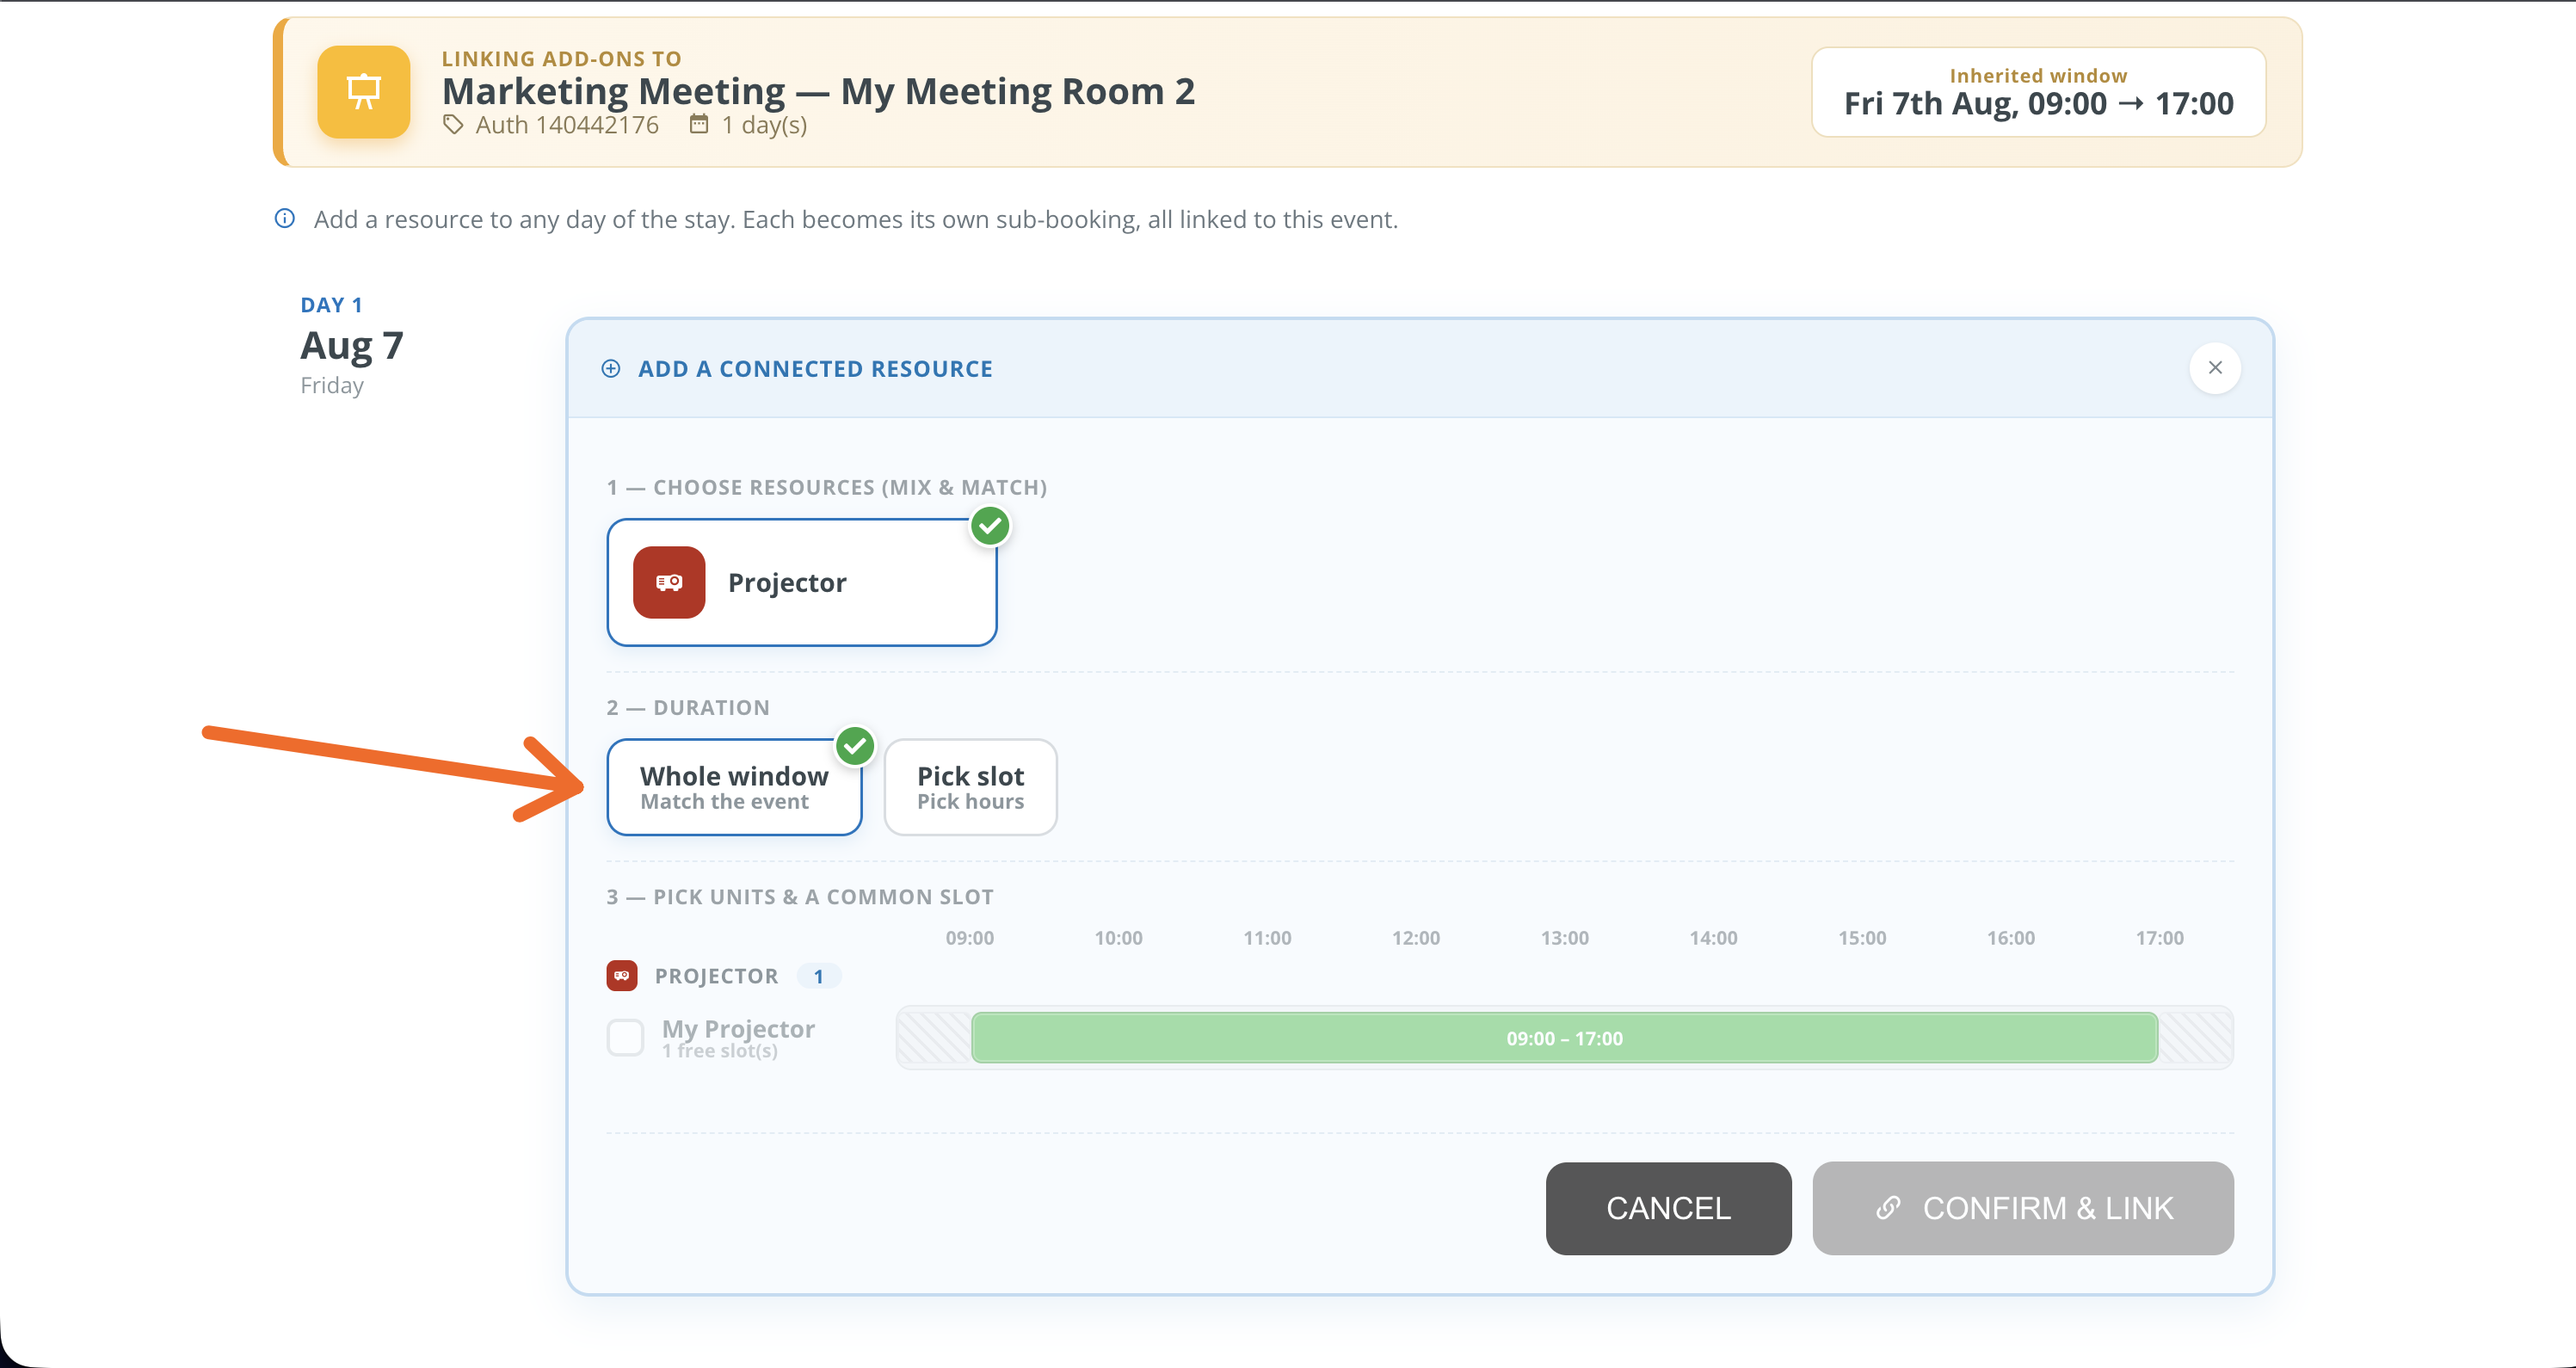
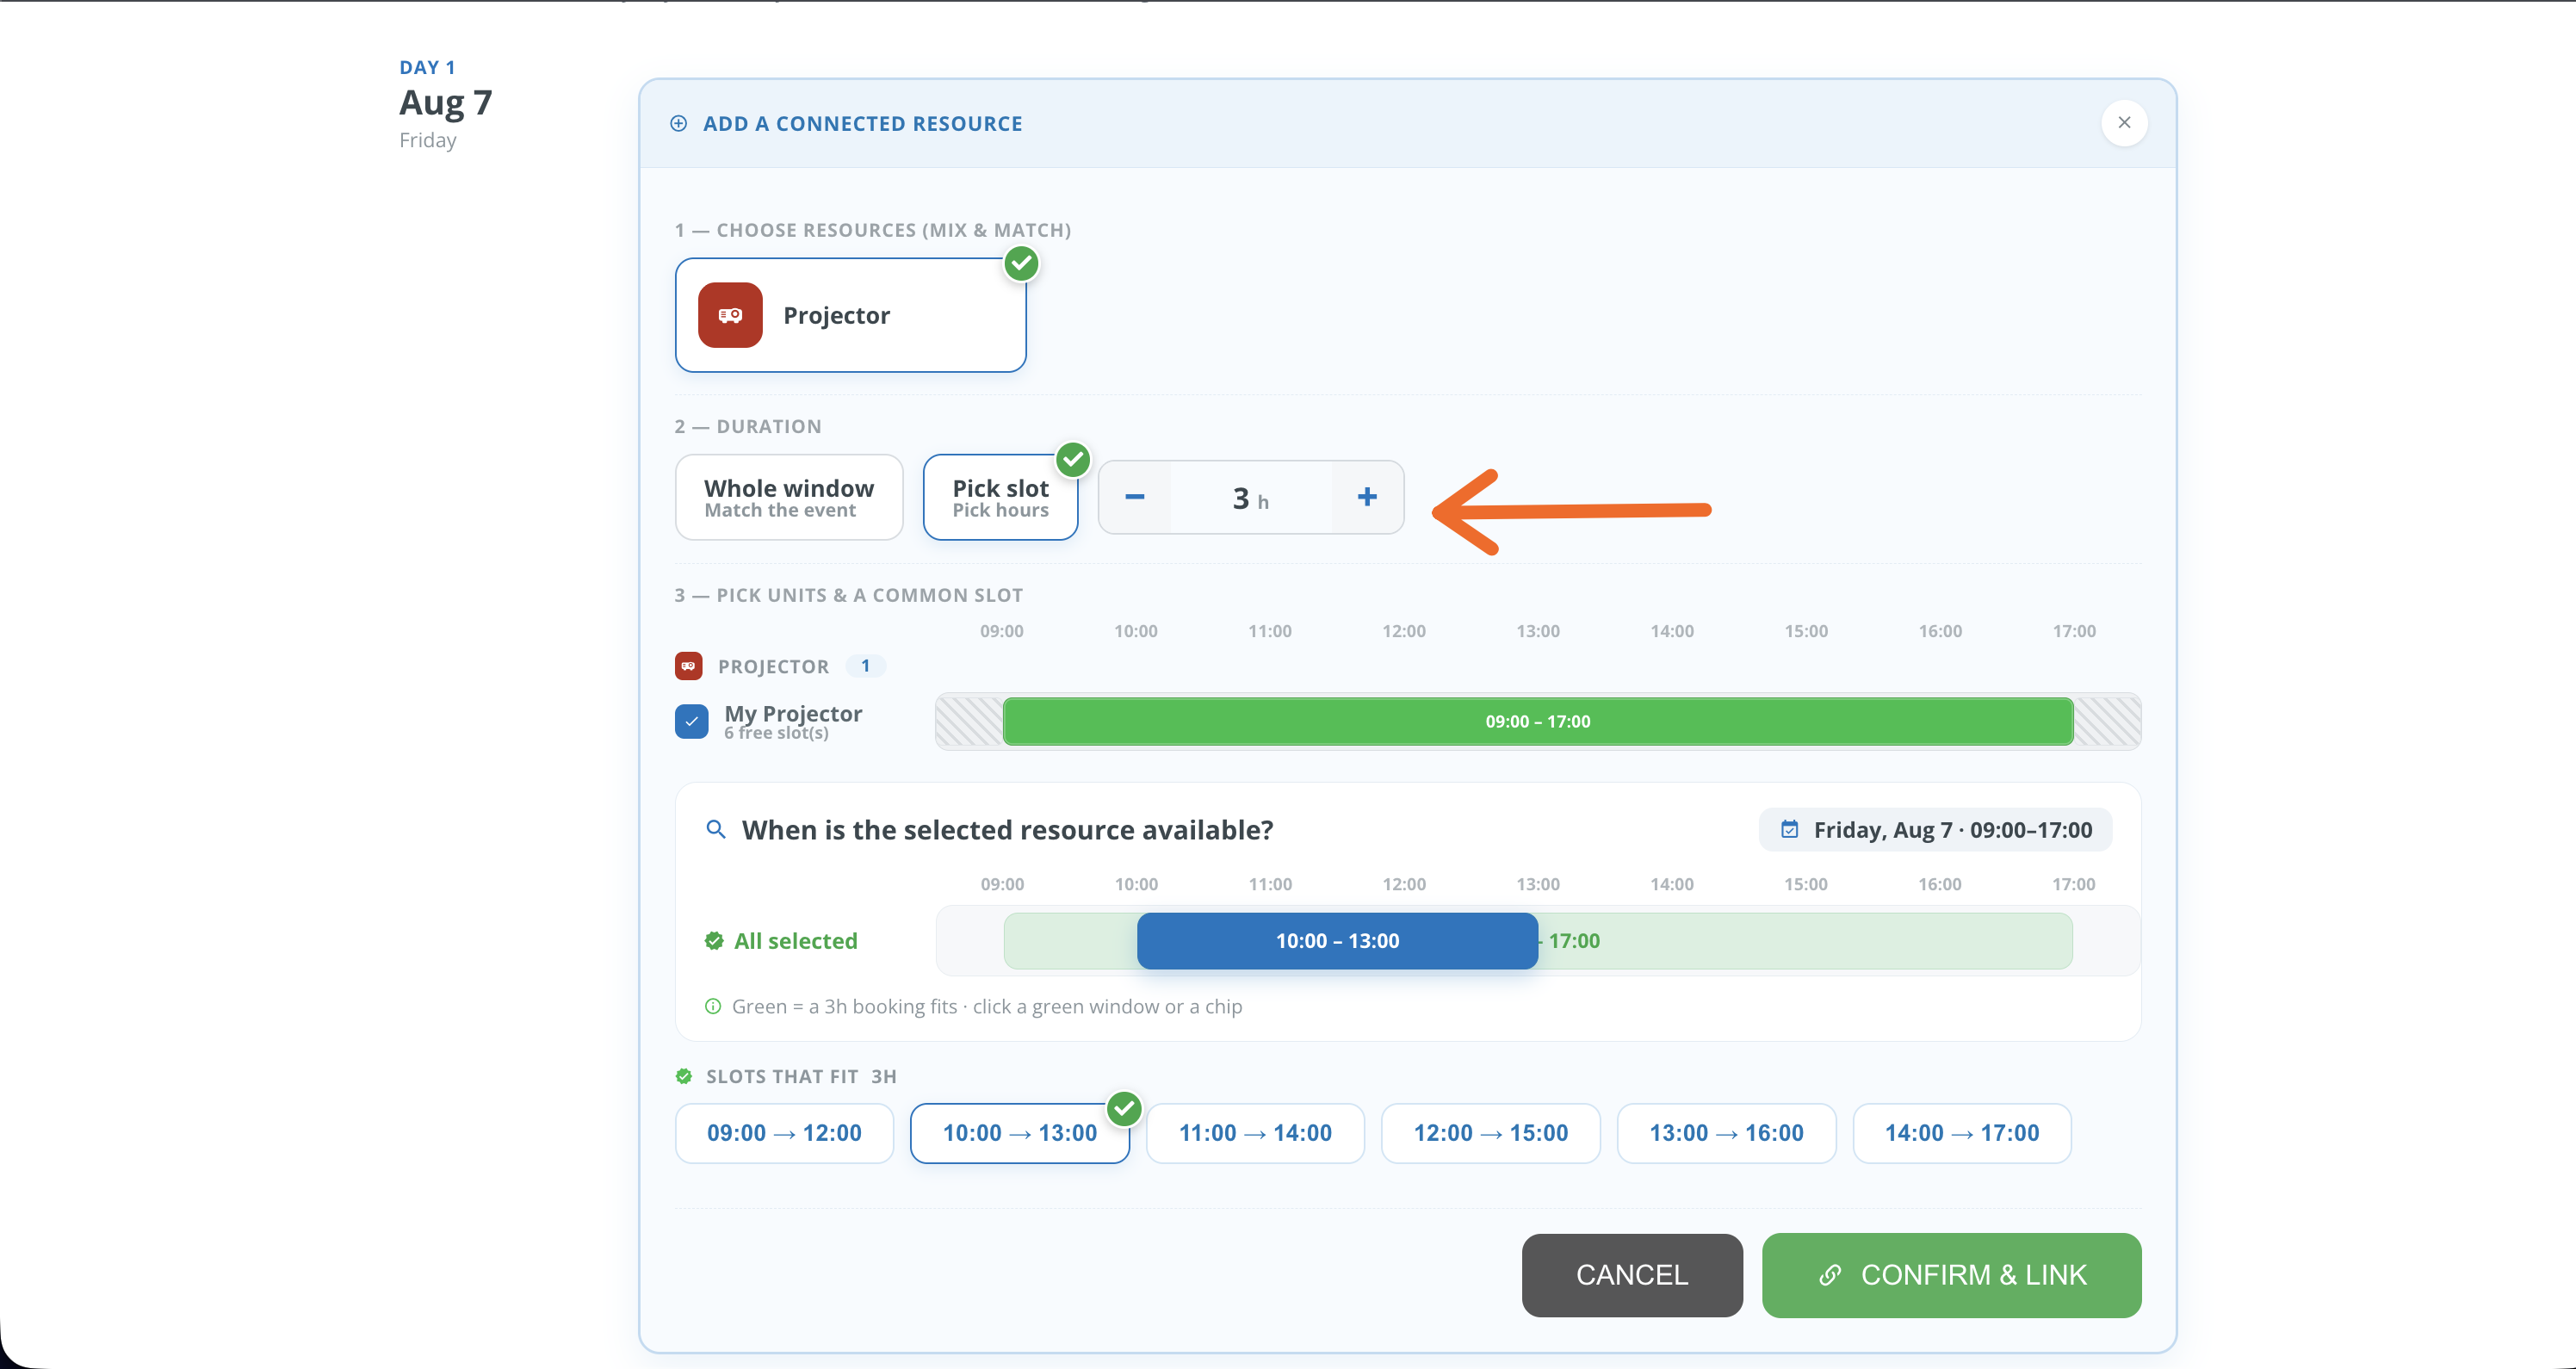
The Add a connected resource panel walks you through three steps.
1. Choose resources
Pick one or more of the resource types offered. These are the types your administrator associated with the one you booked, which is why the step is labelled "mix & match".
2. Duration
Decide how long you need it, with two options.
-
Whole window matches the event exactly. In the example, the marketing meeting runs 09:00 to 17:00, so the projector is reserved 09:00 to 17:00 too.
-
Pick slot reserves it for part of the event only. Set the length in hours with the − and + buttons, then choose when: click a green window in the availability strip, or one of the chips under Slots that fit. In the example, 3 hours inside the meeting gives six possible slots, and 10:00 to 13:00 is the one chosen.
3. Pick units and a common slot
Choosing a type is not the same as choosing the thing itself, so tick the actual unit you want, for example My Projector. Its bar shows when it is free, and green means your booking fits.
Then click Confirm & link.
✅ After linking
The day row now lists the sub-booking with its time range and its type, and the counter at the bottom of the page tracks how many reservations are linked to this booking.
From here you can click + Add to connect something else to the same day, use the 🗑️ bin icon to remove a sub-booking you no longer need, or click Done to go back.
If the connected resource has a resource owner email set, connecting sends a notification to that address.
📇 Back on the reservation card
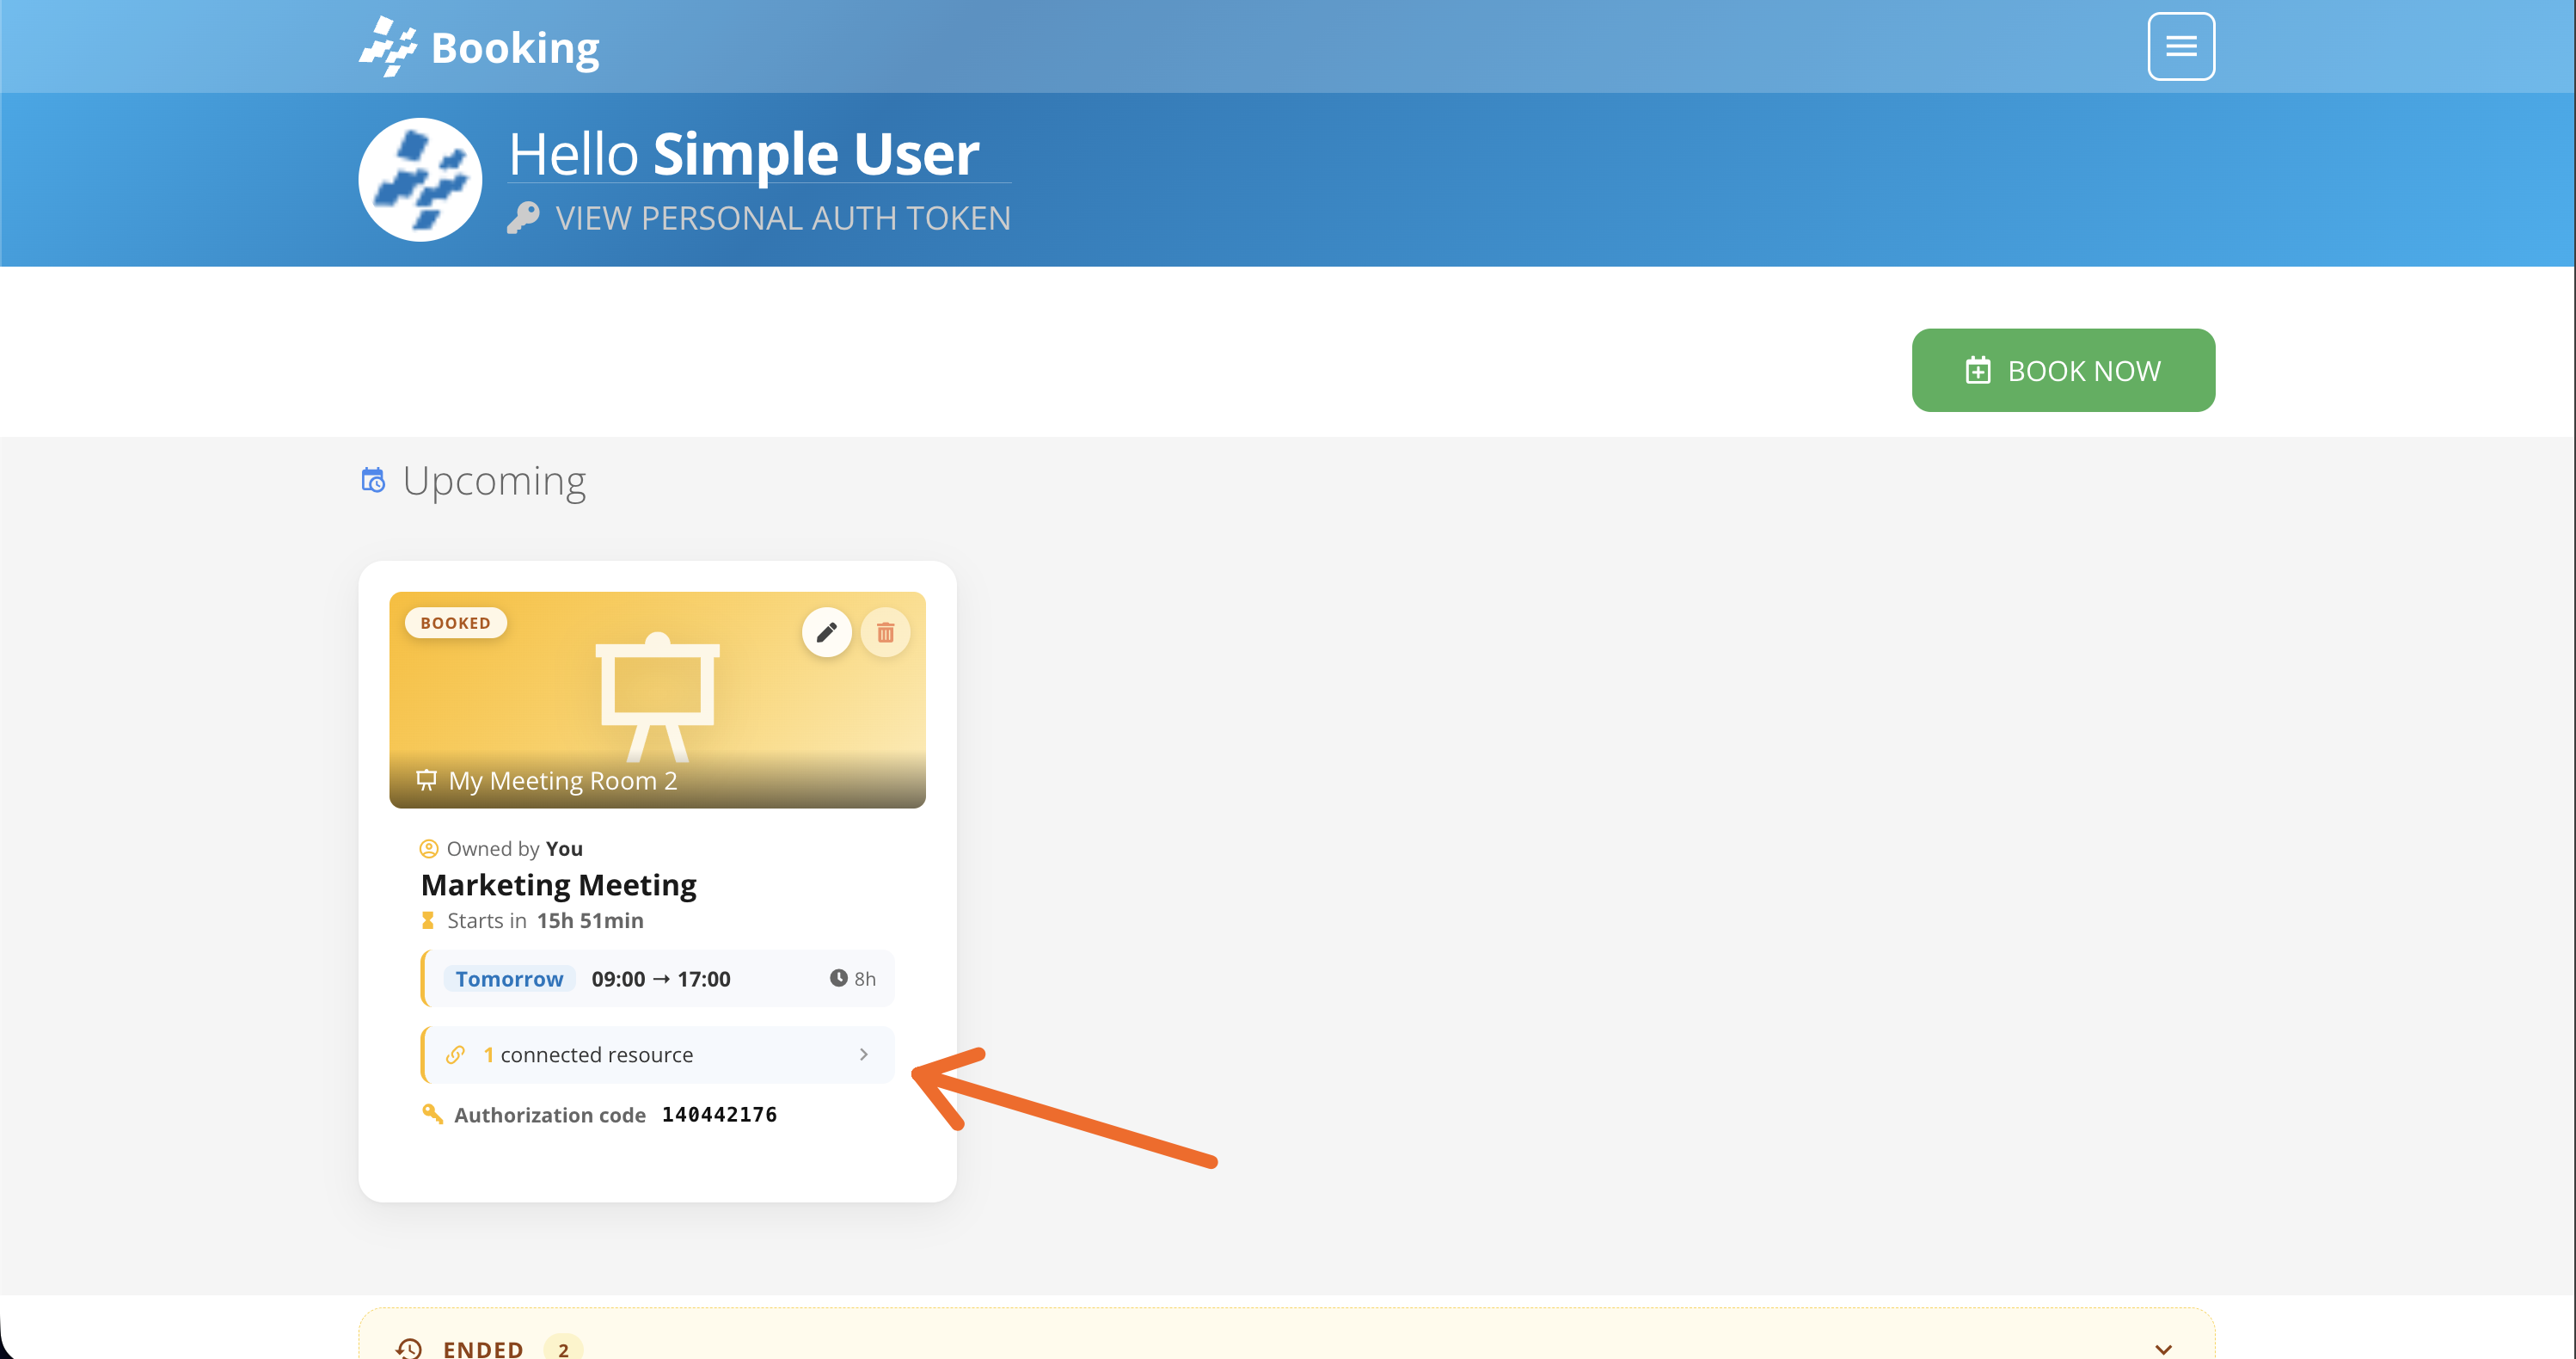
Once something is linked, the card in Your Events replaces the Connect button with a connected resource row that counts what is attached. Click the row to see the sub-bookings and manage them.