🪧 Outdoor Panel (Meeting Room)
The outdoor panel is the touchscreen mounted next to a resource. Its colour tells you from down the corridor whether the room is free, and you can book it, check in, and check out on the spot, without opening the Booking app.
Anything you do here lands in the same place as a reservation made from Book Now, so the two stay in sync.
🚦 Panel States
The panel is always in one of three states, and the LED bar under the screen repeats the colour so it is readable at a distance.
| Colour | Meaning | What you can do |
|---|---|---|
| 🟢 Green | No event running. The room is free right now | Book it immediately or schedule it for later |
| 🟡 Amber | An event starts soon, within the check-in delay | Check in to confirm the event |
| 🔴 Red | An event is in progress | Check out to release the room early |
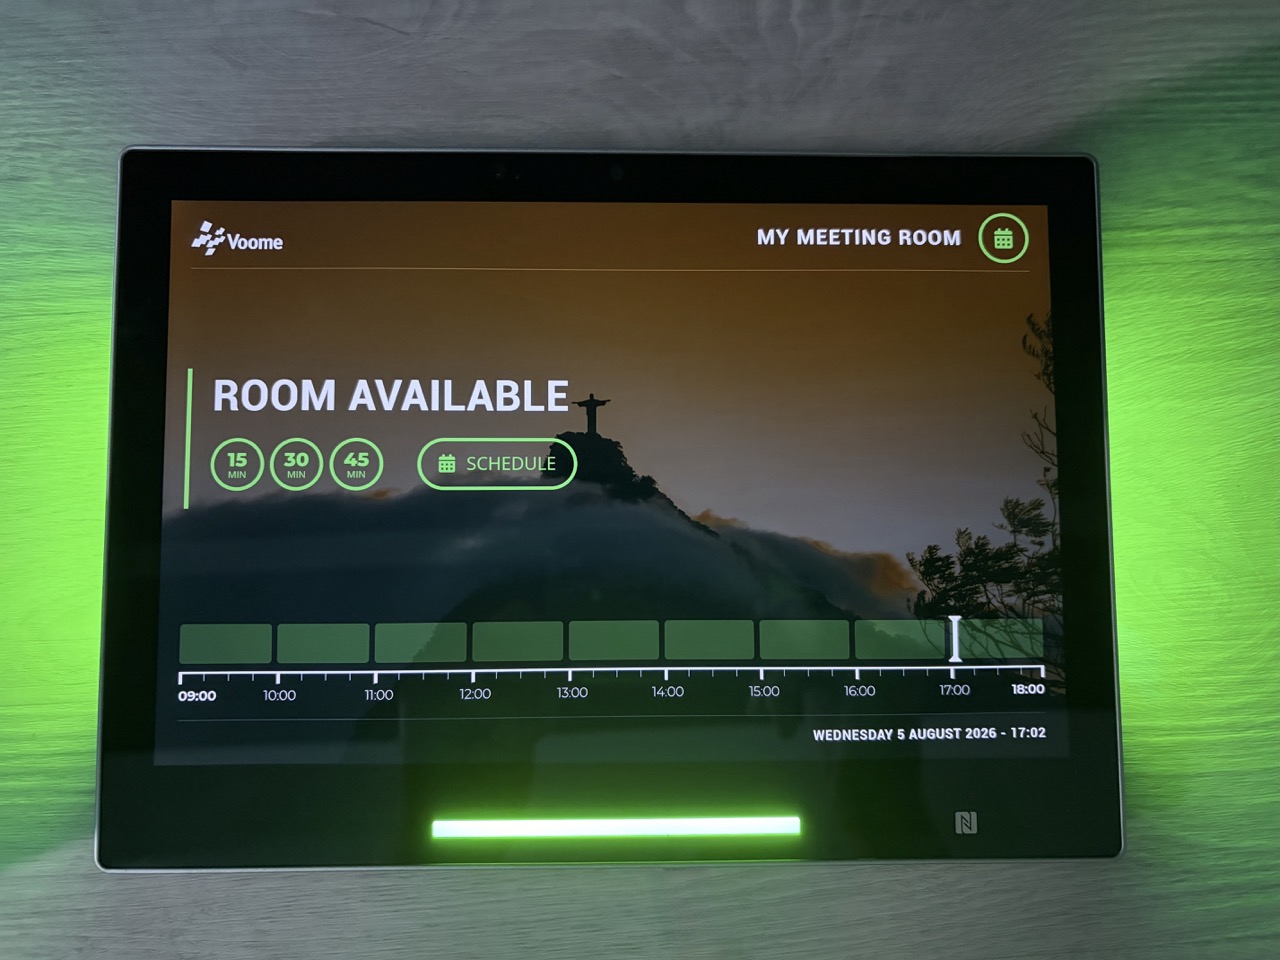
🟢 Green: room available
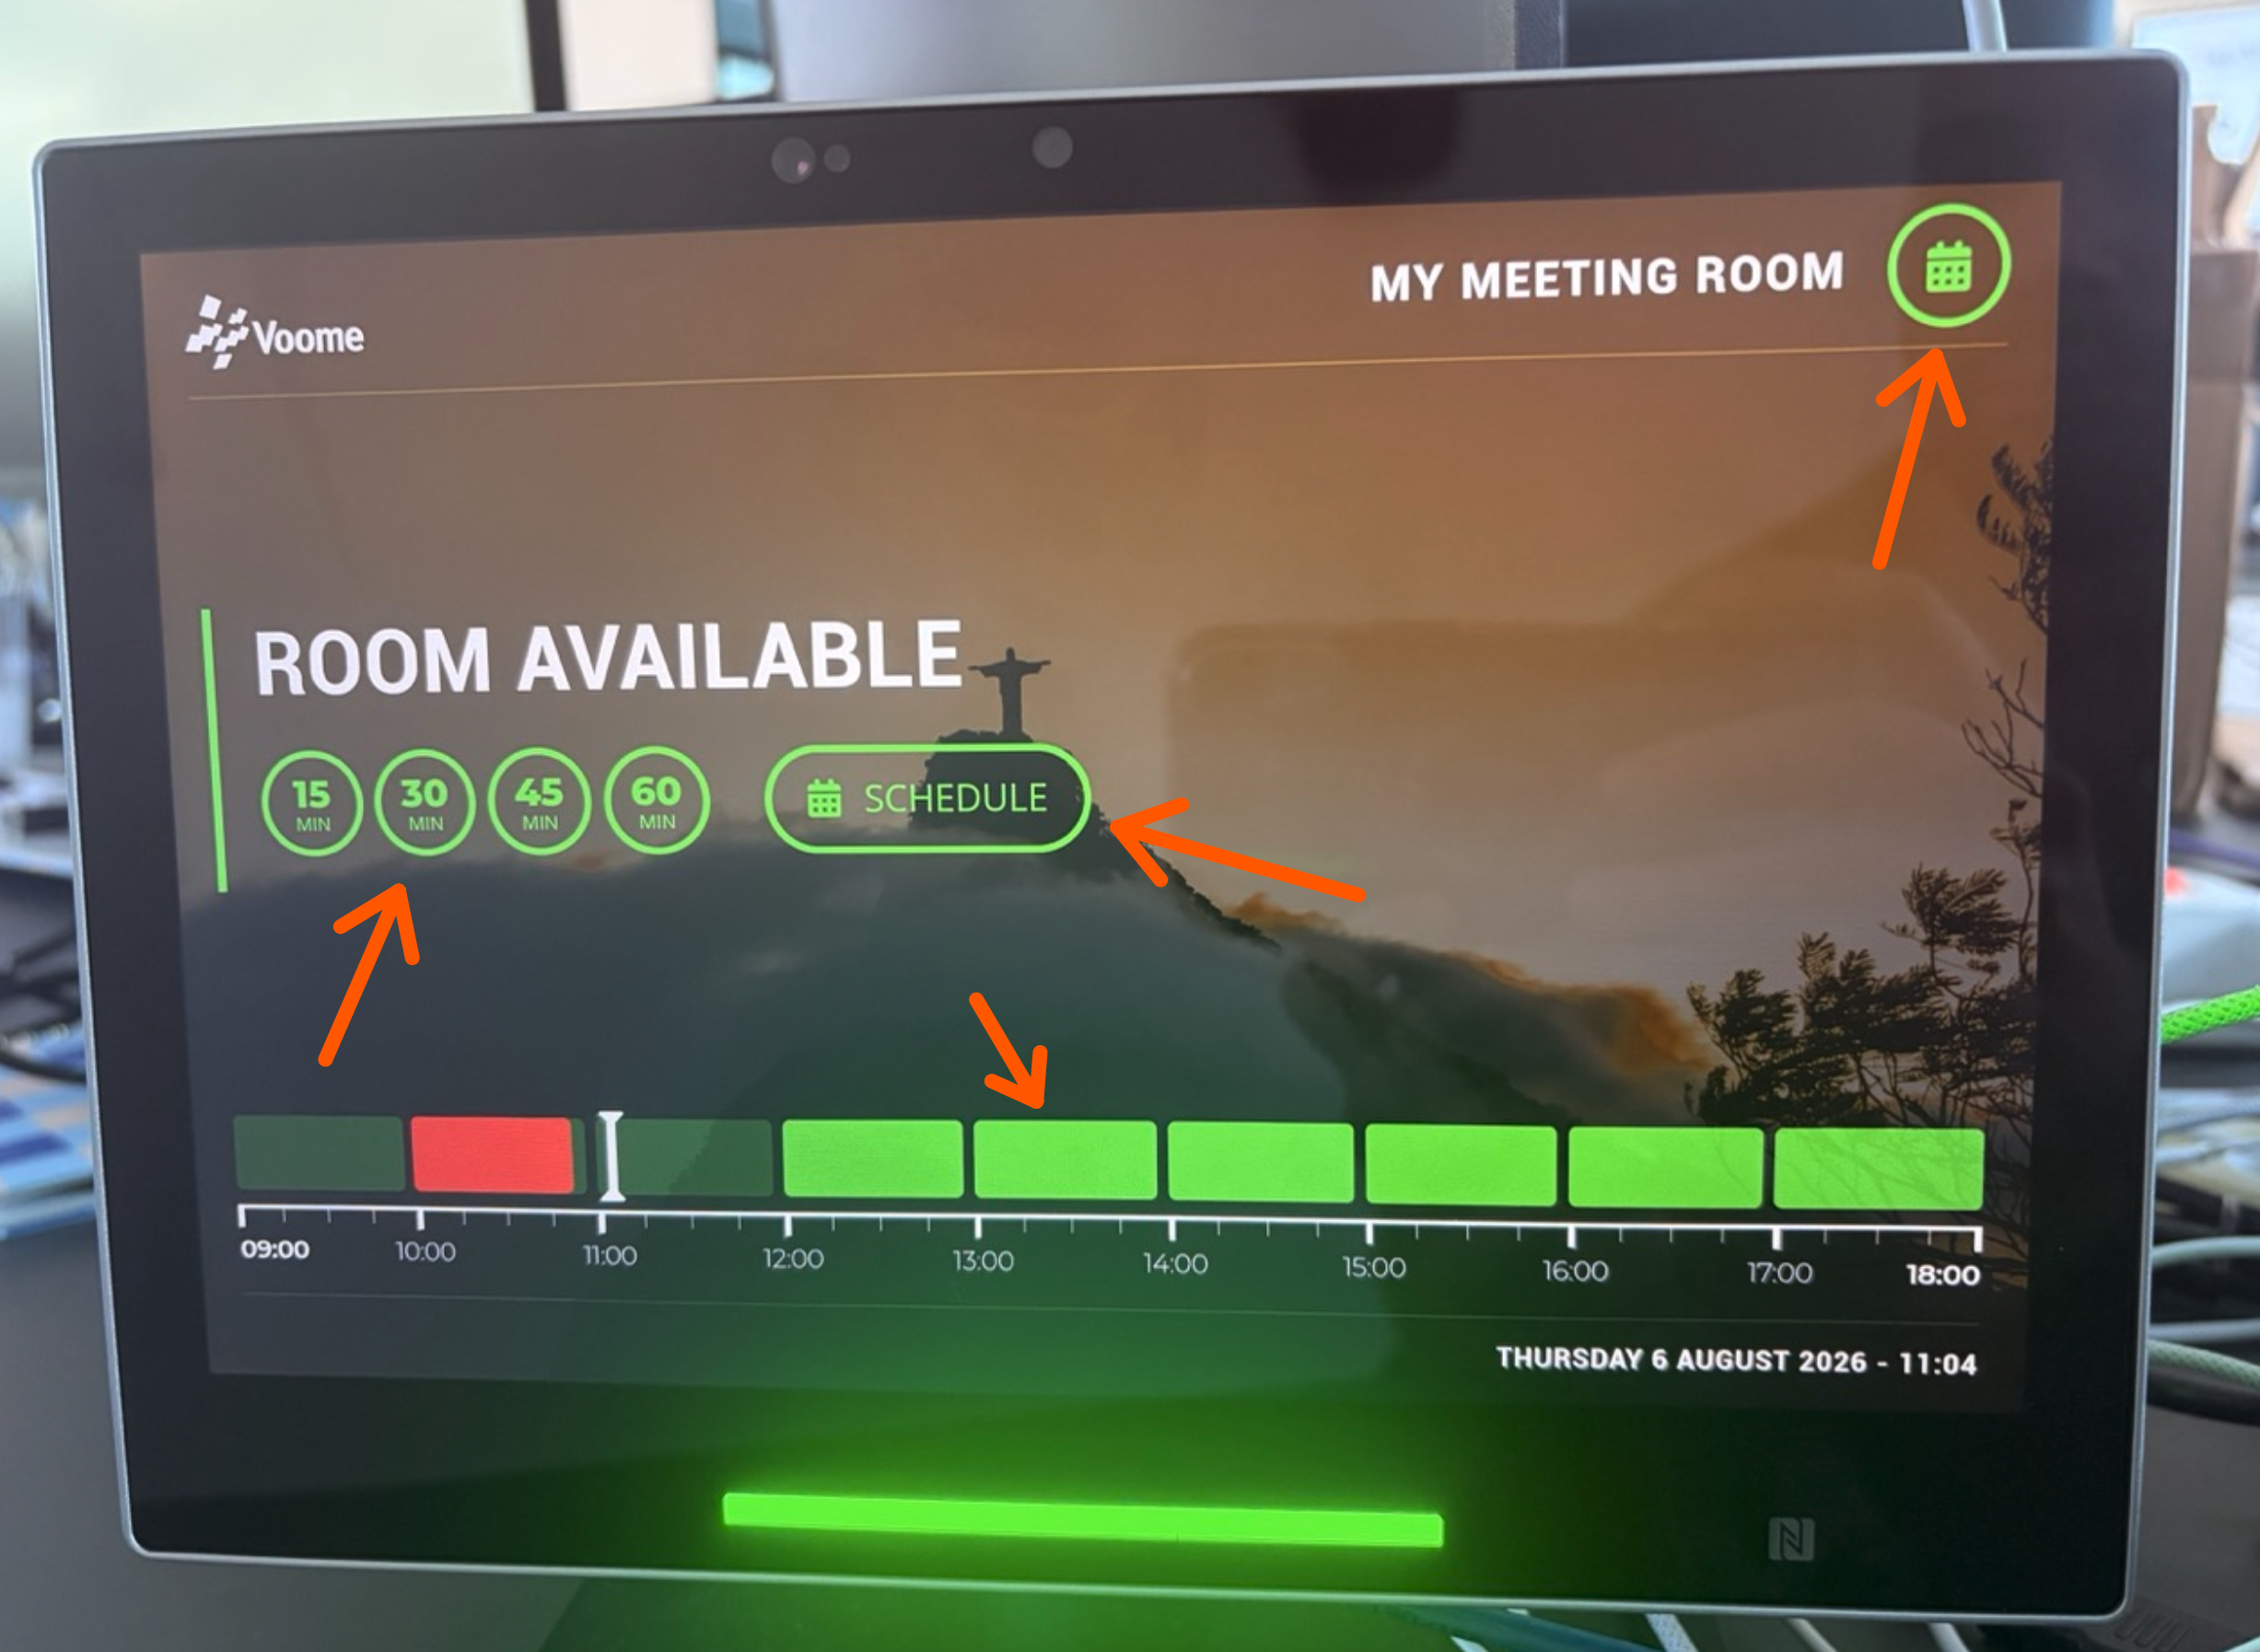
The screen reads ROOM AVAILABLE and offers the quick booking controls.
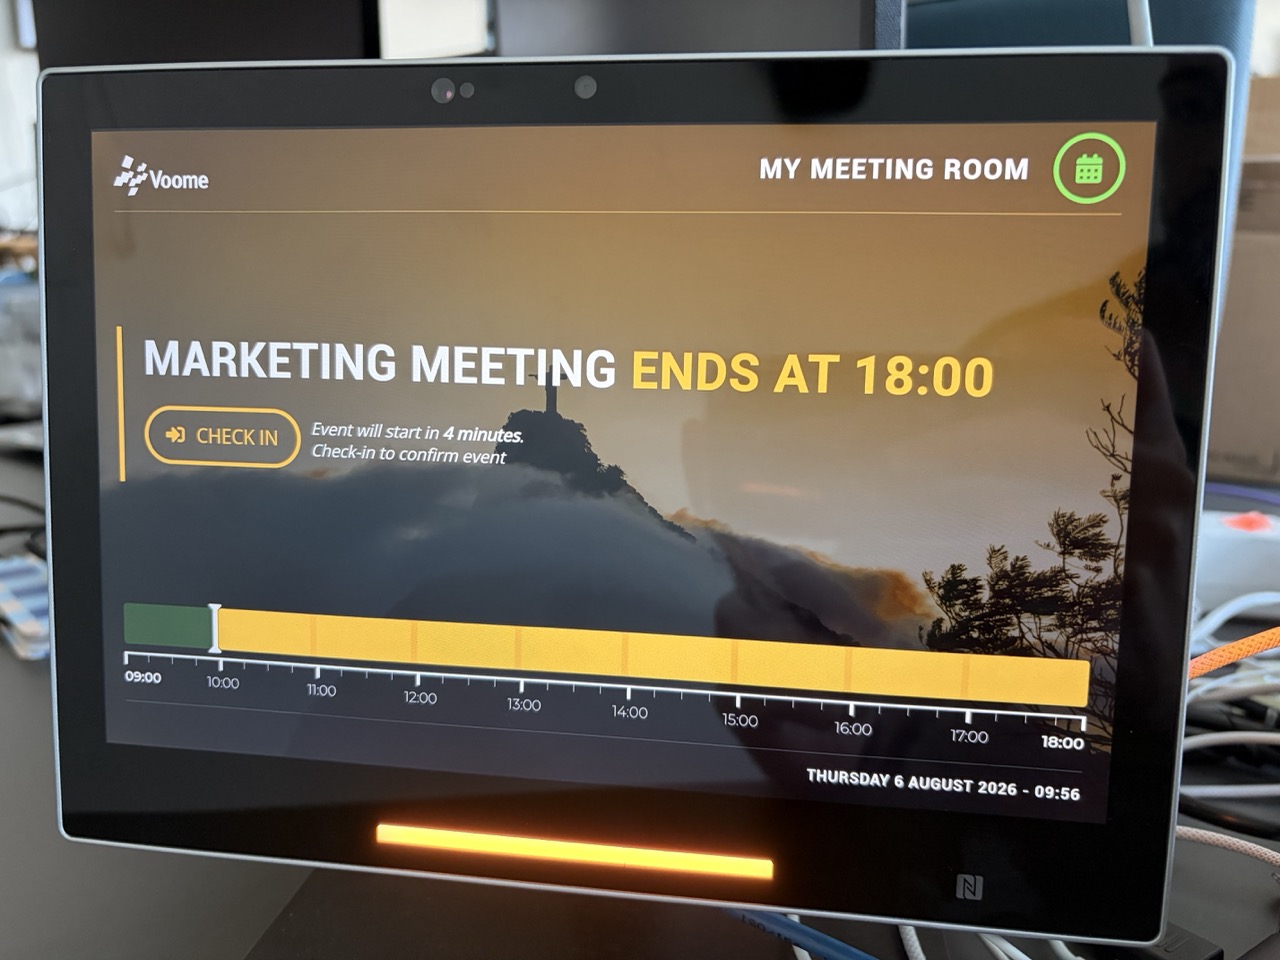
🟡 Amber: starting soon
The screen names the event and counts down to its start, with a Check In button next to it.
The panel switches to amber 15 minutes before the start. That window is the check-in delay, and your administrator can shorten or extend it, so the panel in your office may turn amber earlier or later.
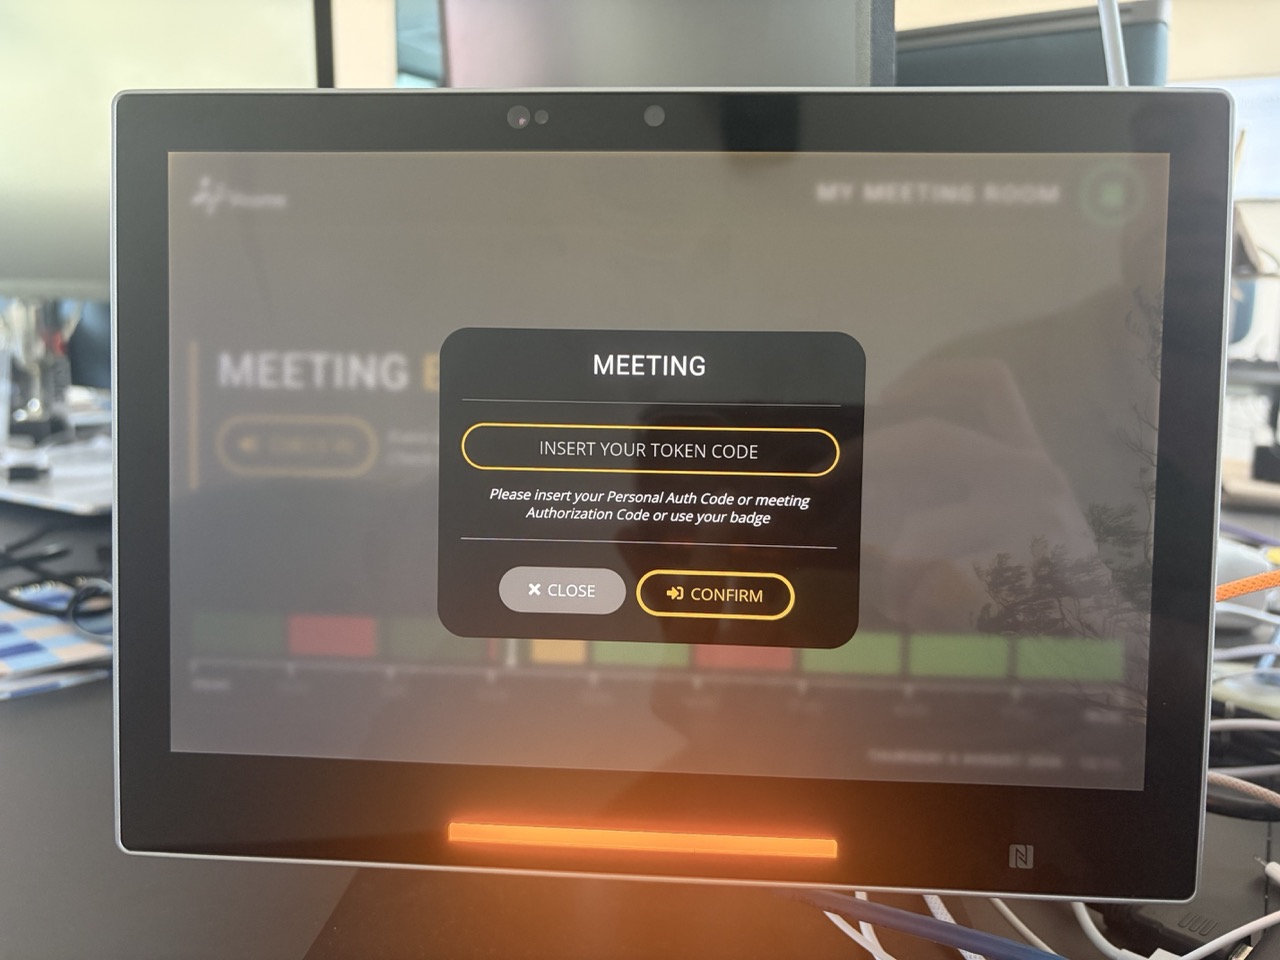
Tapping Check In asks you to identify yourself, unless your administrator disabled booking authorization on the panel. Enter your personal auth code, or the authorization code that was emailed to the event owner and the attendees, or hold your badge to the NFC reader, then tap Confirm to let the event begin.
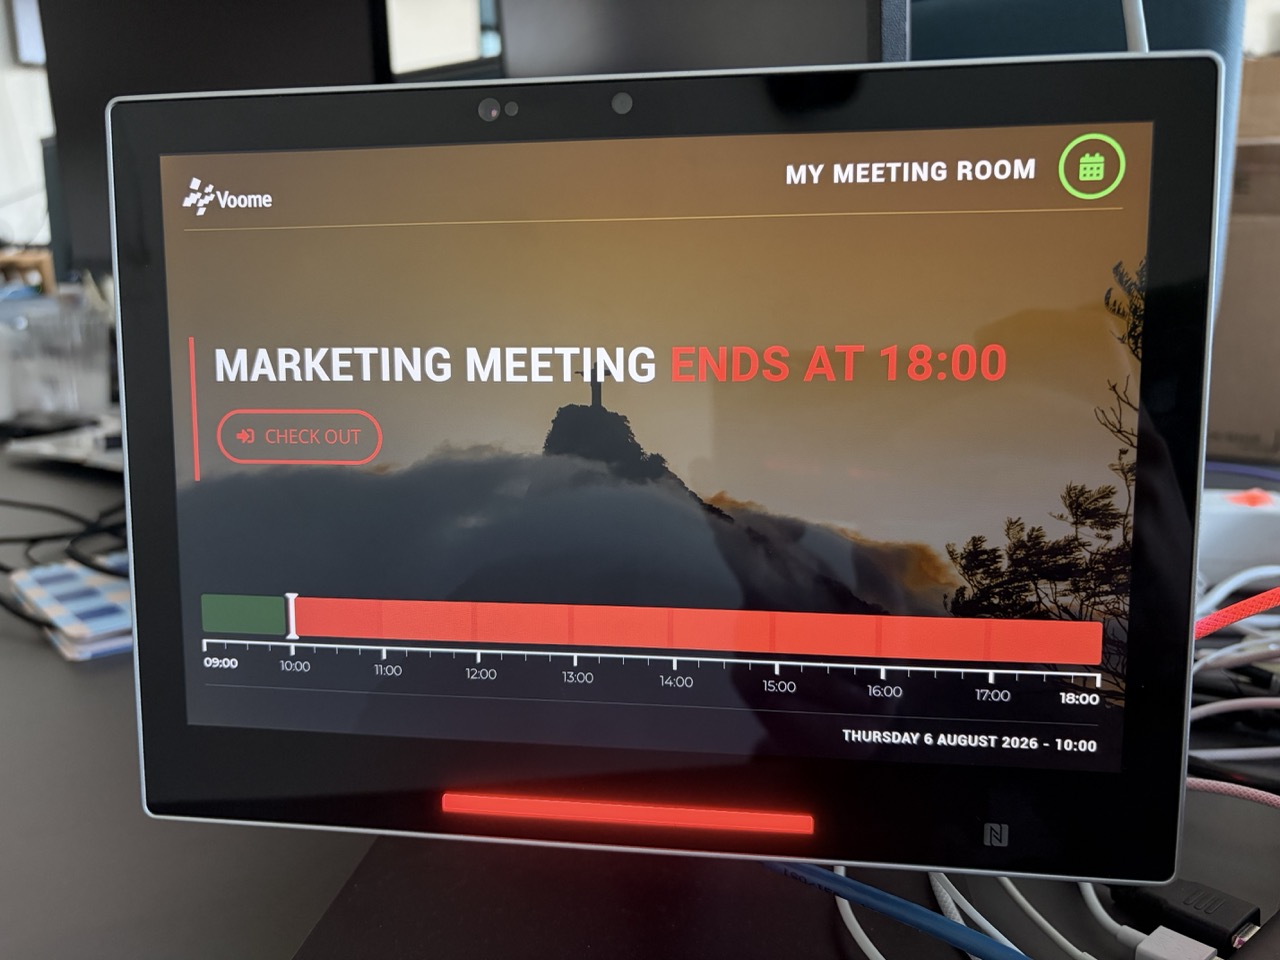
🔴 Red: event in progress
The event is running and the room counts as occupied. The button now reads Check Out.
The panel turns red once someone has checked in, or on its own at the start time if your administrator has enabled auto check-in.
📊 The timeline strip
Every state shows a strip along the bottom that maps the working day, hour by hour, with a marker at the current time. Bright green blocks are free, red blocks are already booked, and dim blocks are outside the bookable hours or already past.
Use it to answer "is the room free after this meeting" without touching anything.
🔑 Checking in and out
- Tap Check In as soon as the panel turns amber, 15 minutes before the start unless your administrator changed the check-in delay.
- Identify yourself in the dialog with a code or a badge, then tap Confirm. Panels with booking authorization disabled skip this step.
- The panel turns red for the duration of the event.
- Tap Check Out when you are done, and the room goes back to green for everyone else.
Either code works at check-in. The two sections at the end of this page show where each one lives.
🗓️ Book an event from the Panel itself
Besides the Book Now wizard, the panel itself offers four ways to book, from fastest to most precise:
- 📍 Quick durations, the circles on the left
- 📍 Timeline strip, the blocks along the bottom
- 📍 Schedule, the central button
- 📍 Calendar, the icon in the top right corner
📍 Quick durations (left)
Tap a circle to book from now for that long. Tapping 30 MIN at 10:57 books the room until 11:27.
Only the durations that actually fit are offered, so a room that is booked again in 40 minutes shows 15 and 30 but not 45 or 60.
📍 Timeline strip (bottom)
Tap any bright green block in the strip to start a booking for that hour of today, for example 14:00 to 15:00. Red and dim blocks are not tappable.
📍 Schedule button (central)
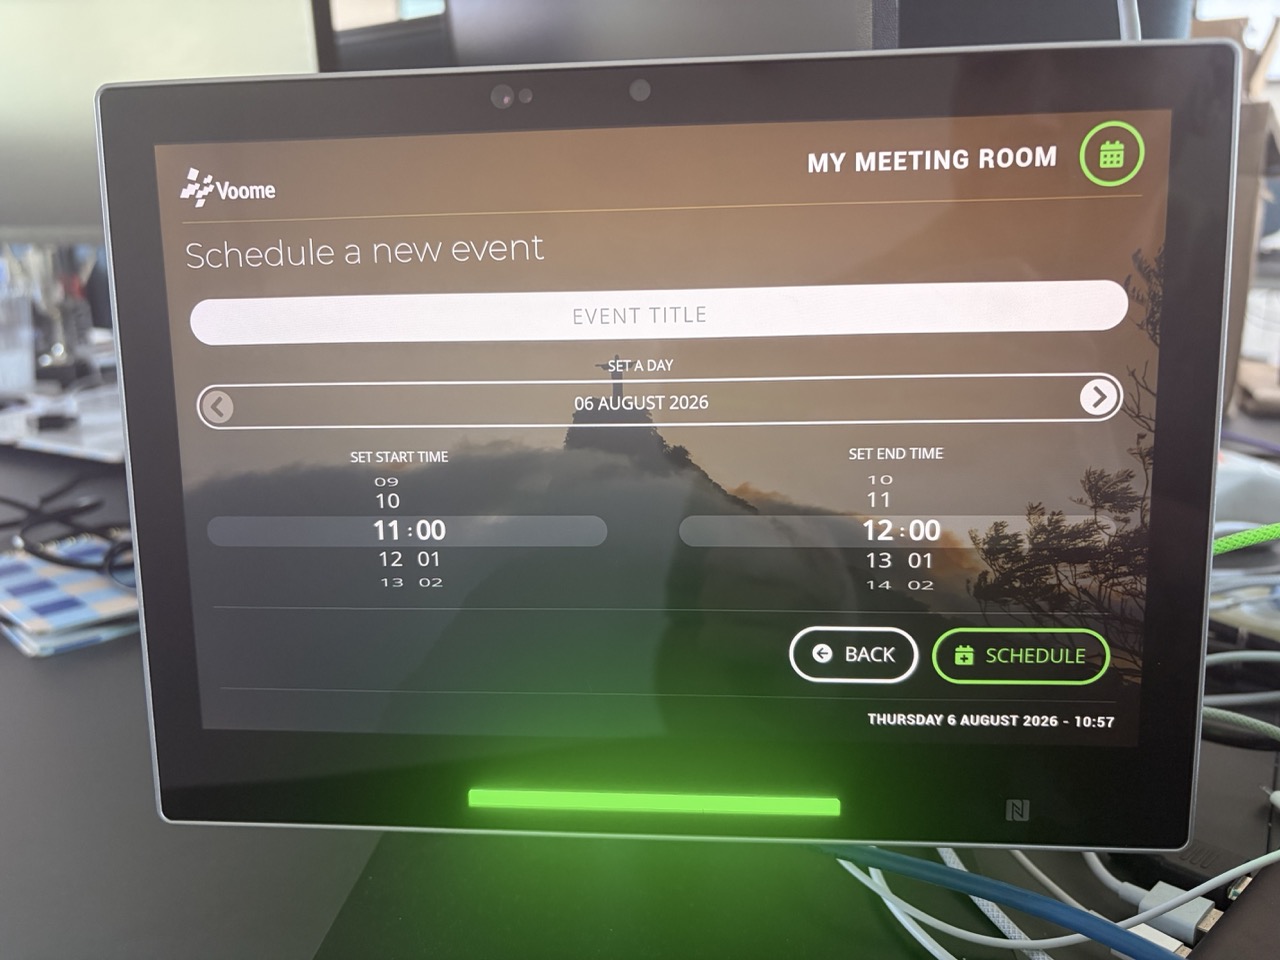
Use this when the booking is not for today, or not for a whole hour.
- Tap Schedule.
- Give the event a title, which is optional.
- Pick the day with the arrows on either side of the date.
- Set the start time and the end time on the two wheels.
- Tap Schedule to confirm.
📍 Calendar (top-right)
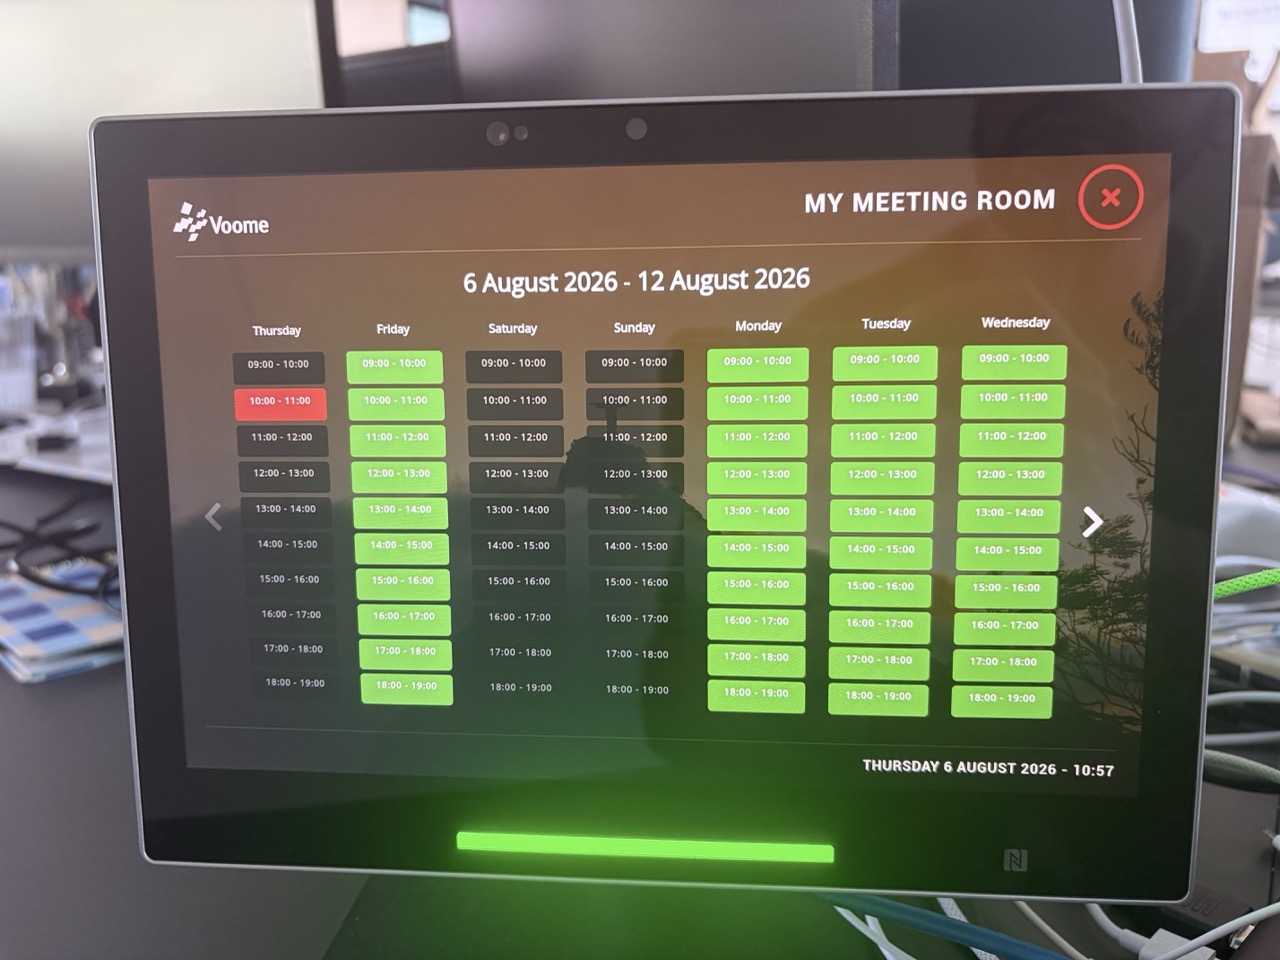
Tap the calendar icon for a full week at a glance, seven days of hourly slots side by side. Bright green slots are bookable, red ones are taken, and dim ones are unavailable. Use the arrows to move to another week, then tap a free slot to book it.
✅ Confirming the booking
All four routes end on the same confirmation dialog. It repeats the room, the day, and the time range, so check them before confirming.
- Add an event title, which is optional but is what everyone else sees on the panel.
- Identify yourself in Insert your token code: type your personal auth code, or hold your badge to the NFC reader. There is no authorization code to use here, because the event only exists once you confirm it. Panels with booking authorization disabled skip this step.
- Tap Confirm.
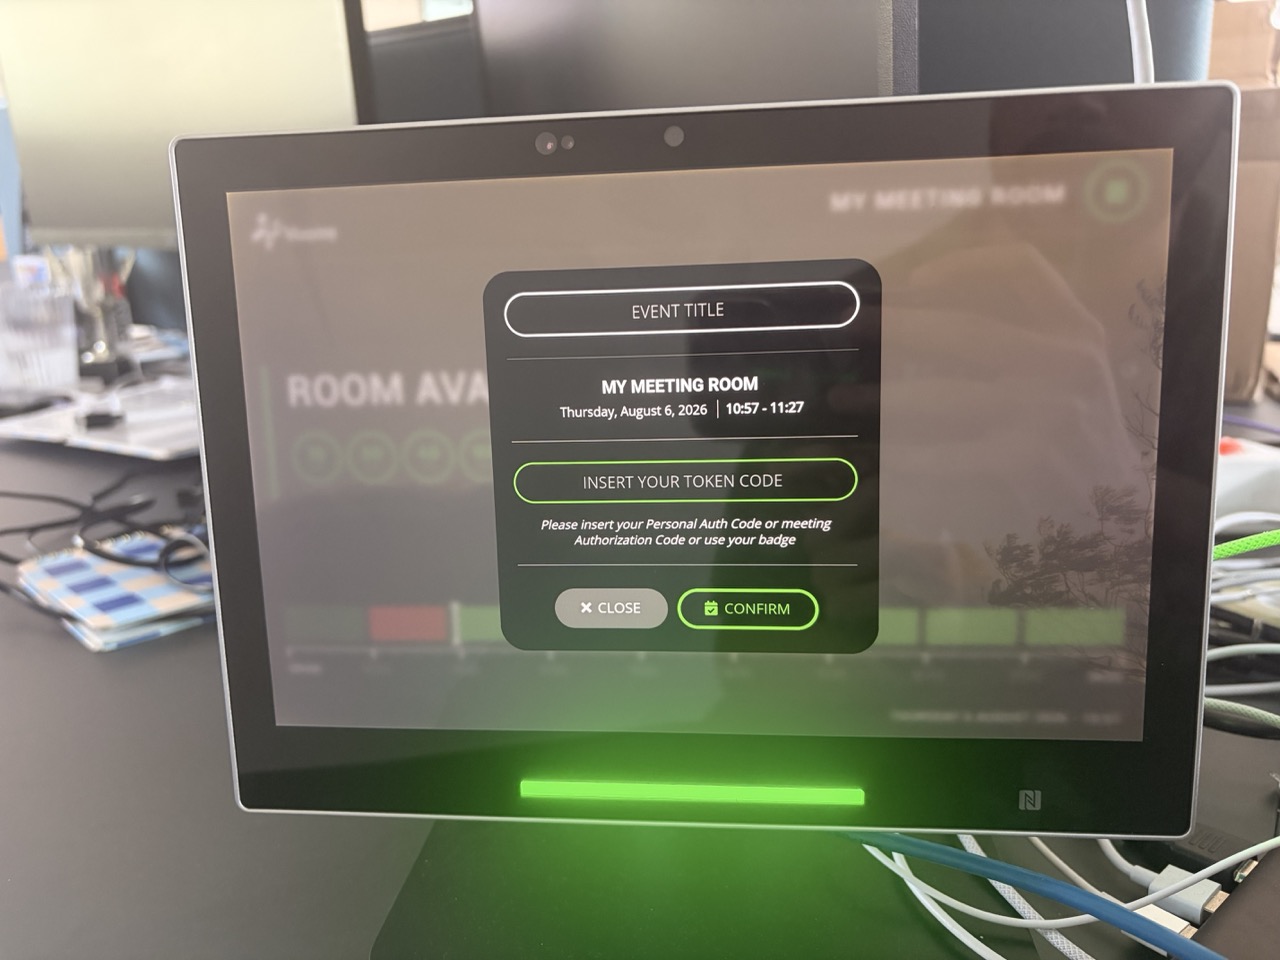
By default a panel asks for a code or a badge before it books or checks anyone in, and that is what links the reservation to your account. Your administrator can turn this off per device with Disable Booking Authorization, in which case anyone standing at the panel can book and check in with a single tap.
❓ Where do you get your authorization code
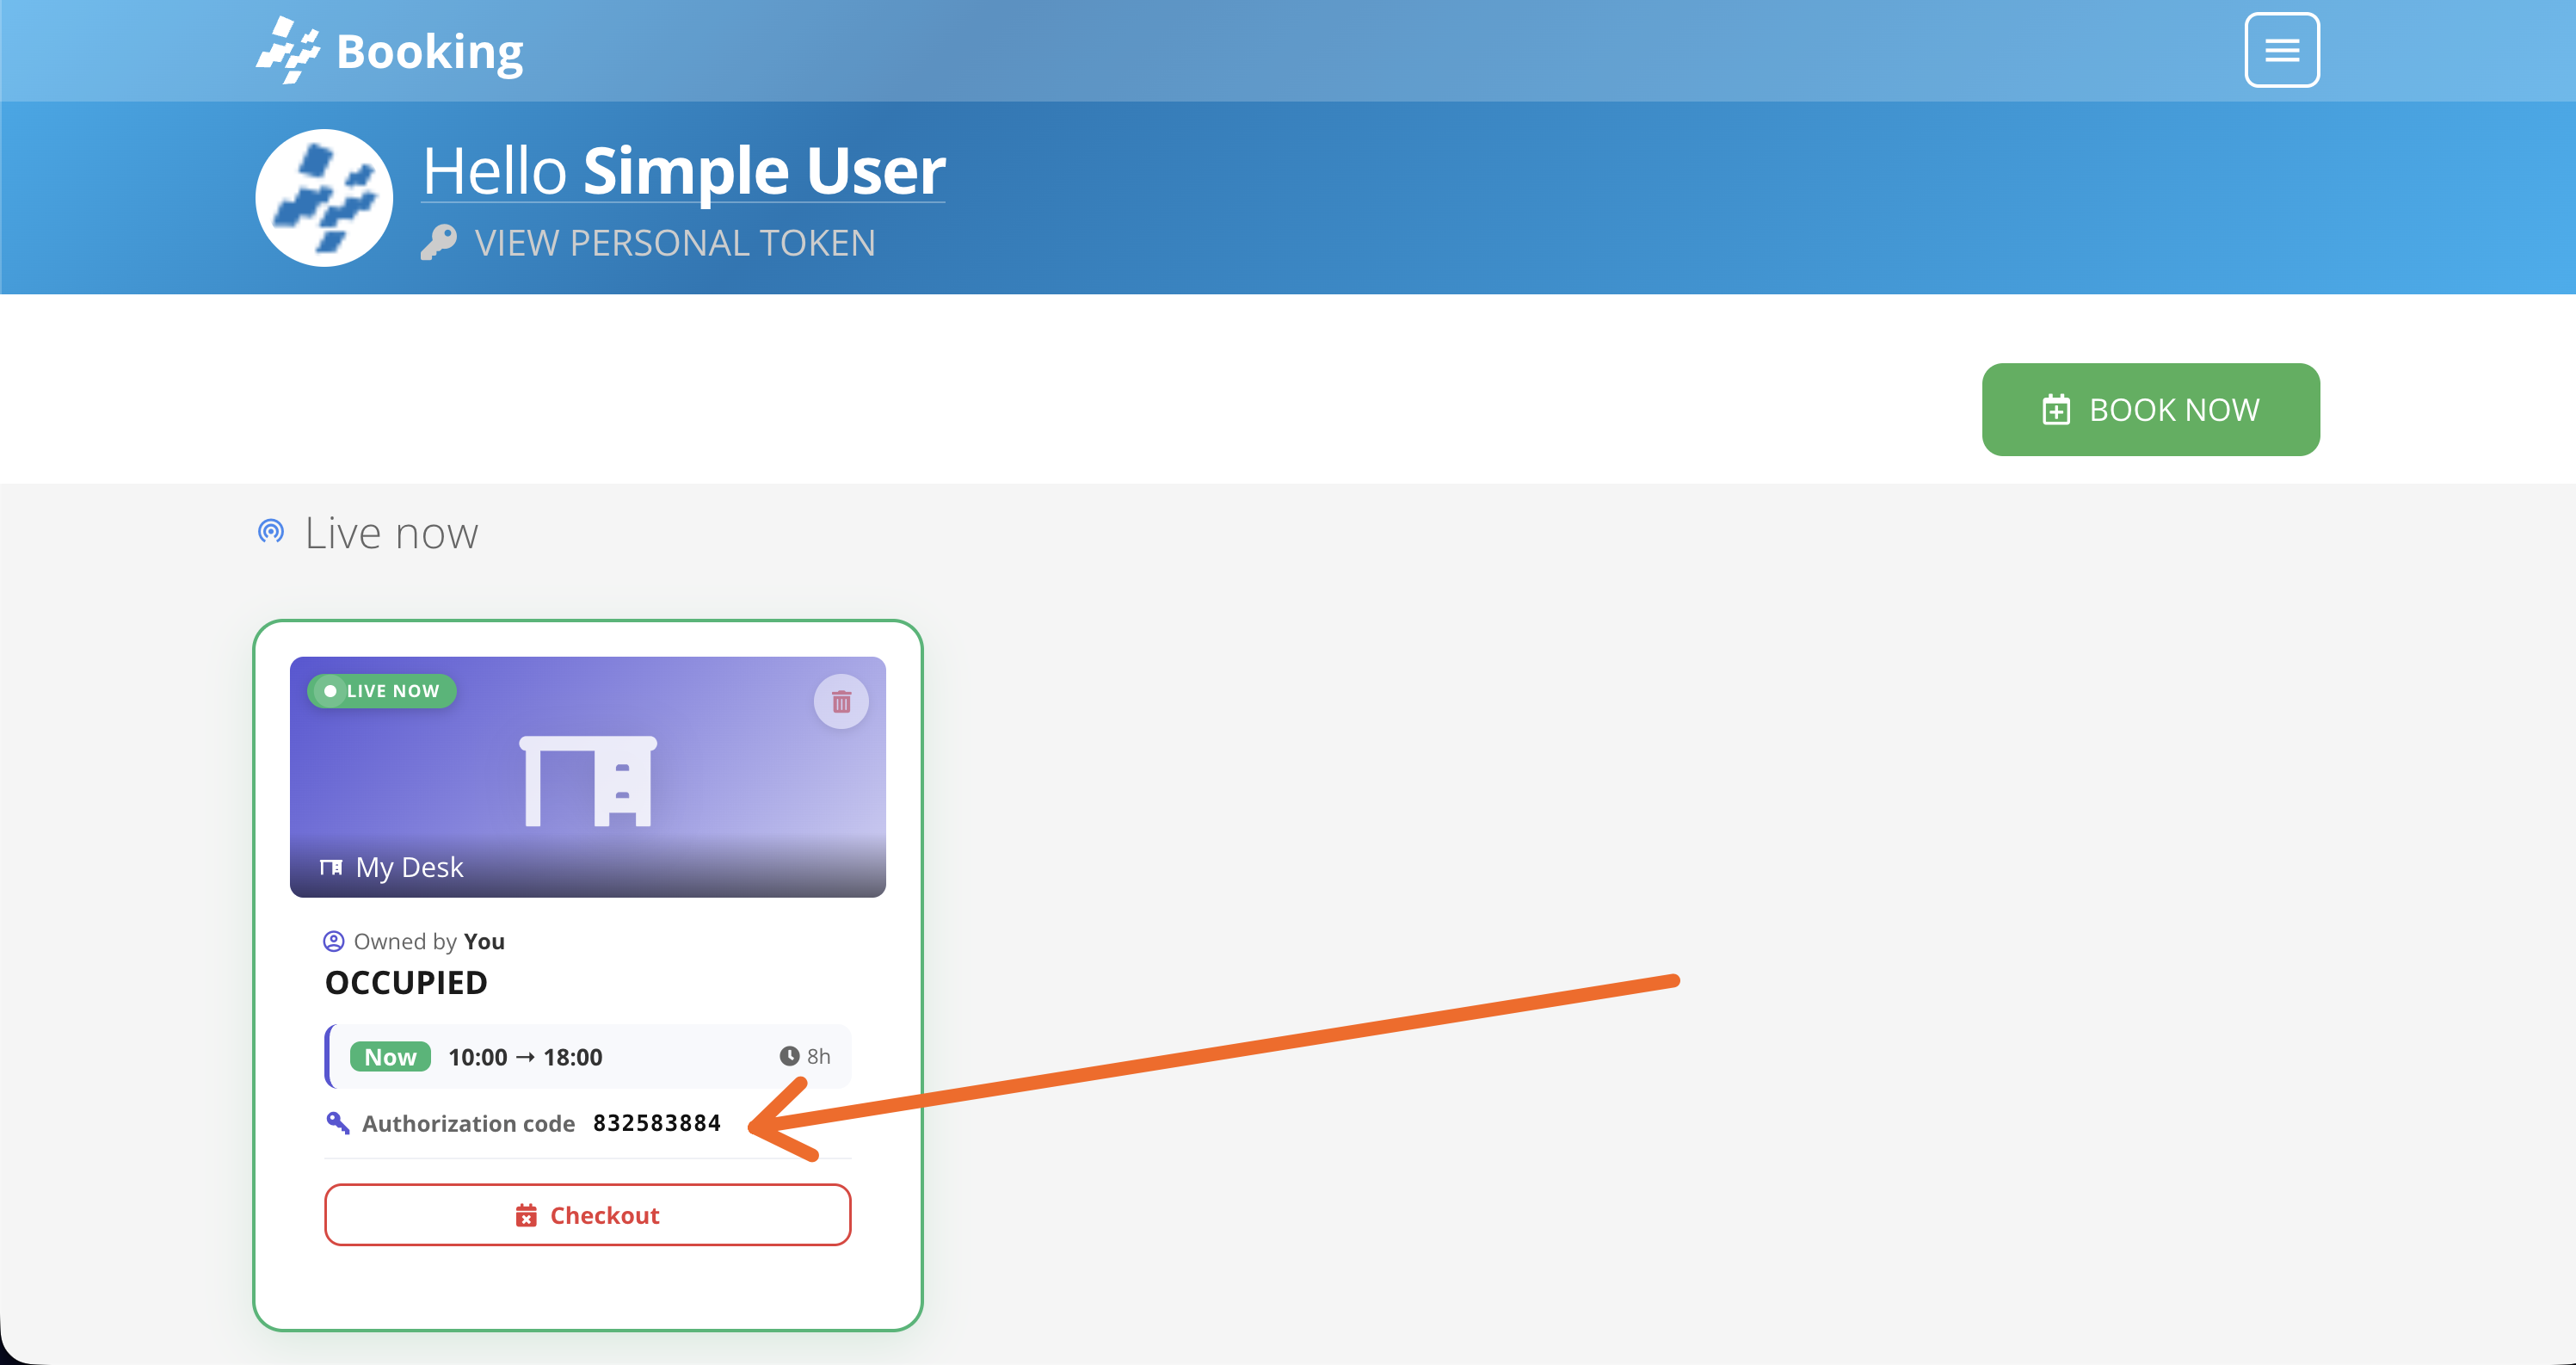
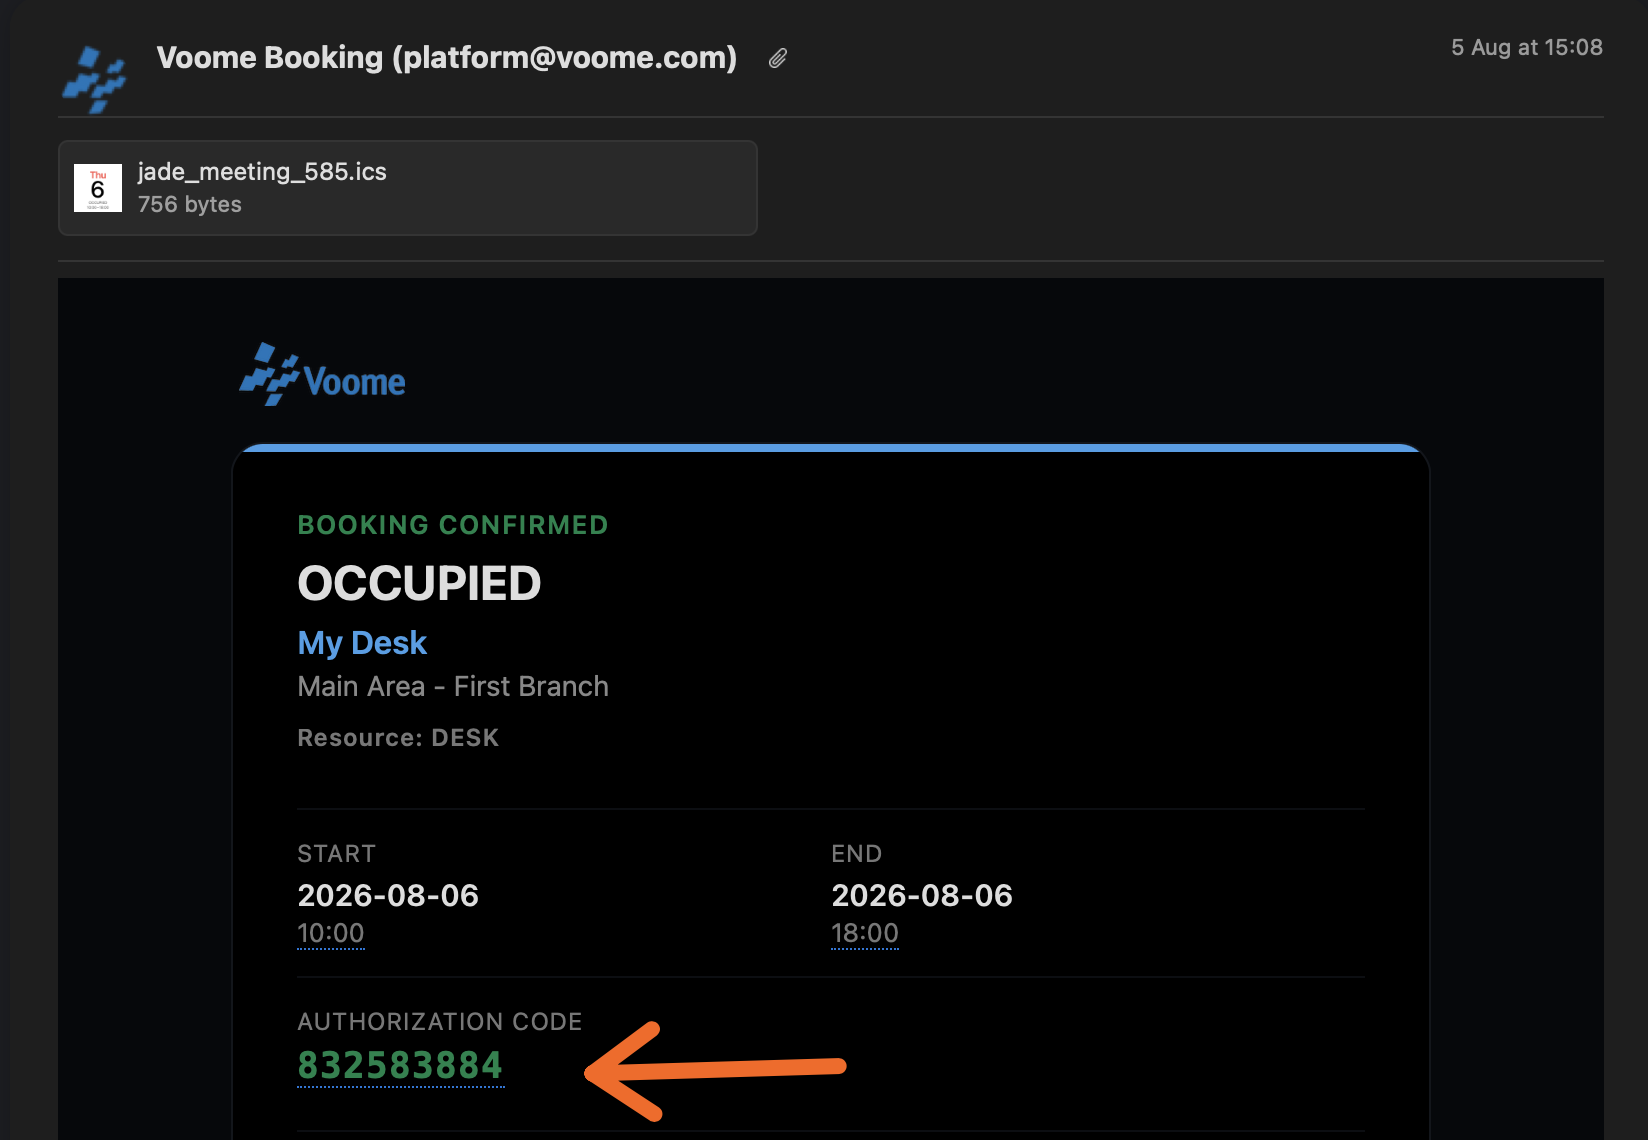
The authorization code belongs to one reservation, and anyone holding it can check that event in and out. There are two places to find it.
-
In the platform, on the reservation card in Your Events.
-
In the ✉️ confirmation email, which goes to the organizer and to every attendee added to the event.
❓ Where do you get your personal auth code
The personal auth code belongs to you rather than to an event, so it works on any panel and for any resource you are allowed to book. It is the code to use when you book a new event at the panel, since that event has no authorization code yet.
Click the 🔑 key icon, or View personal token, in the header of the Booking homepage to reveal it.
