Devices
The Devices view is the full control surface for the screens in your network. From here you can see the status of every player, search and filter your fleet, open a single device to inspect it, and run any operation the platform supports.
Depending on your account setup, step 5 shows either Devices or Monitoring. The Devices view is aimed at advanced and IT users, while the Monitoring view is a simple, intuitive control room.
Devices List
The Devices section gives you a comprehensive view of what is happening across your network.
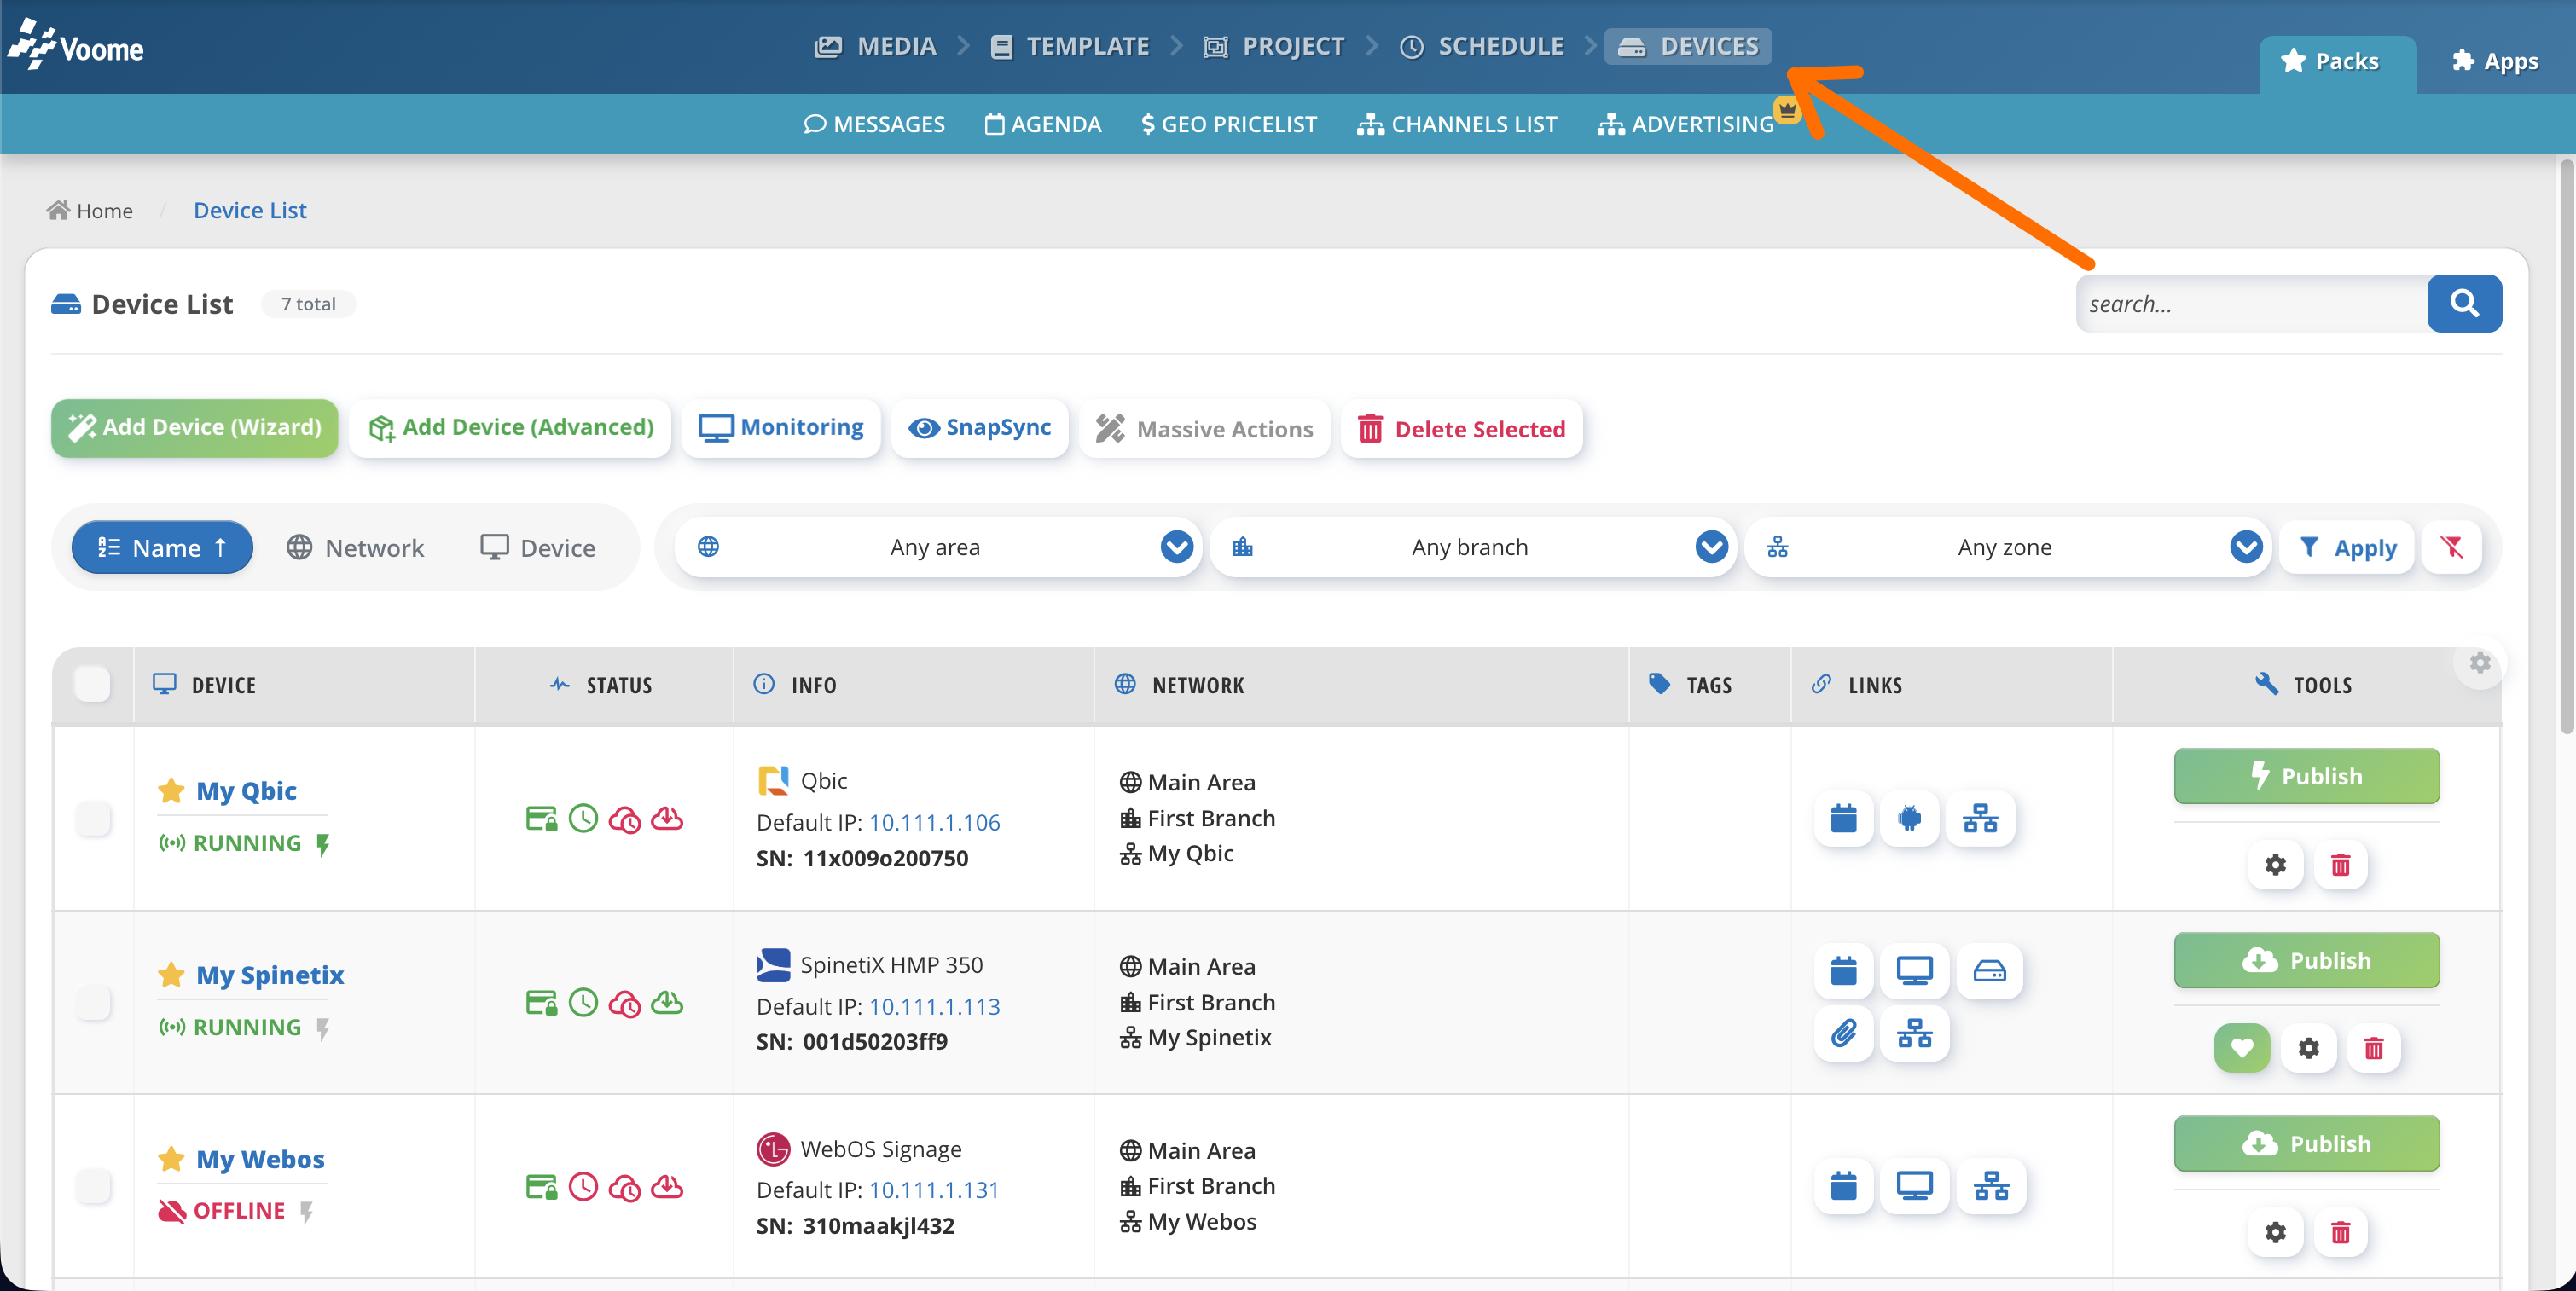
🔍 Search
If you have a long list of devices, search will save you a lot of time. Type part of a term and the table below updates instantly, highlighting the matching text. Search is always case-insensitive, so you don't have to worry about capitalization.
You can search by:
- Device title (e.g. My Spinetix)
- Device model (e.g. HMP 350)
- Device serial number (e.g. 001d50203...)
- Network position (e.g. My Branch Name)
- Tags (e.g. horizontal)
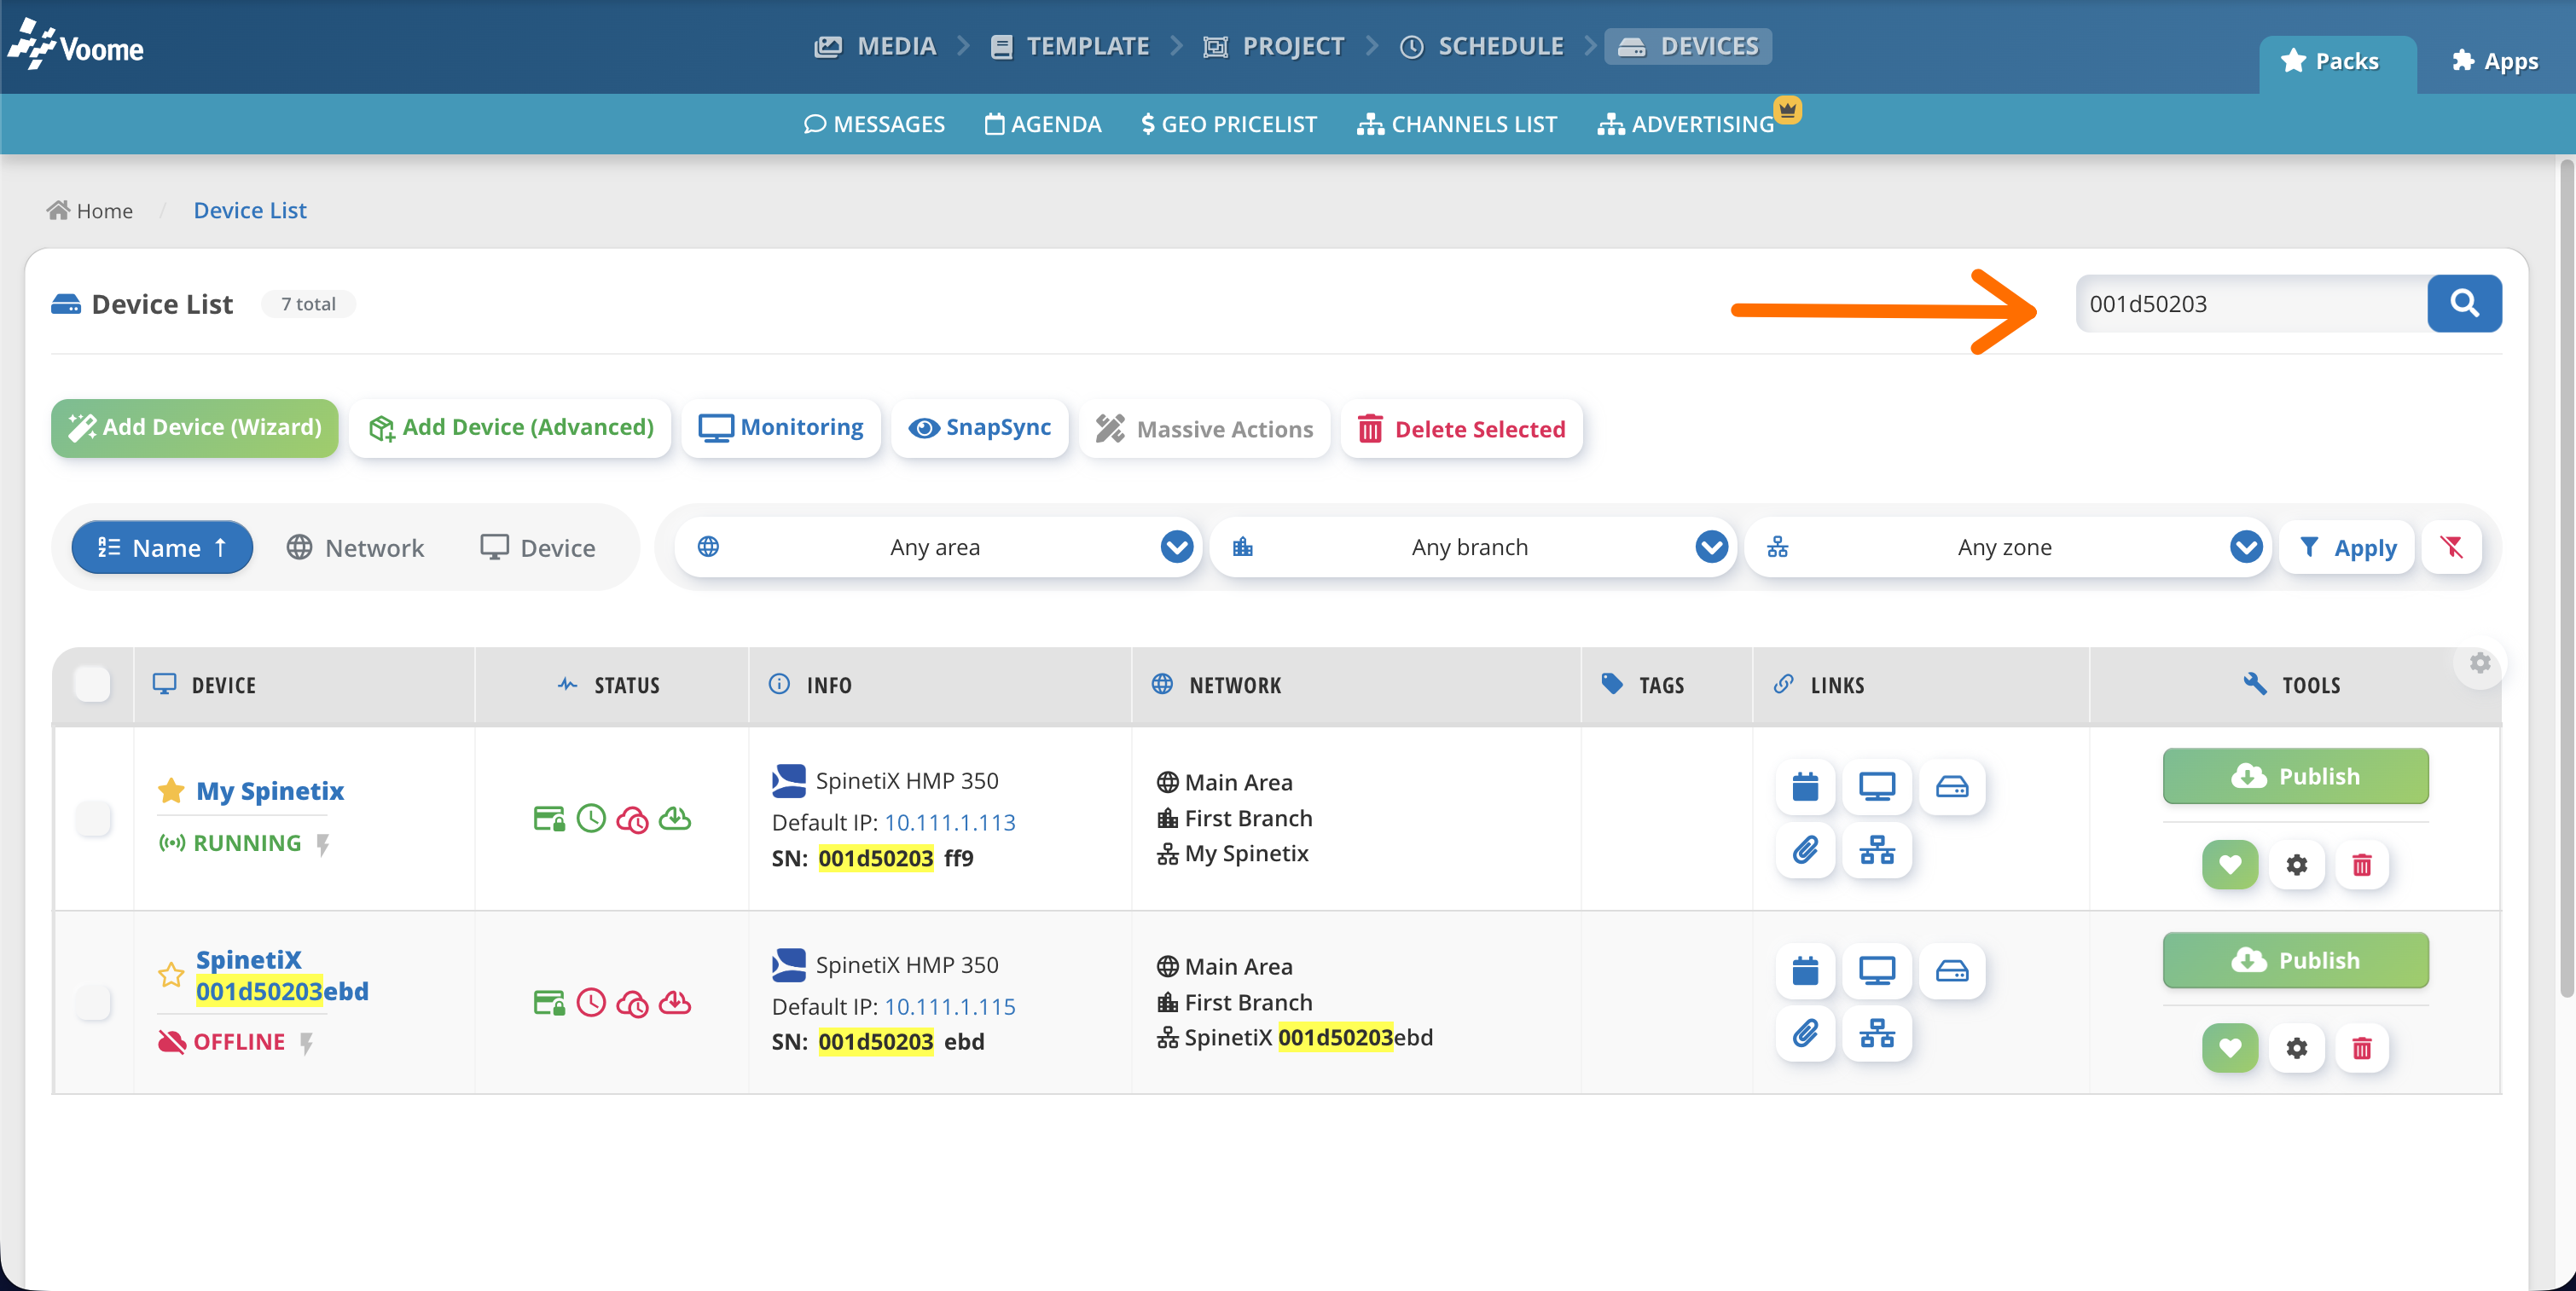
🔍 Advanced Search
You can also use special search terms to make a search more precise or to broaden it. Say, for example, that you want to see all of your Spinetix devices together with all of your webOS devices. In that case you could search for:
spinetix || webos
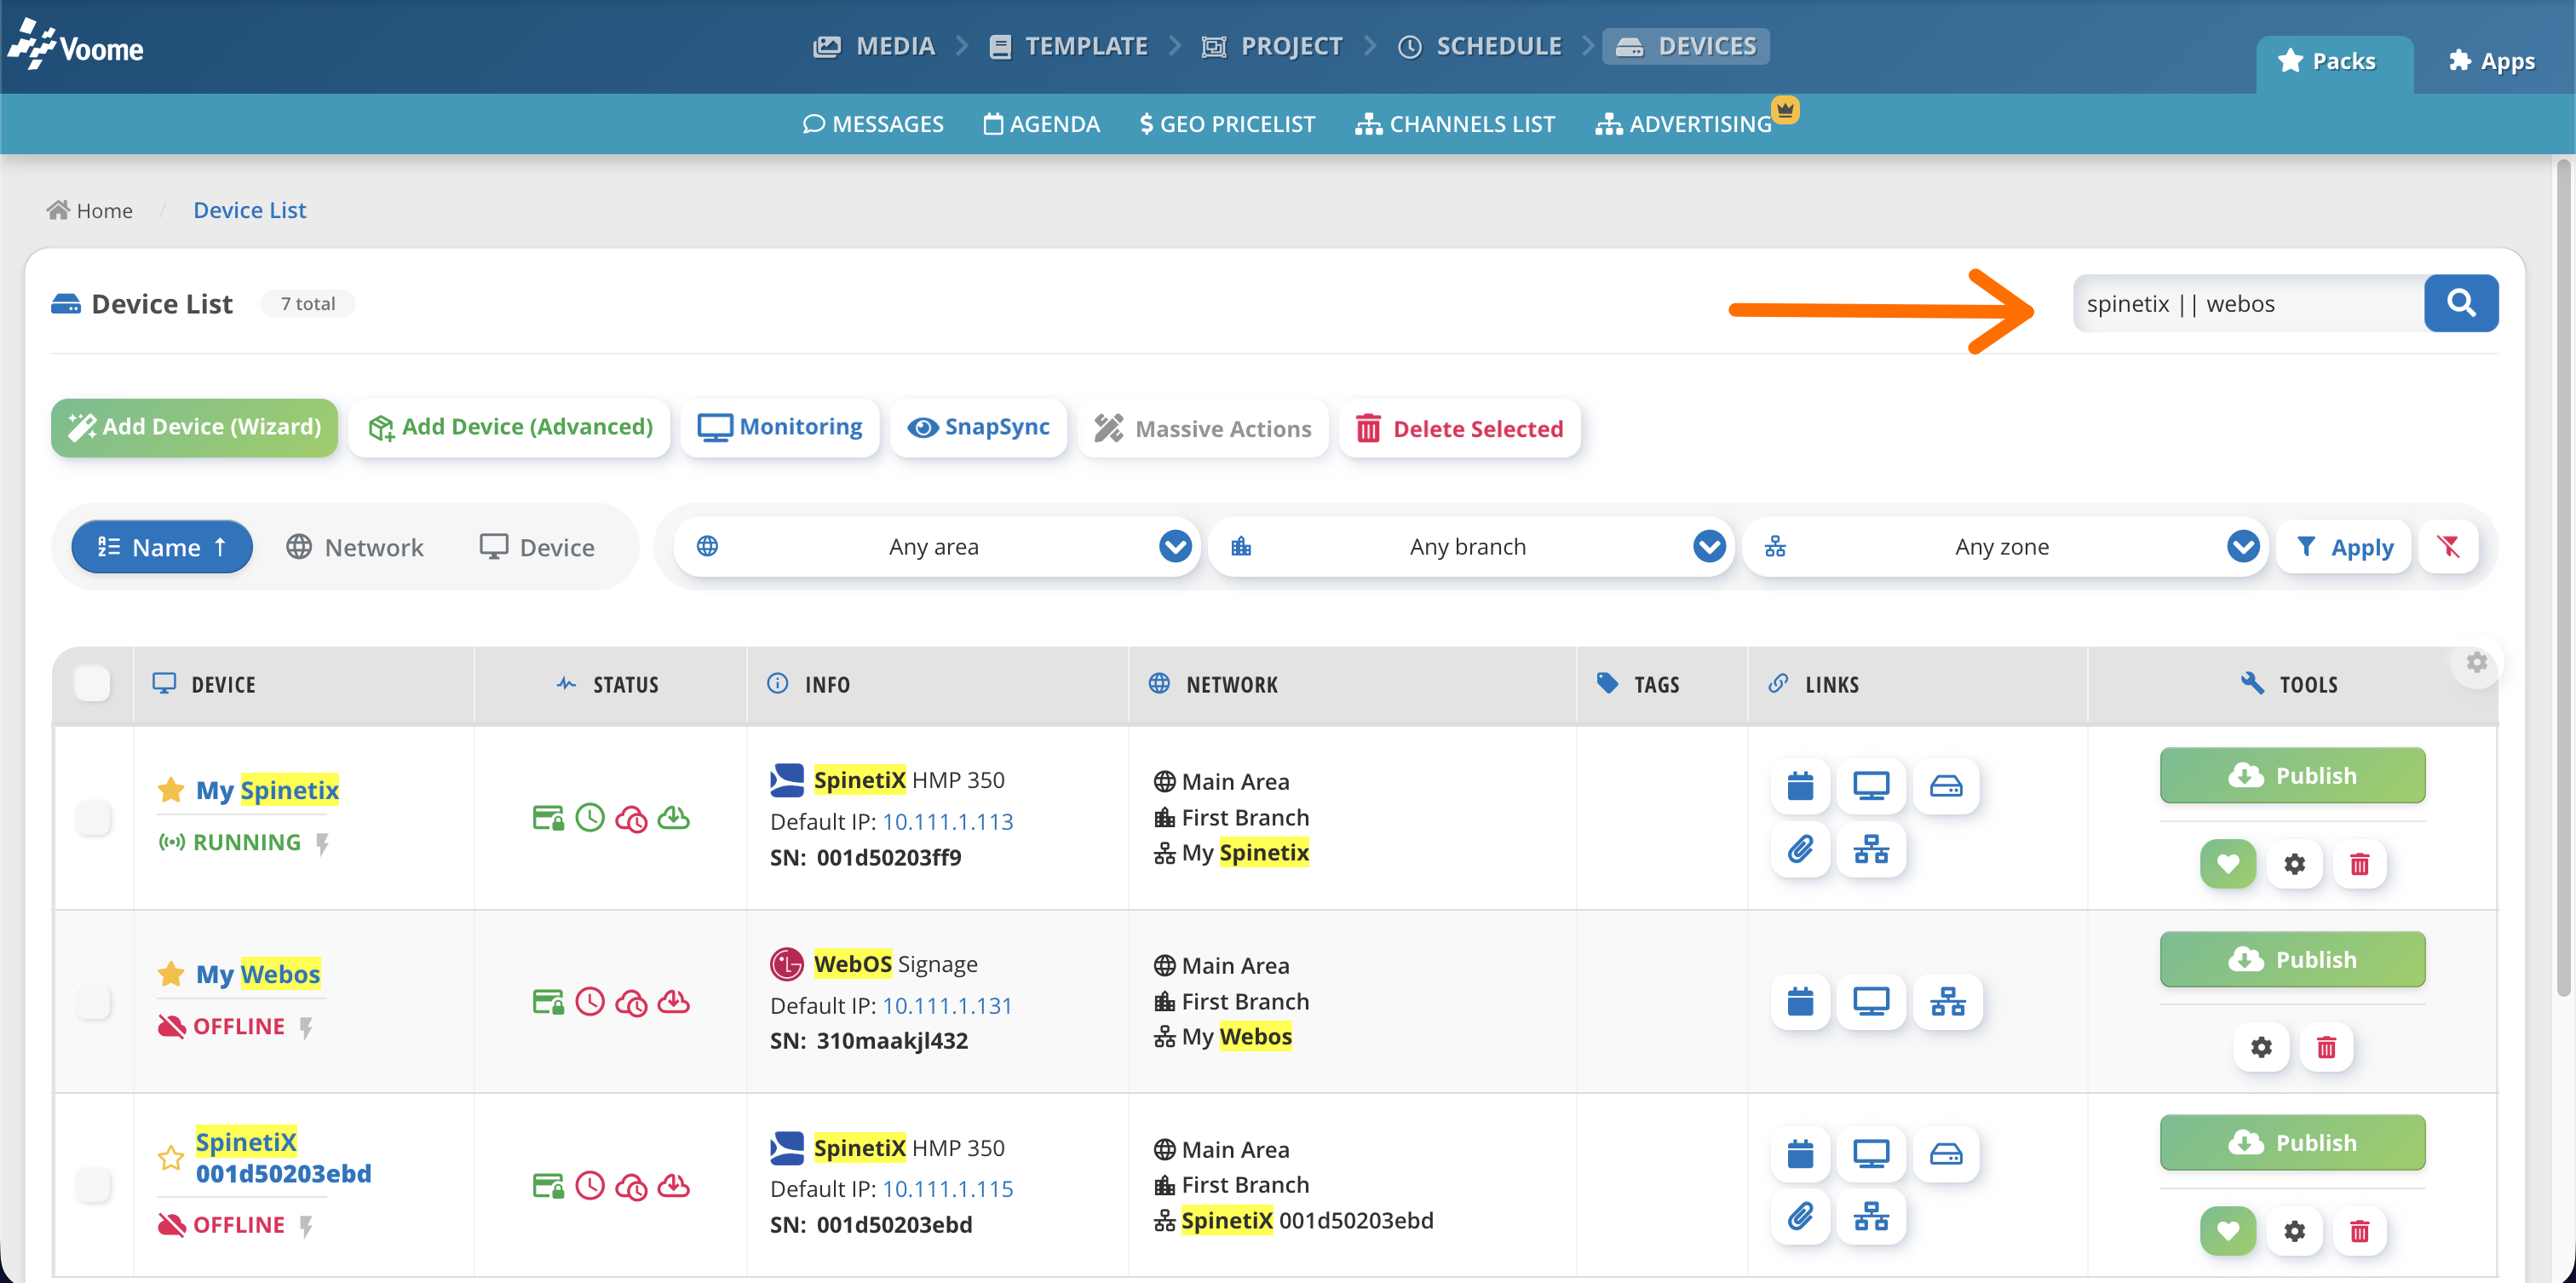
Here are all the special keywords you can use as search terms:
- OR operator (e.g.
spinetix || webos) - AND operator (e.g.
spinetix && webos) - Keyword
active: shows all devices activated within the account - Keyword
expired: shows all devices with an expired licence
🔍 Order The List
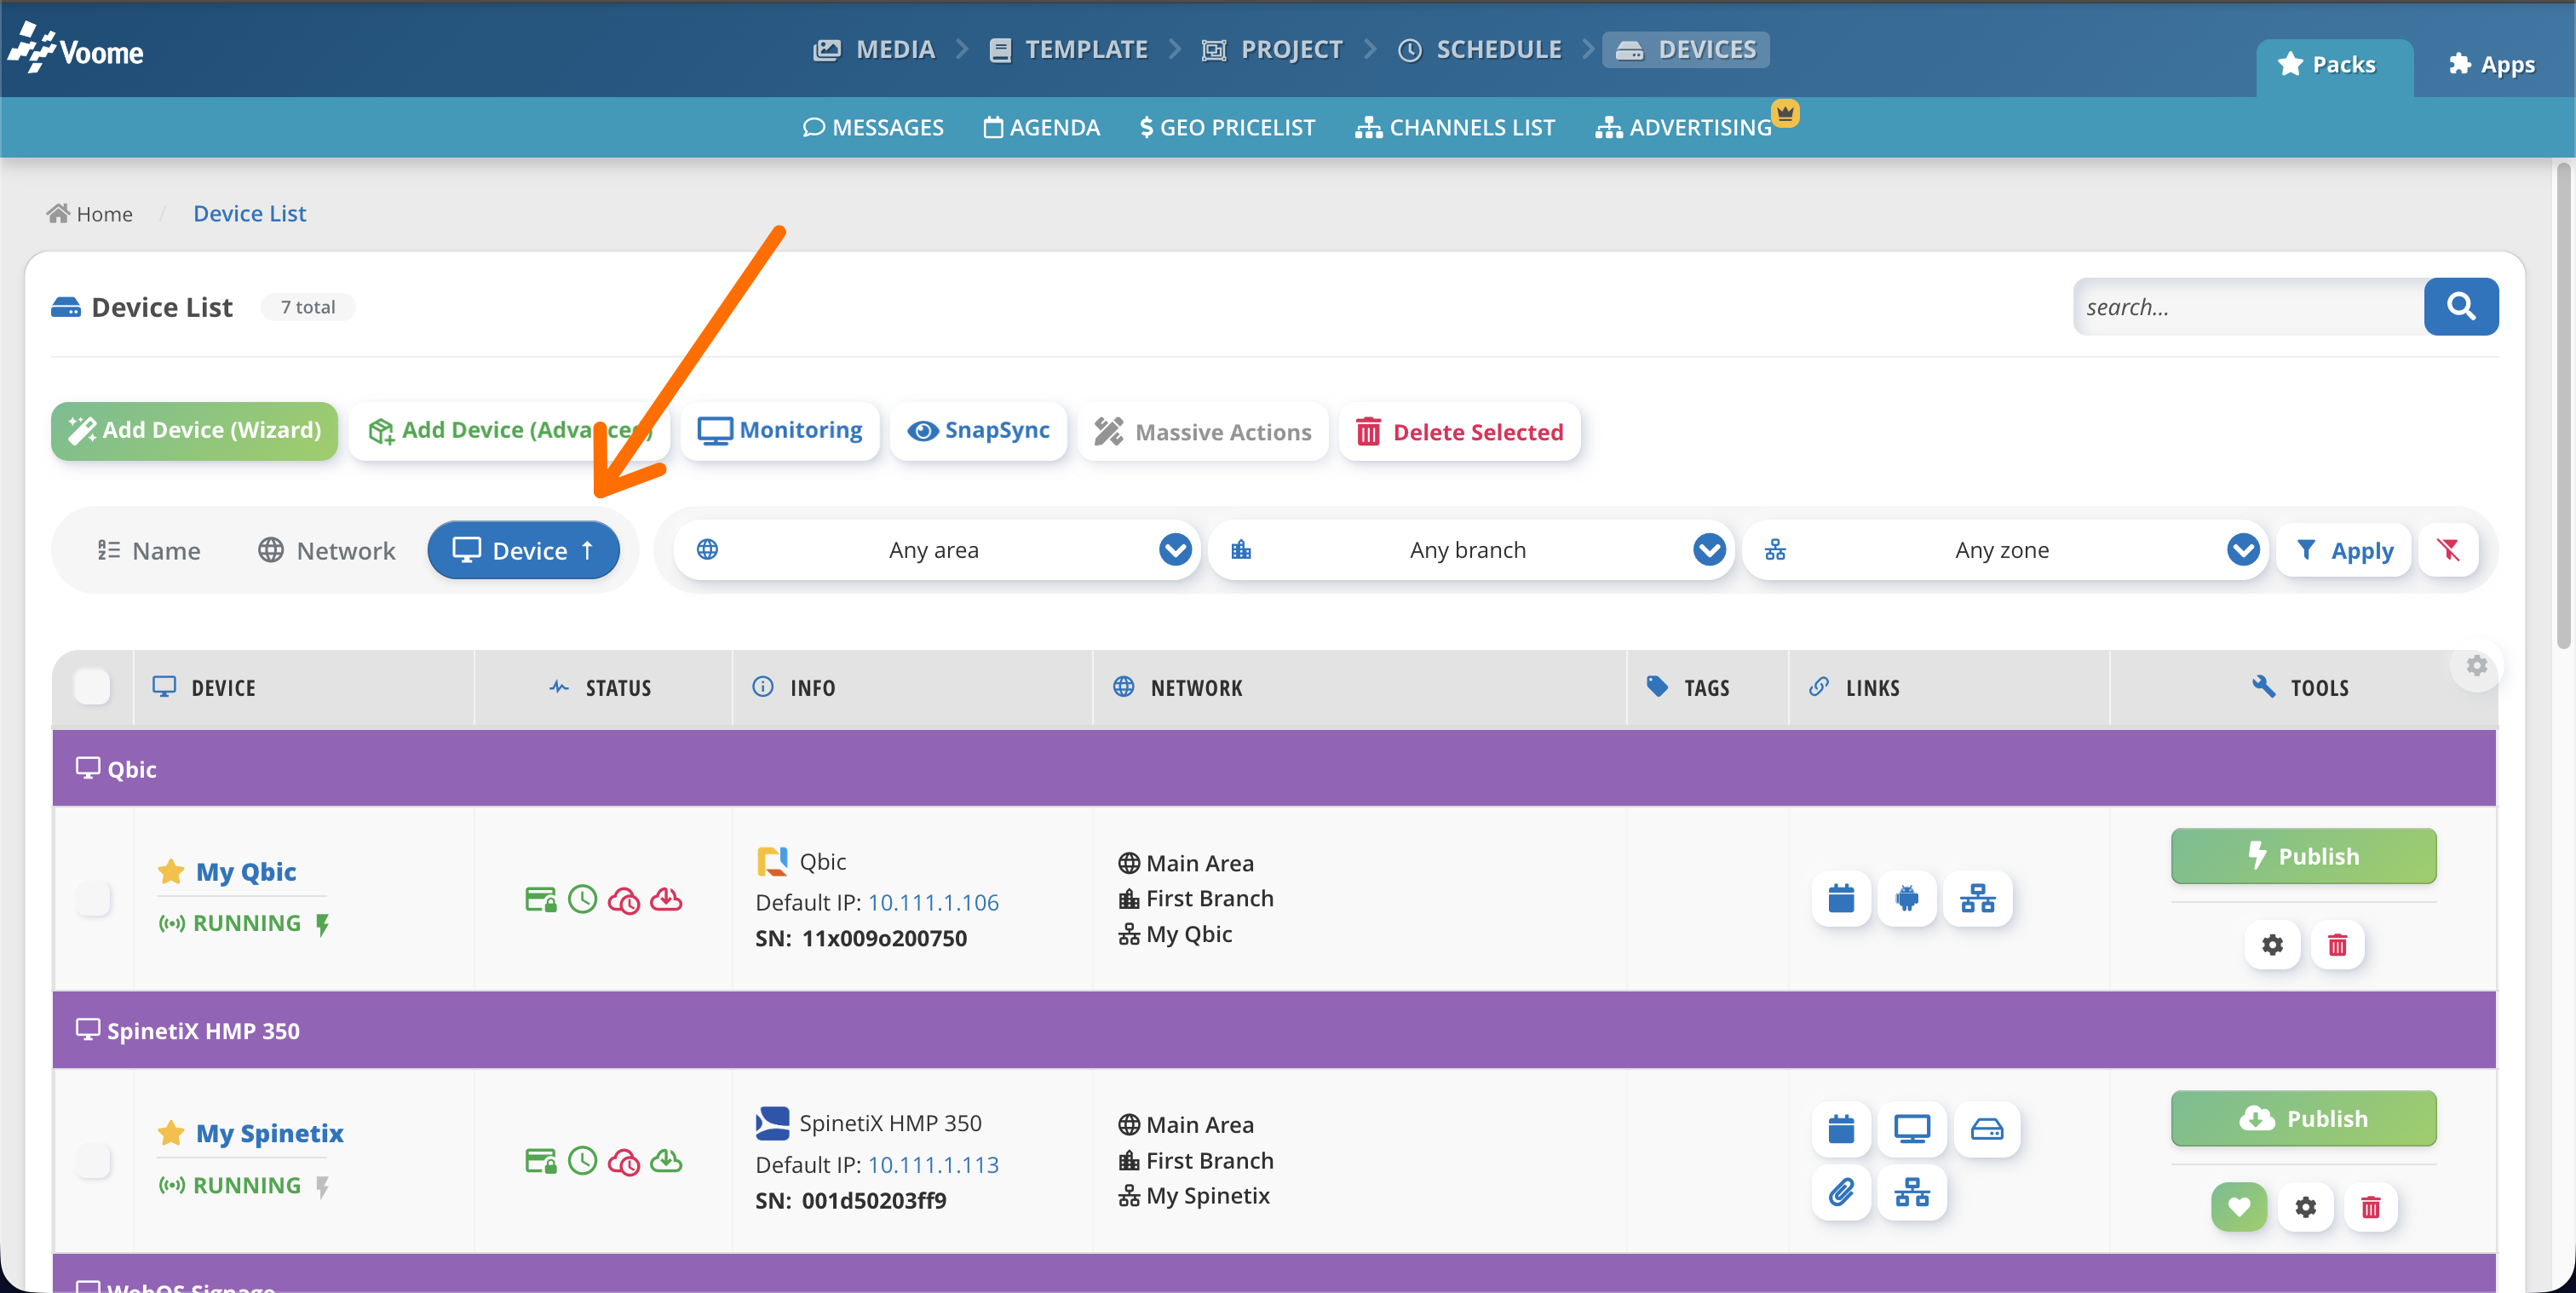
Use the Order by control to sort the device list. You can order by:
- Name (ascending/descending)
- Network branch (ascending/descending)
- Device type (ascending/descending)
🔍 Filter List By
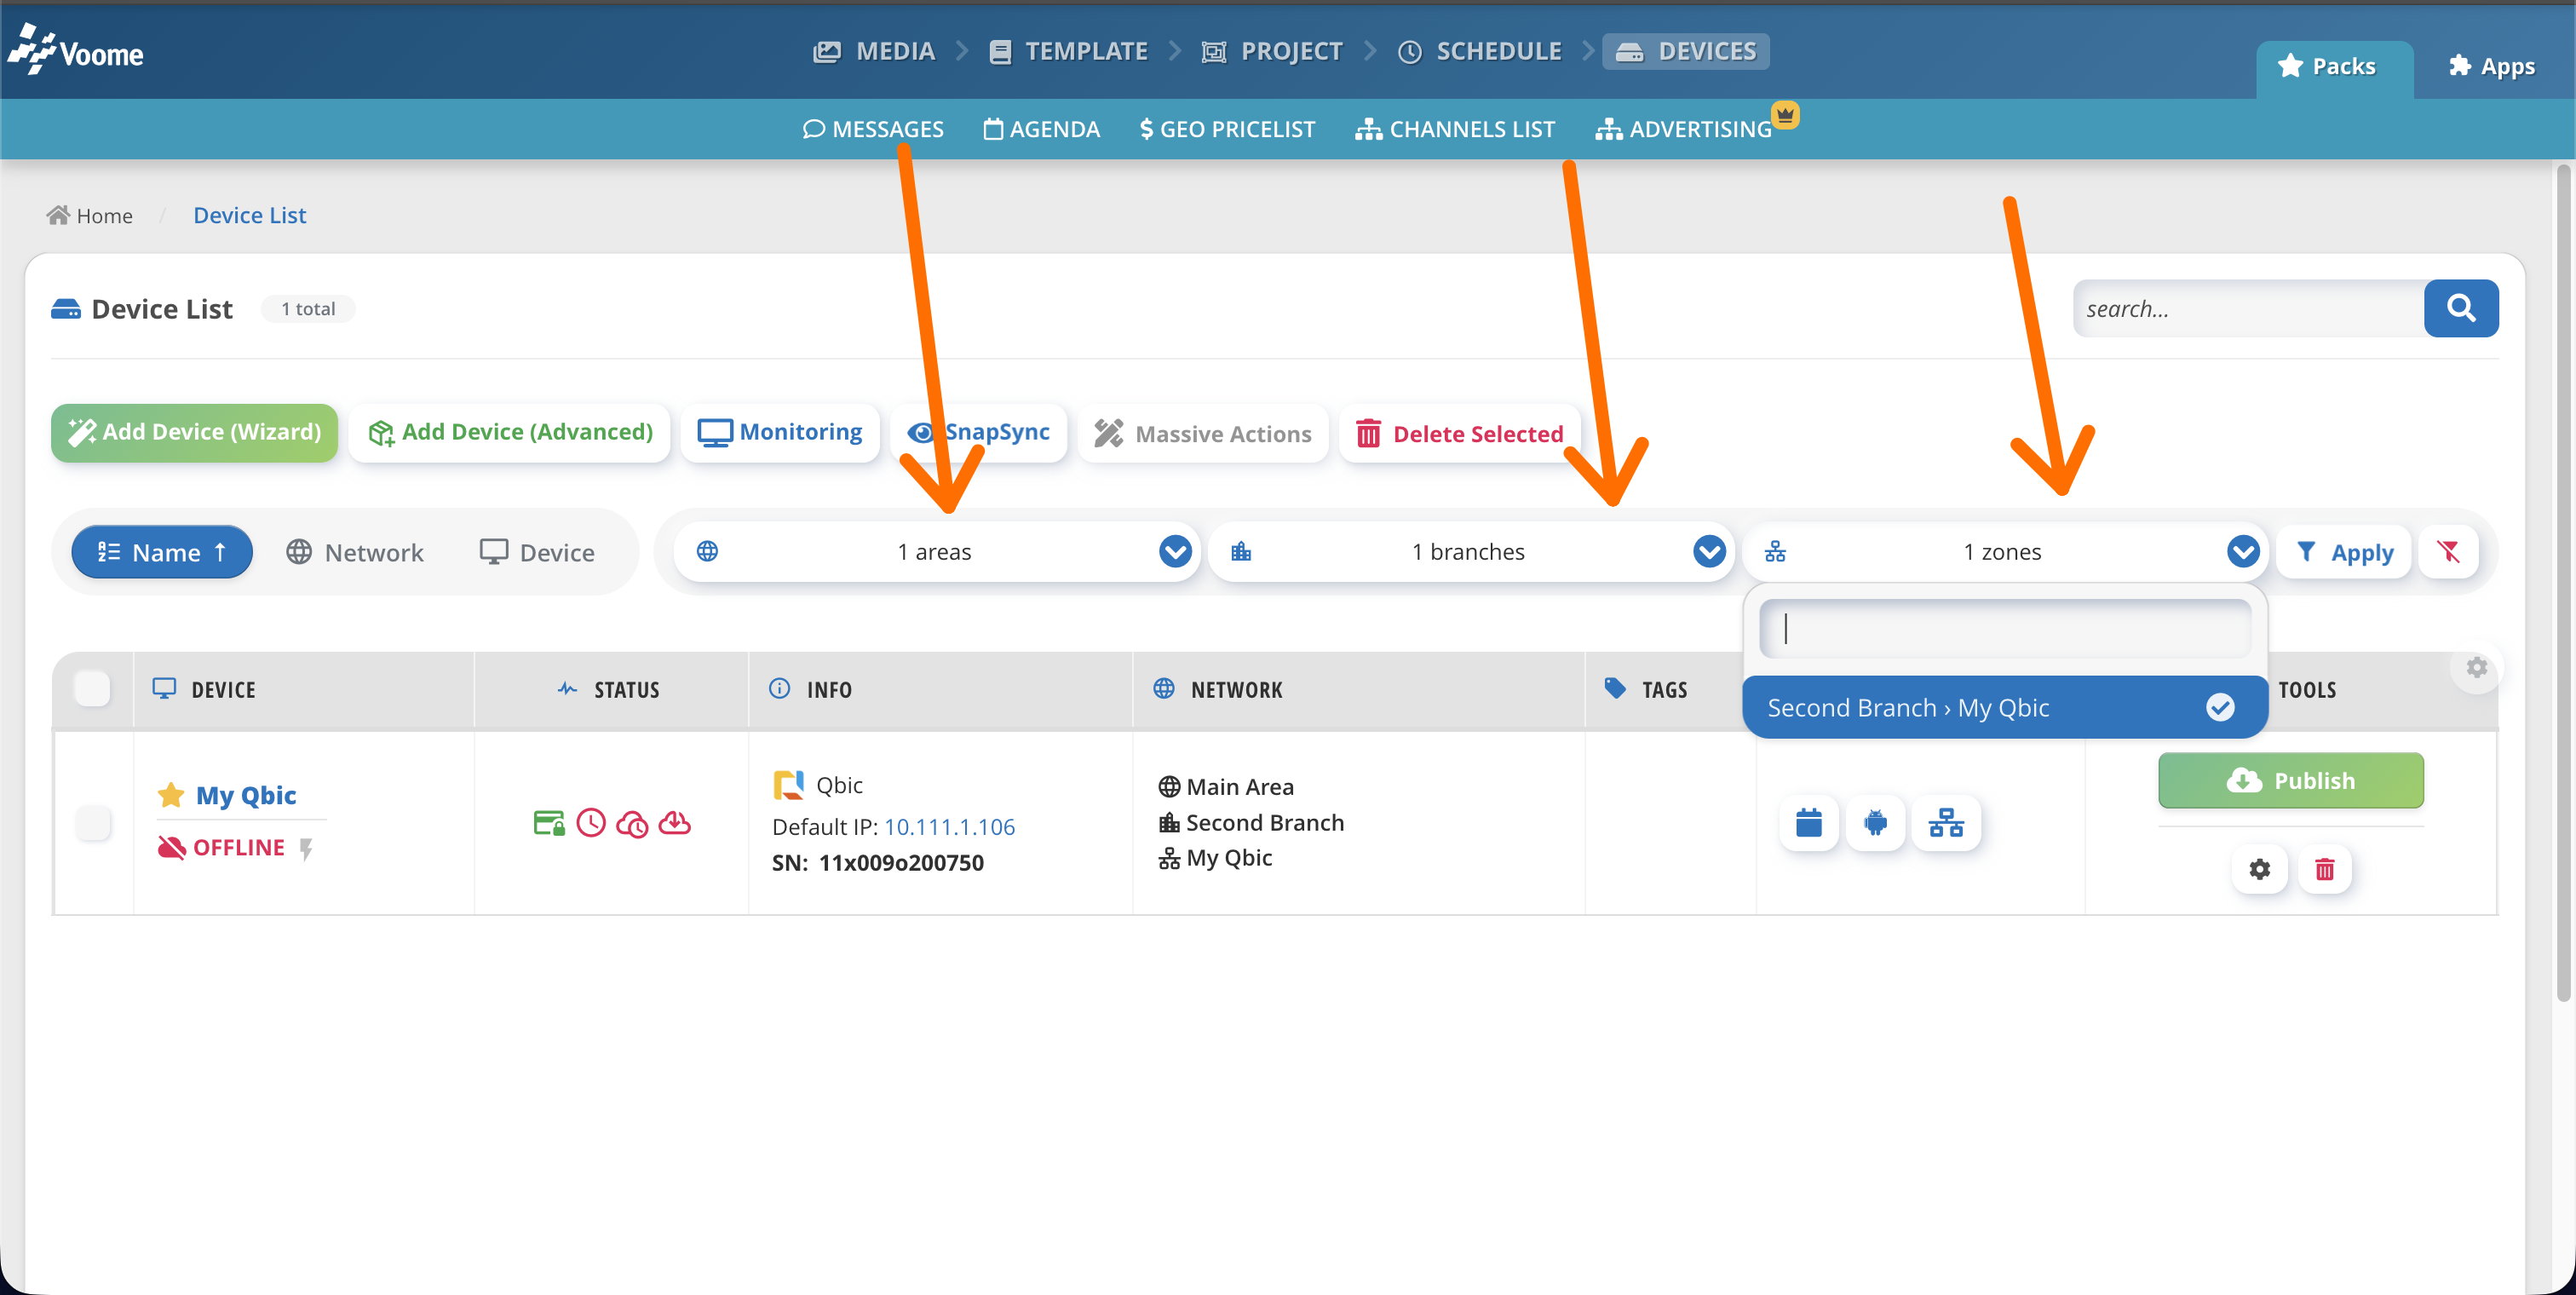
Quickly find the devices you need by filtering your network by Area, Branch, or Zone. You can also select multiple areas, branches, and zones at once. Once you've made your selection, click Apply to filter the list. The filter persists across page refreshes.
❓ How to Device Detail
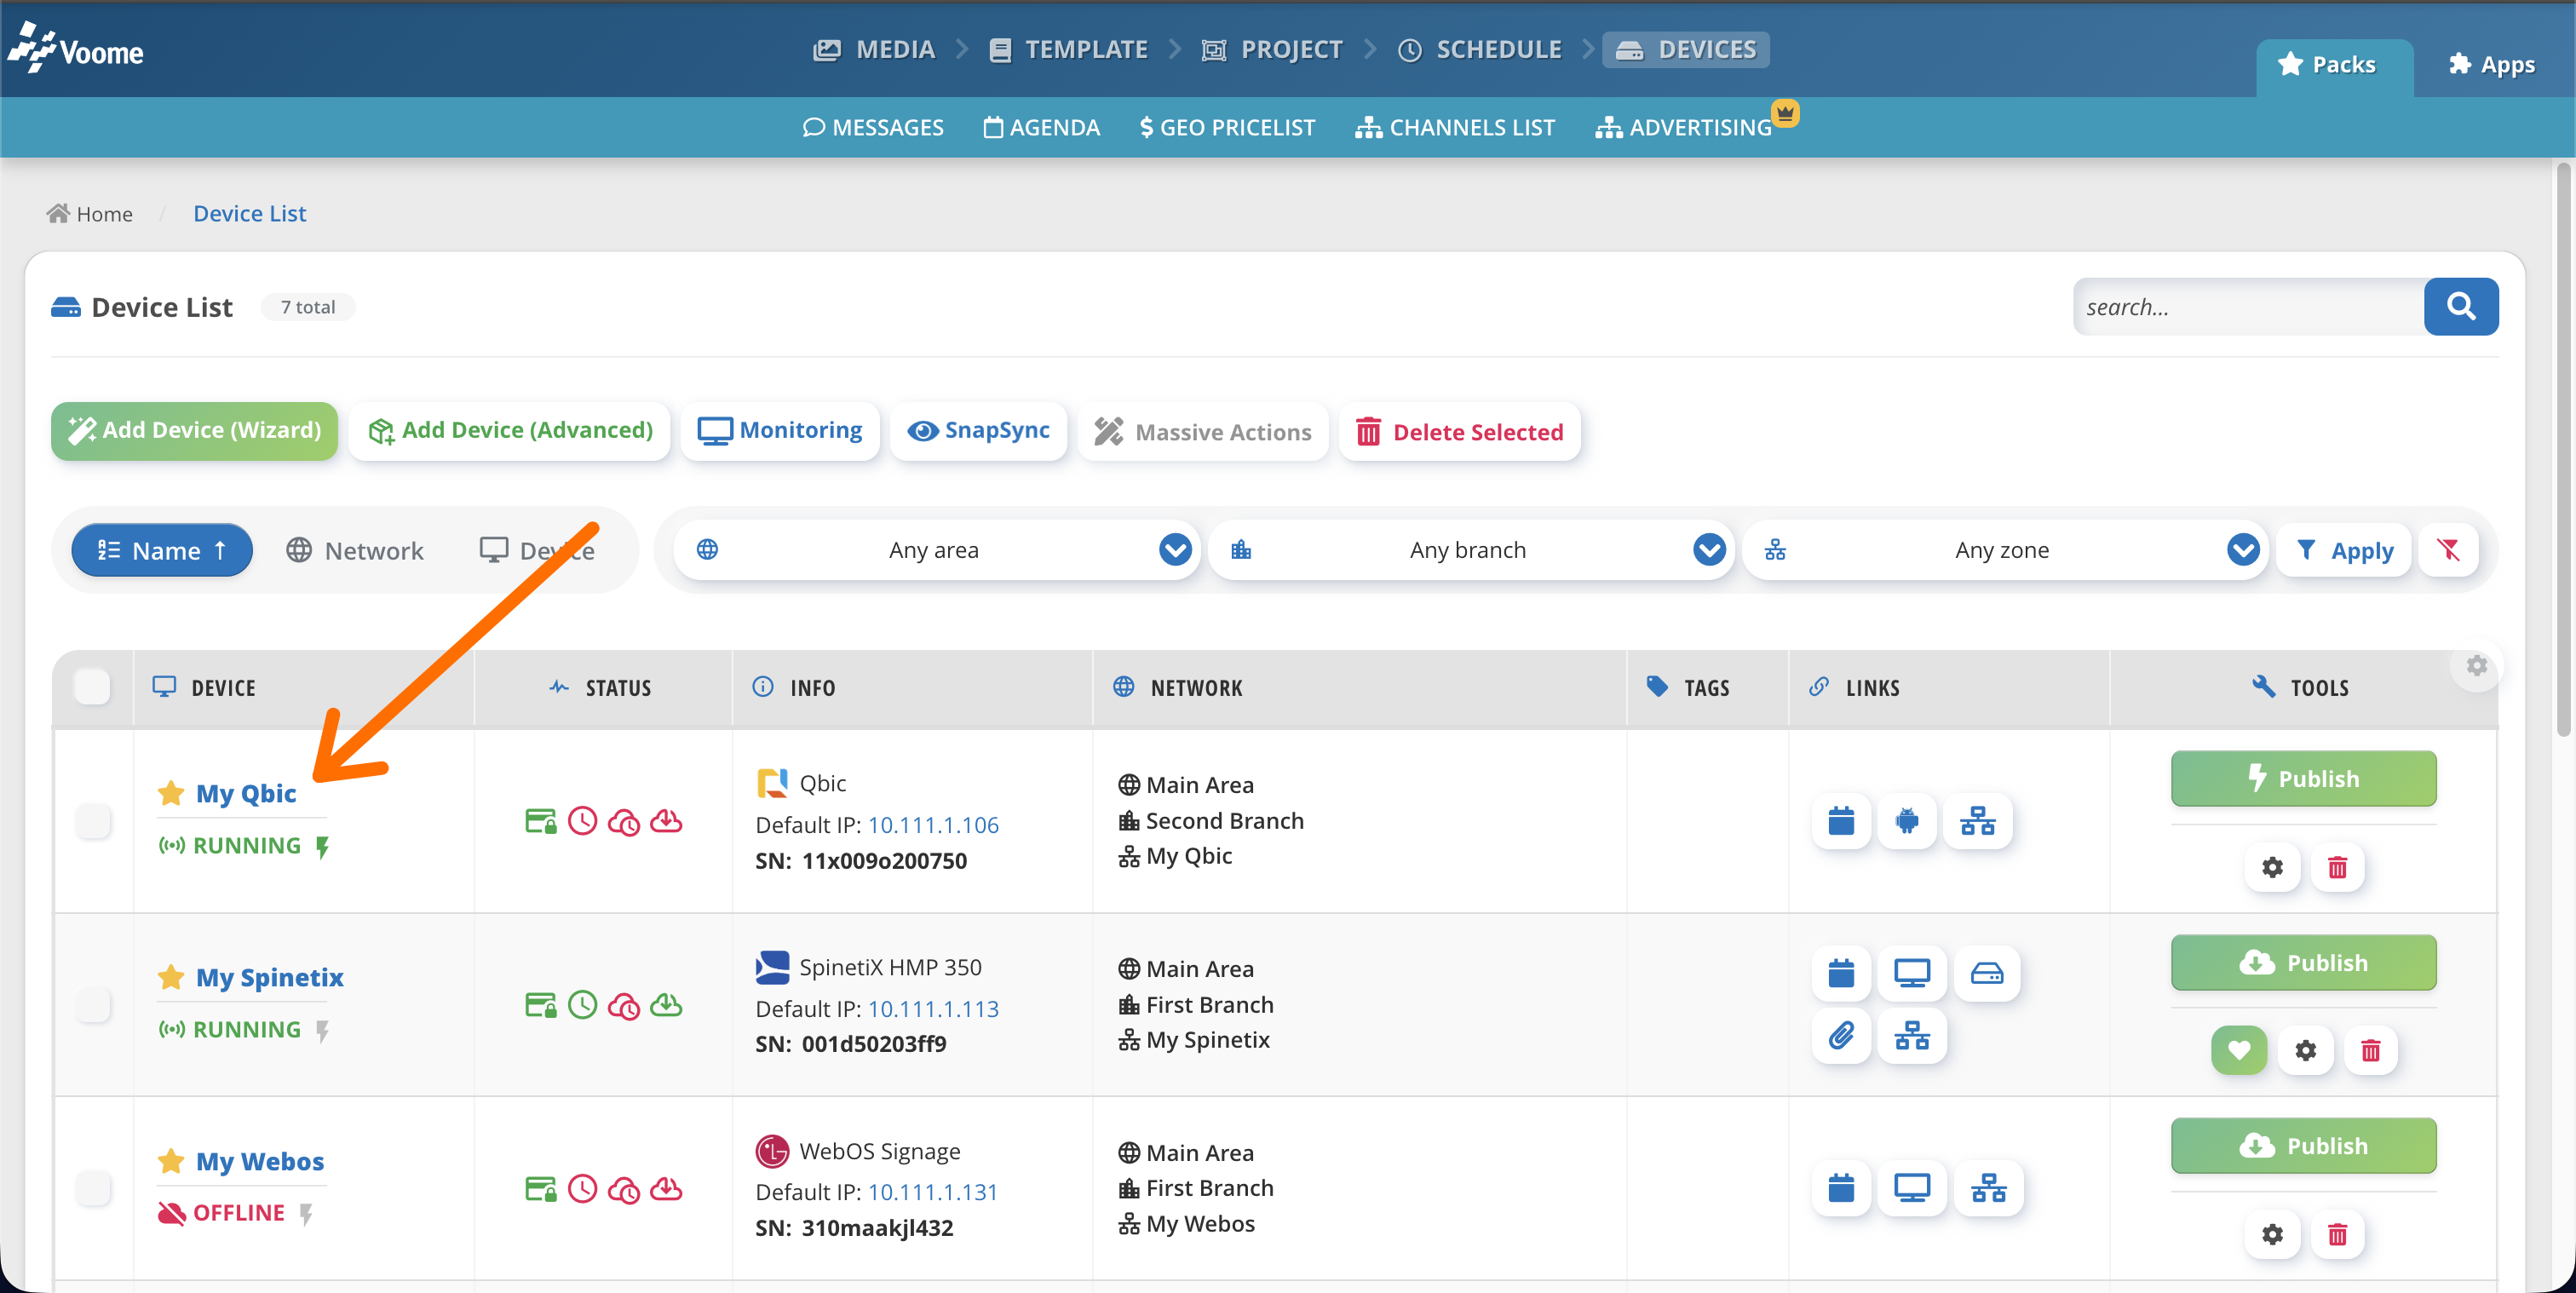
To open a device's detail view, simply click the Device Name you're interested in or the ⚙️ gear icon on the right.
🗃️ Tab: Status
The Status tab gathers all the data related to the selected device, giving you a single place to check its health at a glance.
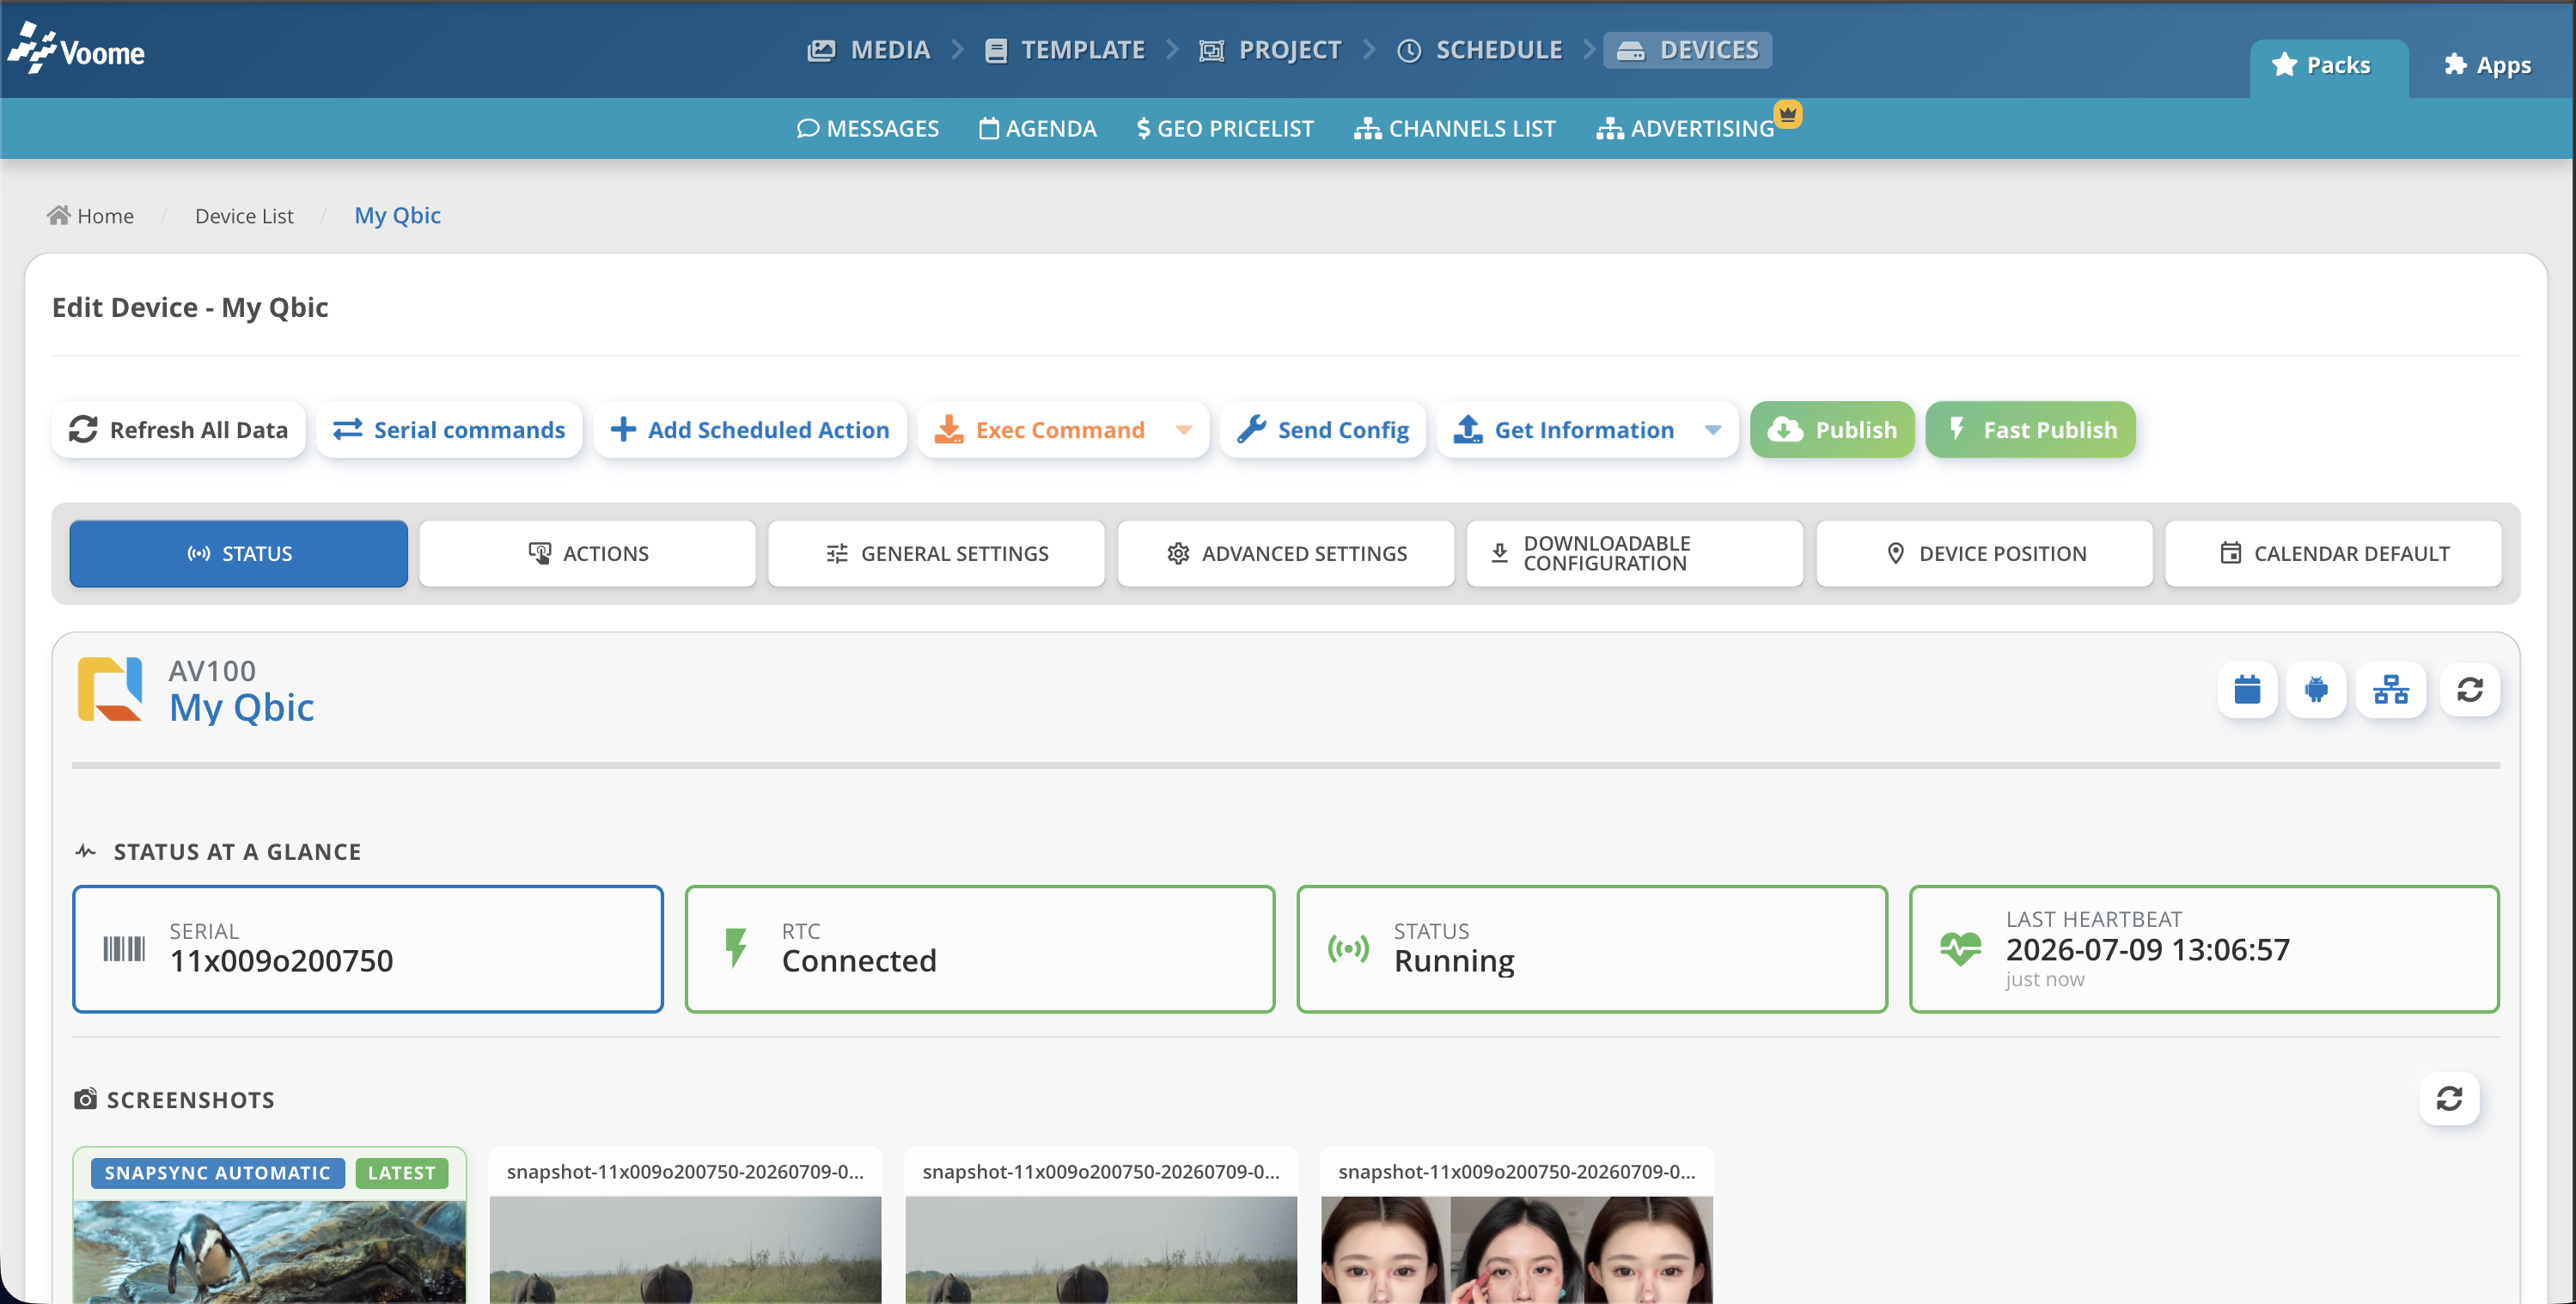
From top to bottom, this tab contains:
- Status at a Glance: the device's online status, based on Voome's RPC and RTC connections.
- Screenshots: recent captures of what's on screen, including automatic Snapsync images.
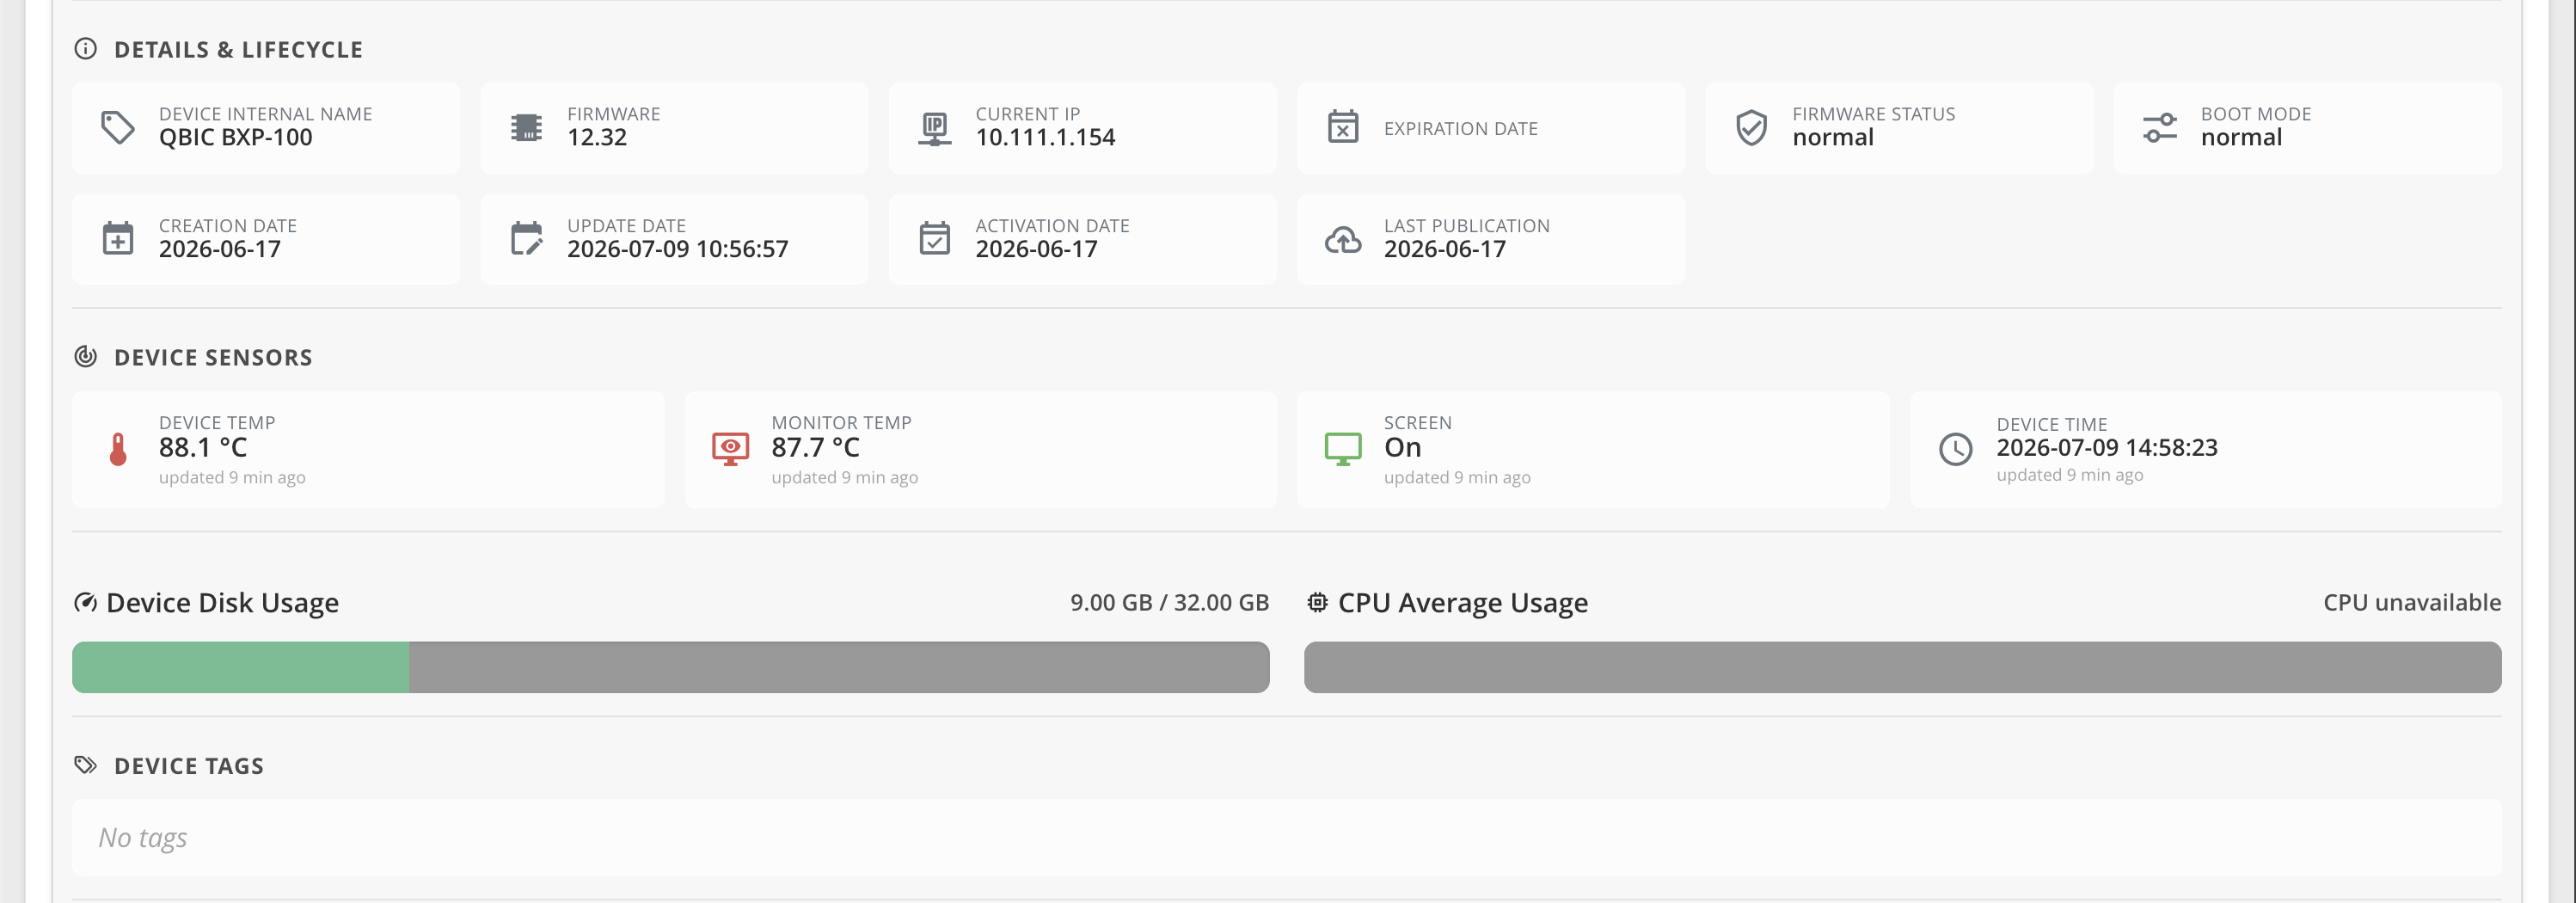
- Device Metrics: hardware specifications such as IP address, disk usage, temperature, and device time.
- Device Alerts: a timeline of recent connectivity issues.
📍 Status at a Glance
A section reporting the main data about the device.

Voome uses two systems to define whether a device is online:
- RPC (Remote Procedure Call): the device pings the Voome servers every minute.
- Status (Running/Offline): whether the device was able to reach the Voome servers in the latest period.
- Last heartbeat: the last time the device reached the Voome servers.
- ⚡ RTC (Real-Time Communication): a connection that lets the Voome servers send commands immediately, without waiting.
📍 Screenshots
All the collected screenshots. Click the refresh button on the right to update the available screenshots. In the carousel you'll also find a special screenshot card called Snapsync, an automatic screenshot collected from the device once every five minutes.
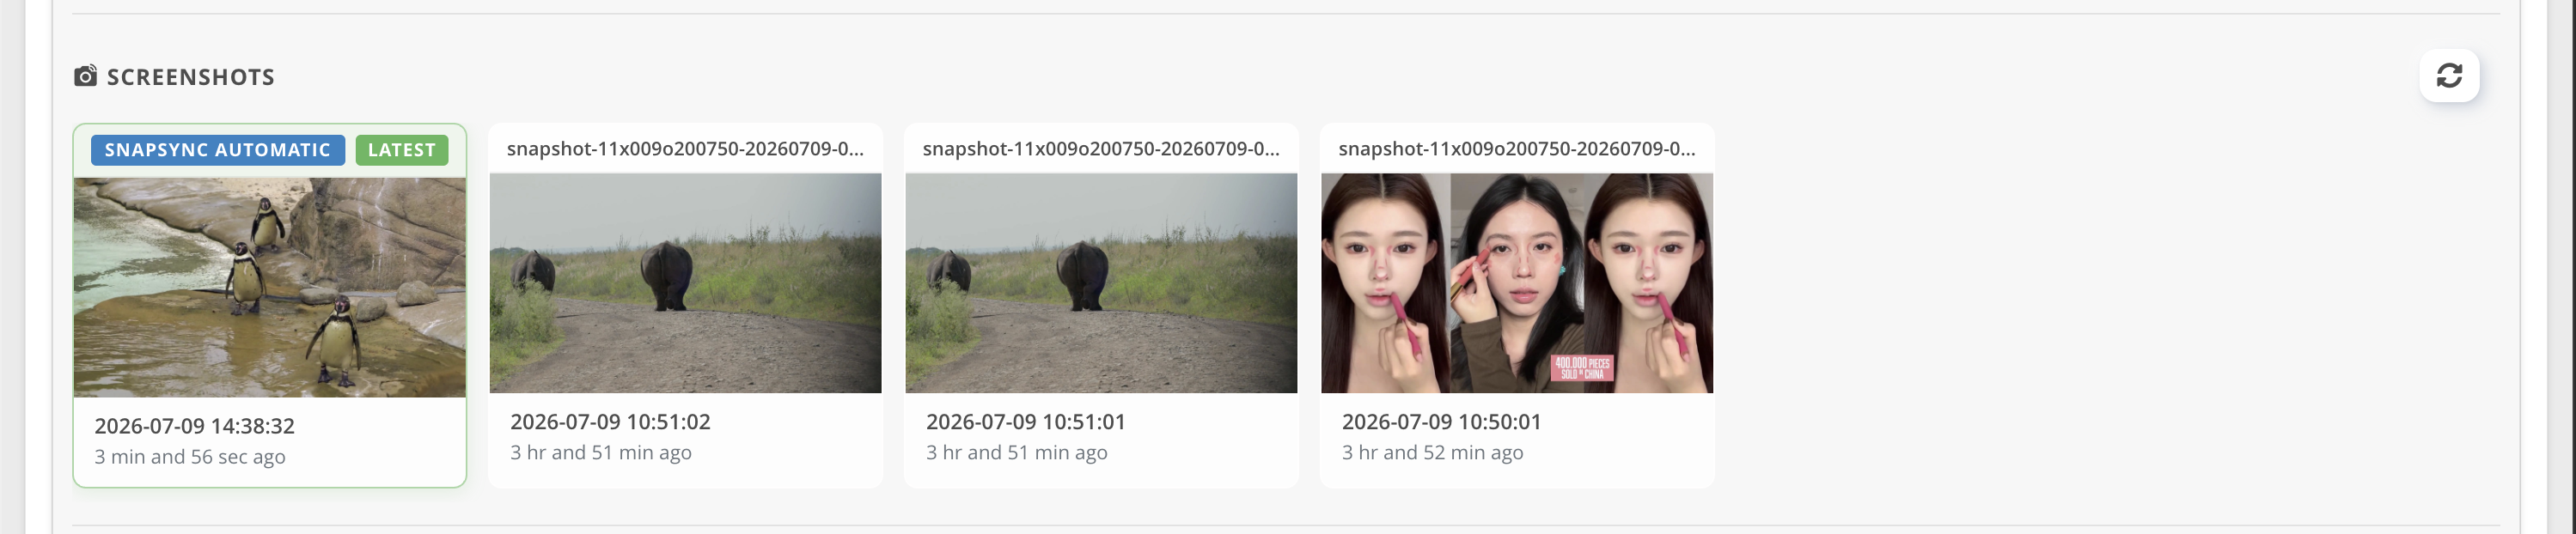
To request a screenshot, click the Get Information button > Get Device Screenshot. The action is scheduled and will be ready in about one minute (if the device is online). After that minute, click the refresh button to make it appear in the carousel.
📍 Device Metrics
This section lists the device's specifications, such as IP address, disk usage, temperature, and tags.
It also shows the Device Time, which is useful for checking the timezone currently set on the target device. Setting the correct timezone is essential for publishing: if it's wrong, the content on screen will be offset from what you scheduled.
If the device has just been configured, it's good practice to pull fresh data from it. To do so, click Get Information > Get Device Info > wait 1 minute > click refresh/reload the page.
📍 Device Alerts
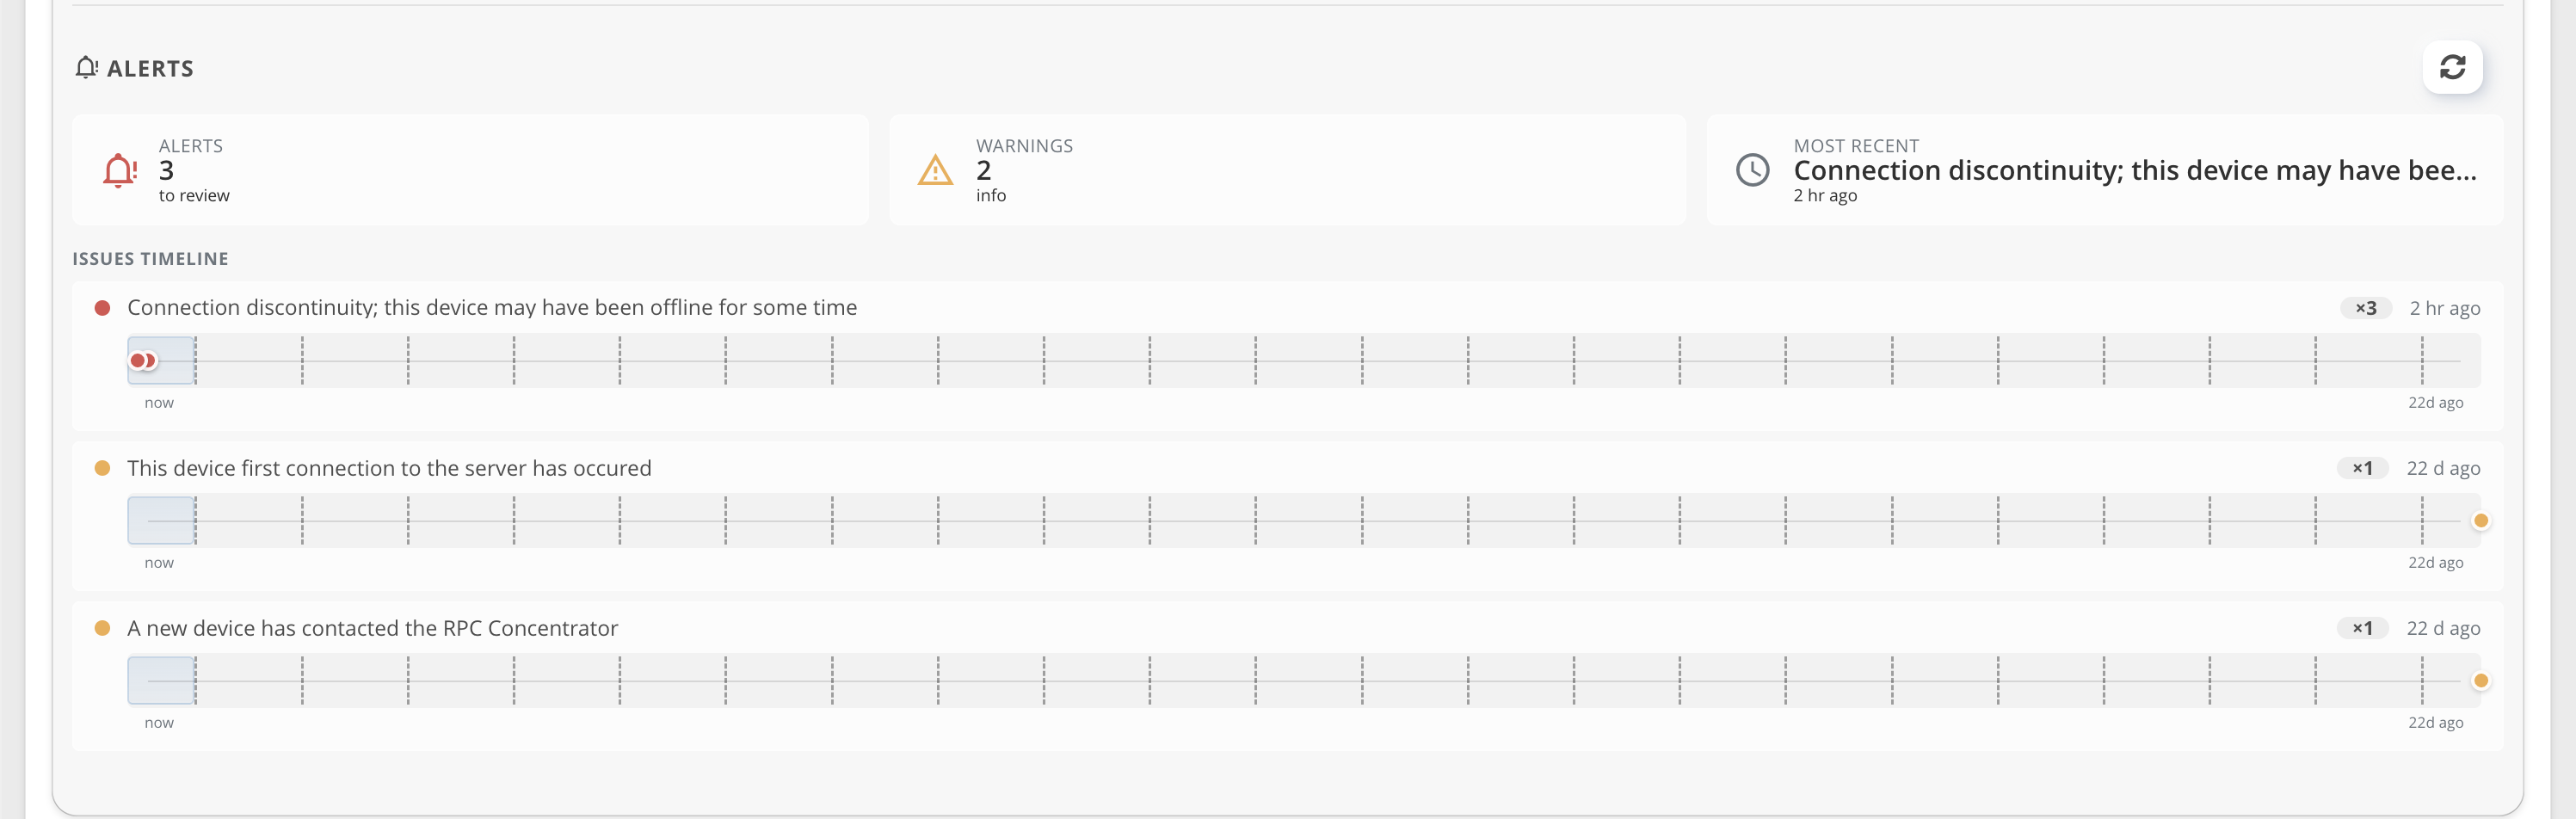
The Alerts section gives you a timeline overview of the latest alerts. It's mainly useful for understanding how often a device is losing its internet connection.
A lot of connection discontinuity dots here is an early sign of a likely issue with the device's LAN configuration: the internet signal may be weak, or the connection may be faulty for some reason that needs further investigation.
🗃️ Tab: Actions
From the action bar, click an action to schedule it on the device.

📍 RPC vs RTC actions
How an action behaves depends on which connection it uses:
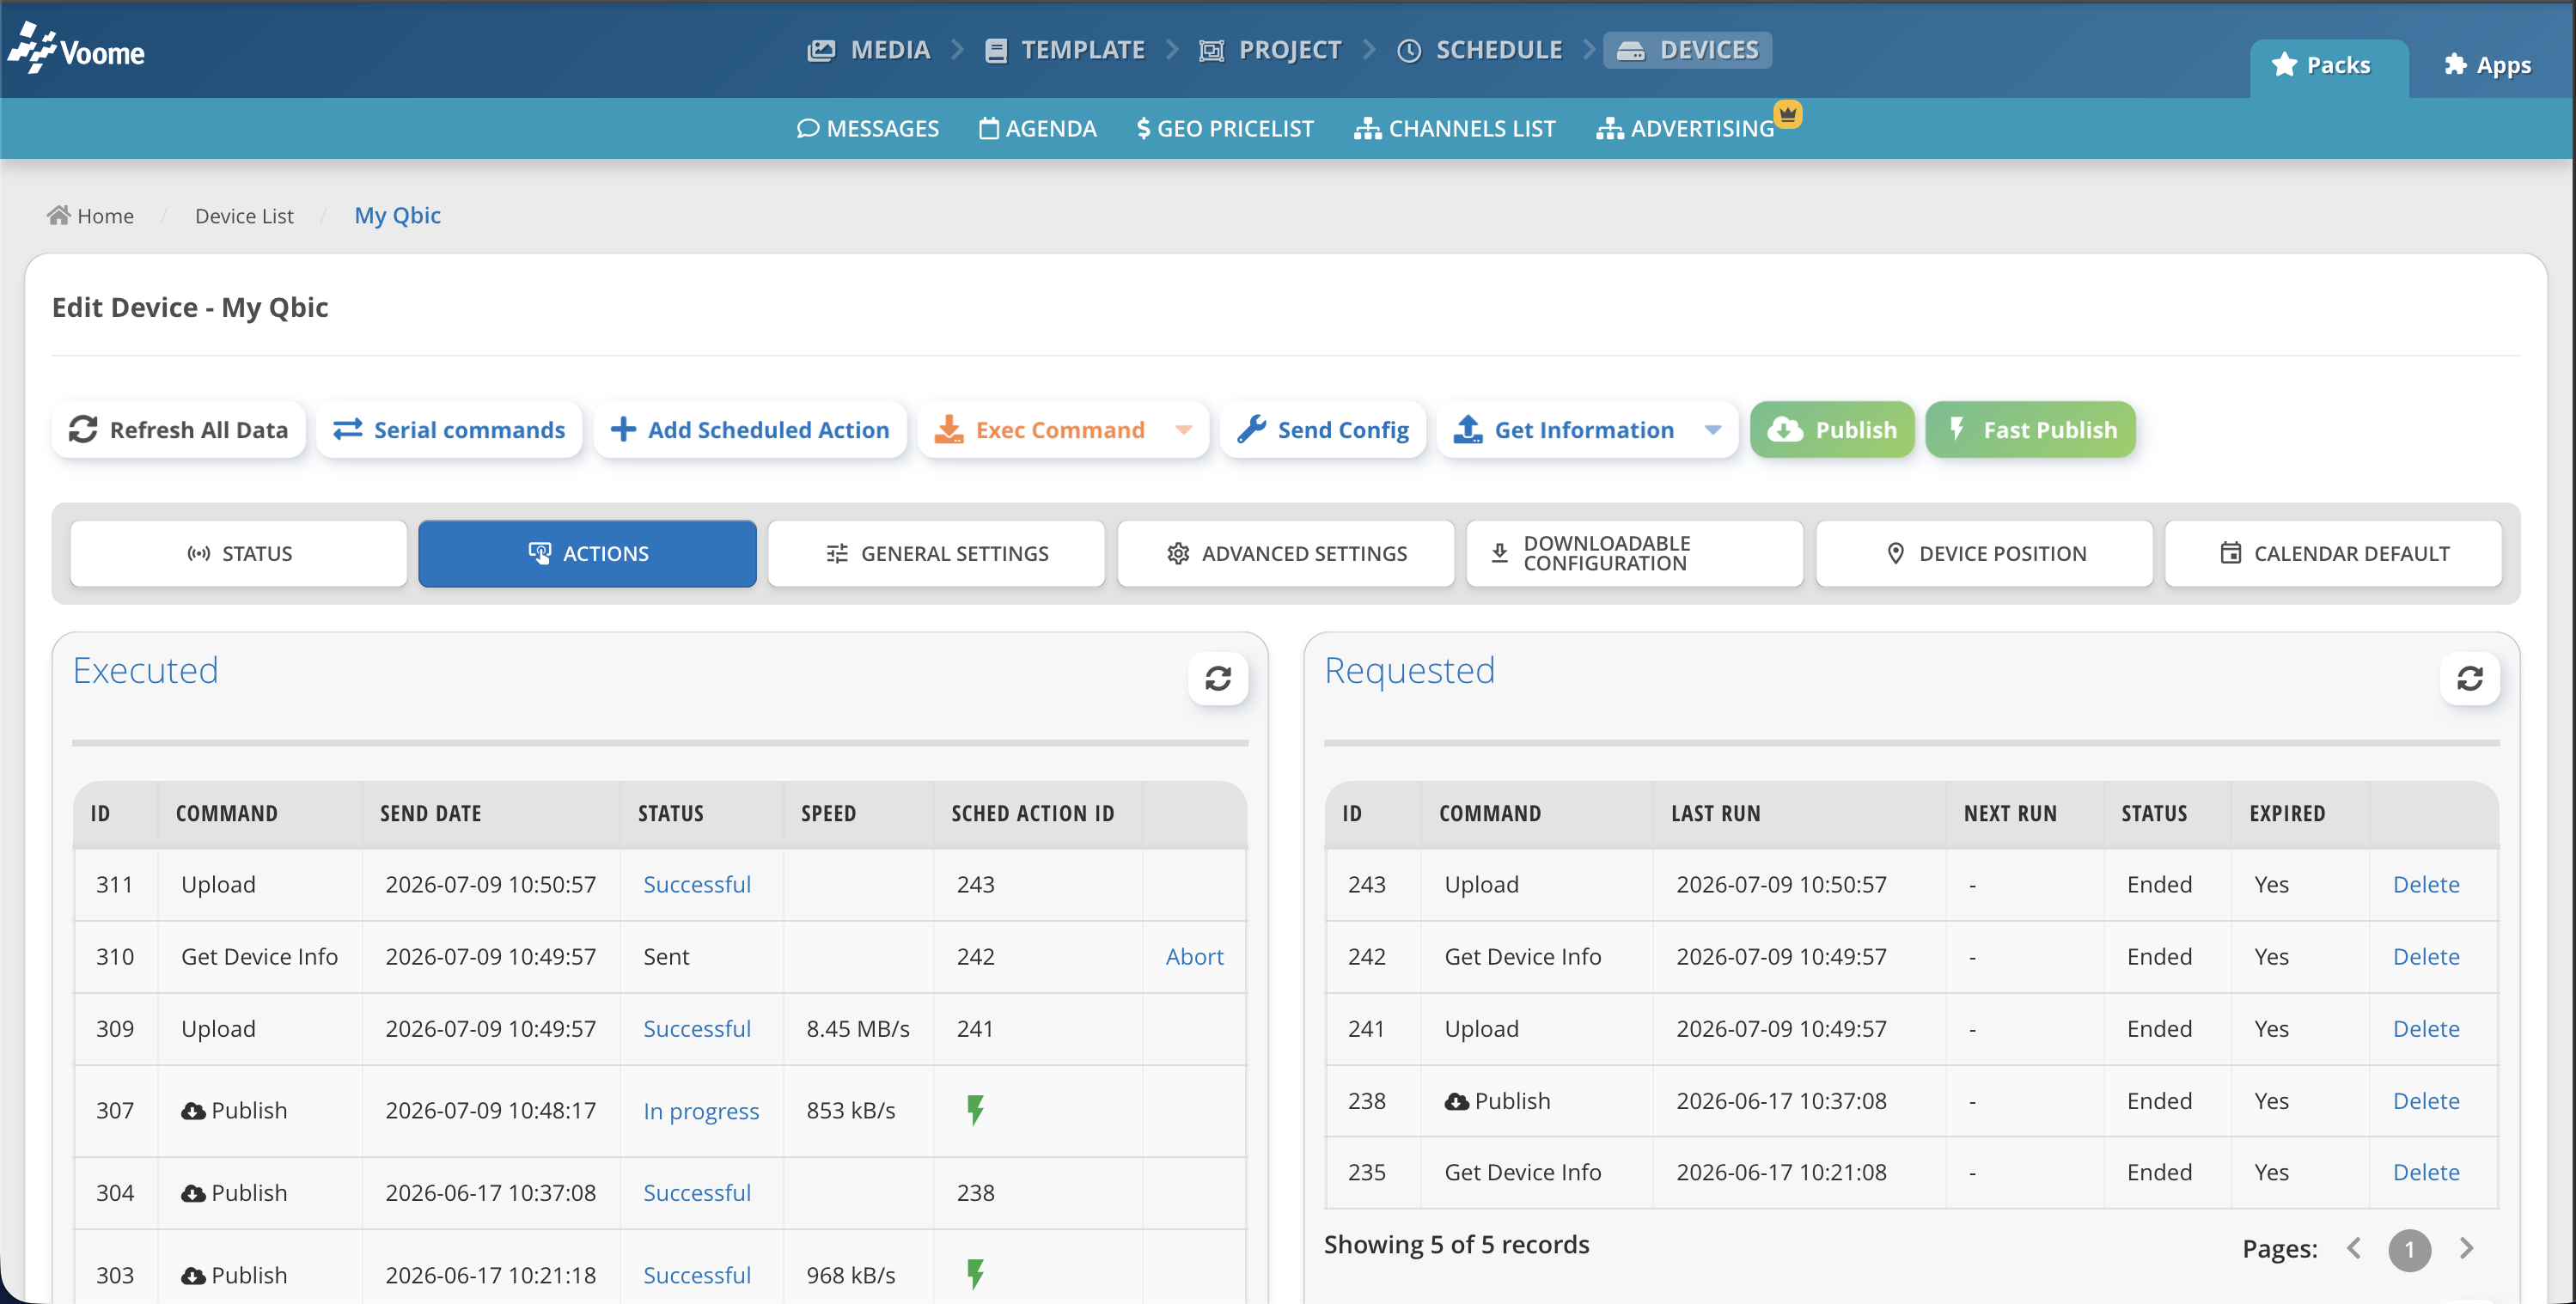
- RPC action (e.g. publish, get screenshot):
- The action is added to the
Requestedsection. - After about one minute, it moves to the
Executedsection. - Click refresh to check its state.
- The action is added to the
- RTC action (e.g. fast publish):
- The action is placed in the
Executedsection immediately.
- The action is placed in the
📍 Recurrent Action
Once you set an action with the Add scheduled action button and it runs for the first time, it appears under the Recurrent section.
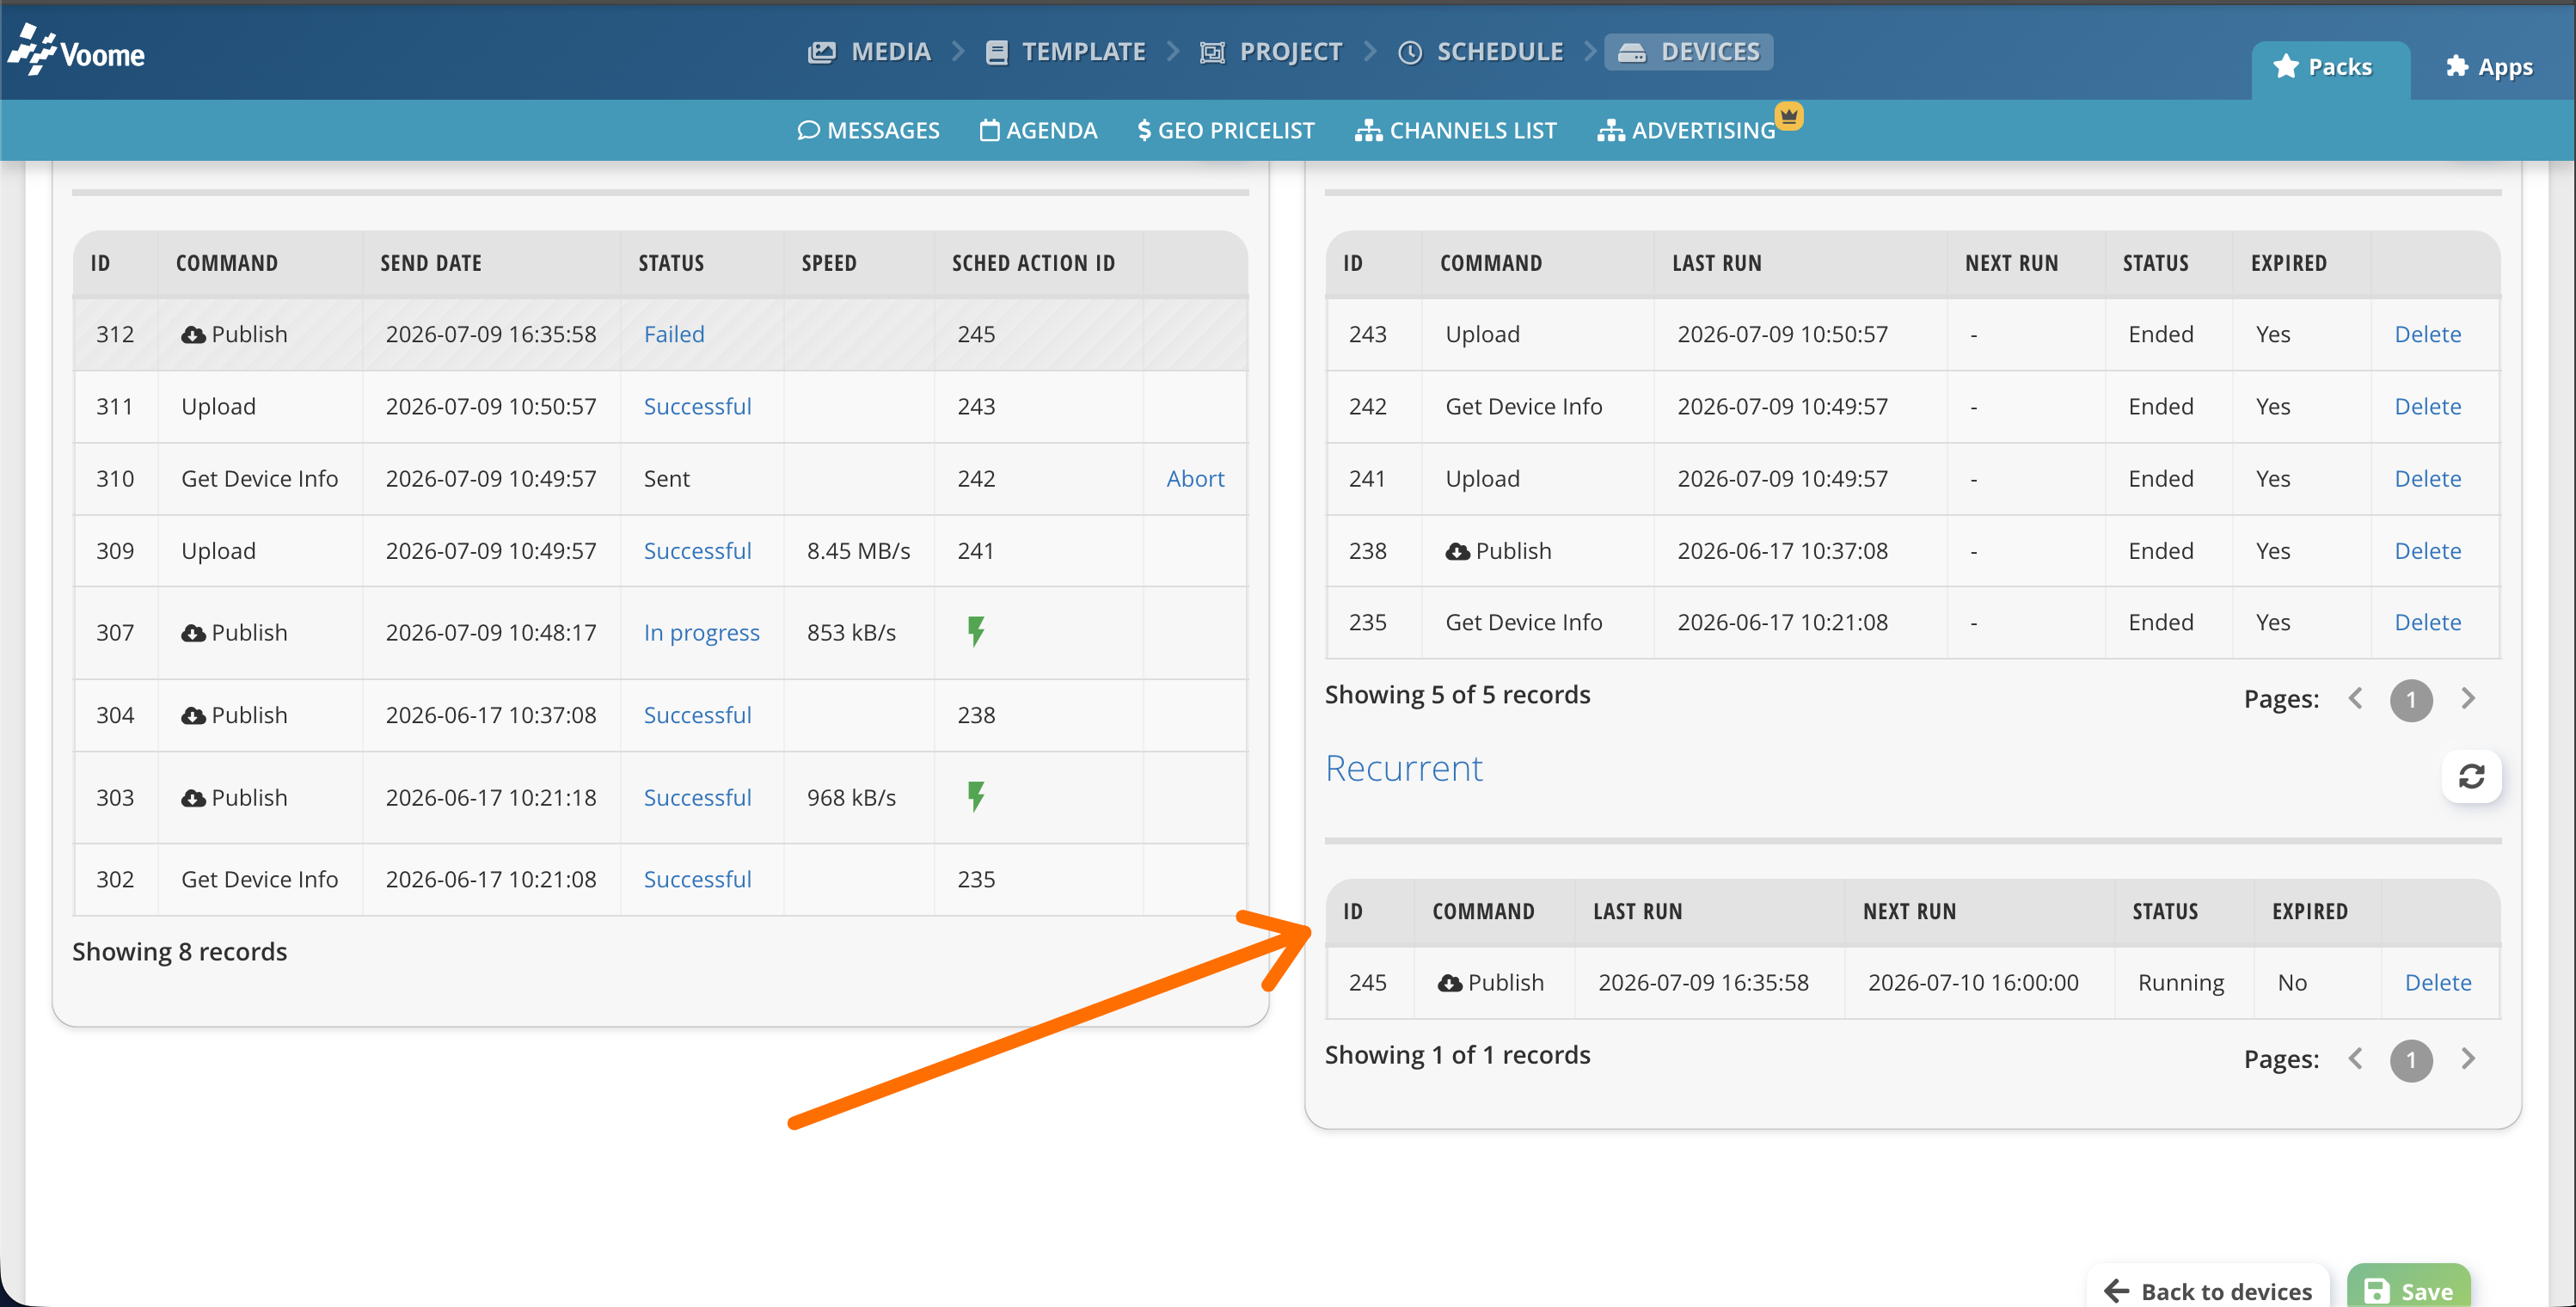
By default, on first installation Voome sets up a recurring publish action that runs once a day (you'll find it in this section). This is useful if you'd rather not click the publish button manually: it avoids calendar default issues and periodically refreshes the content scheduled on the player.
🗃️ Tab: General Settings
Some of the fields here are populated automatically when the device is activated.
🎯 Useful actions in this tab:
- Change the
nameto update the player/monitor name. - Enter comma-separated values in
tags(e.g. horizontal) to find the monitor/player quickly during scheduling. - Change the CMS-perceived
ipv4 address(required for some special applications). - Change the player/monitor
password(required for some special applications).
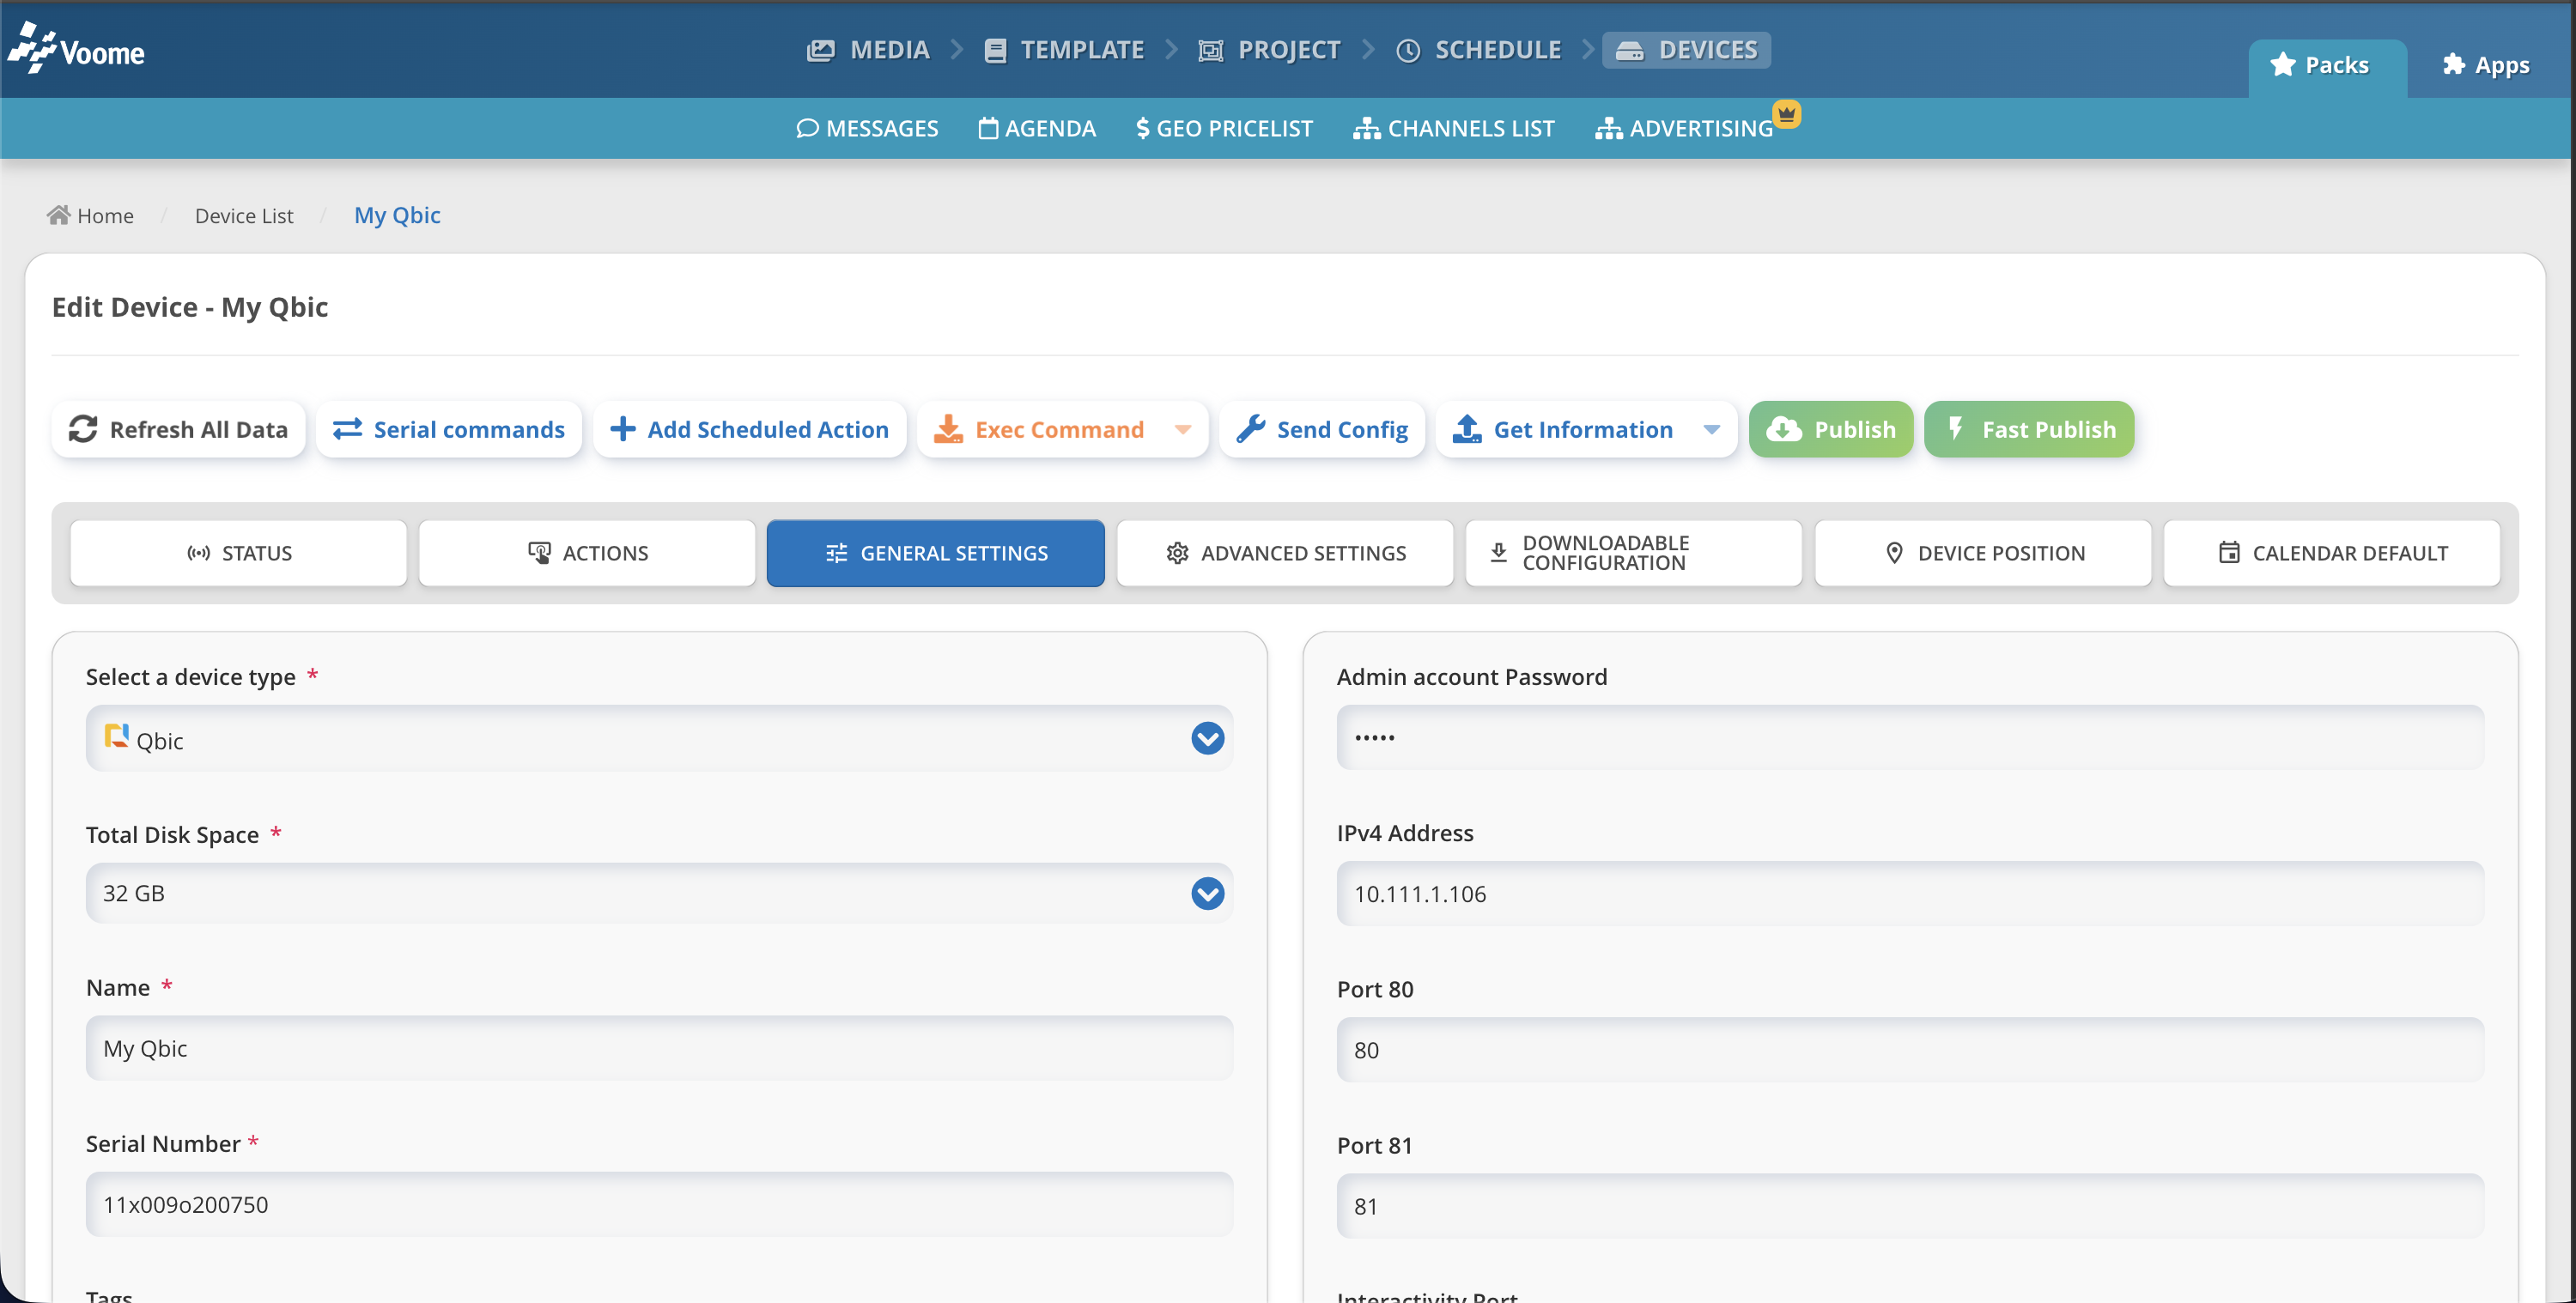
This is an advanced section. If you feel you need to edit it, please contact support.
🗃️ Tab: Advanced Settings
🎯 Useful actions in this tab:
- Set up the Spinetix Multiscreen configuration.
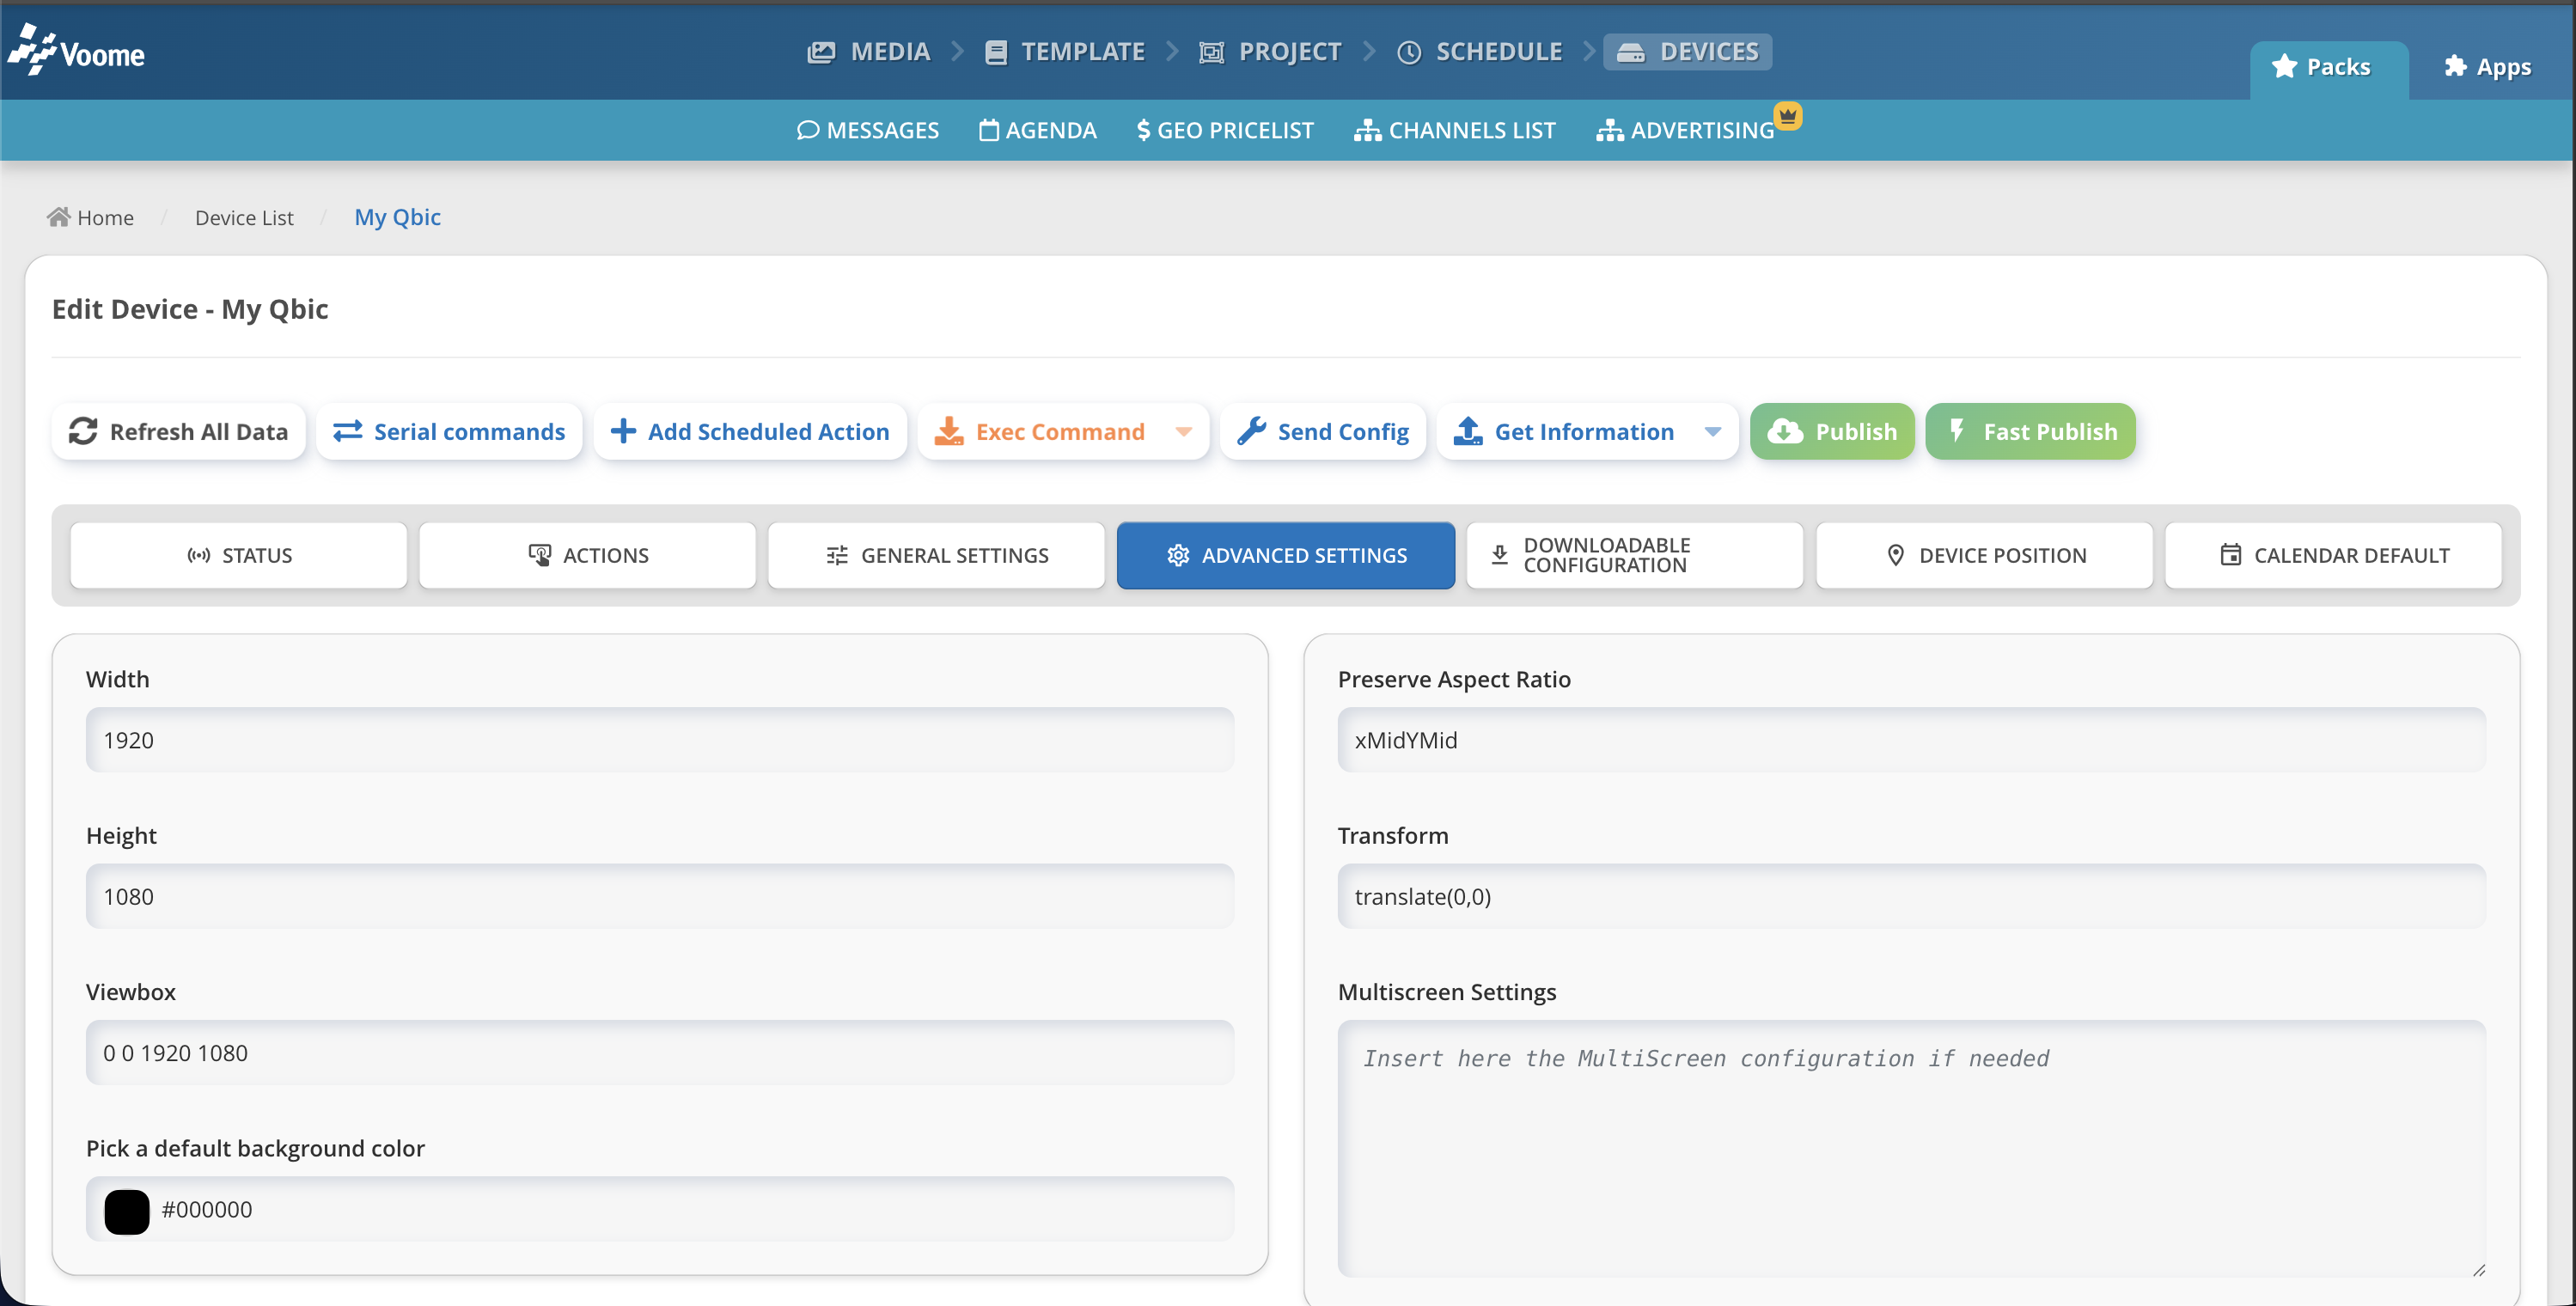
This is an advanced section. If you feel you need to edit it, please contact support.
🗃️ Tab: Downloadable Configuration
🎯 Useful actions in this tab:
- Enable room booking mode on outdoor panels so the device downloads the configuration. You need to publish afterwards to apply the config to the player/monitor.
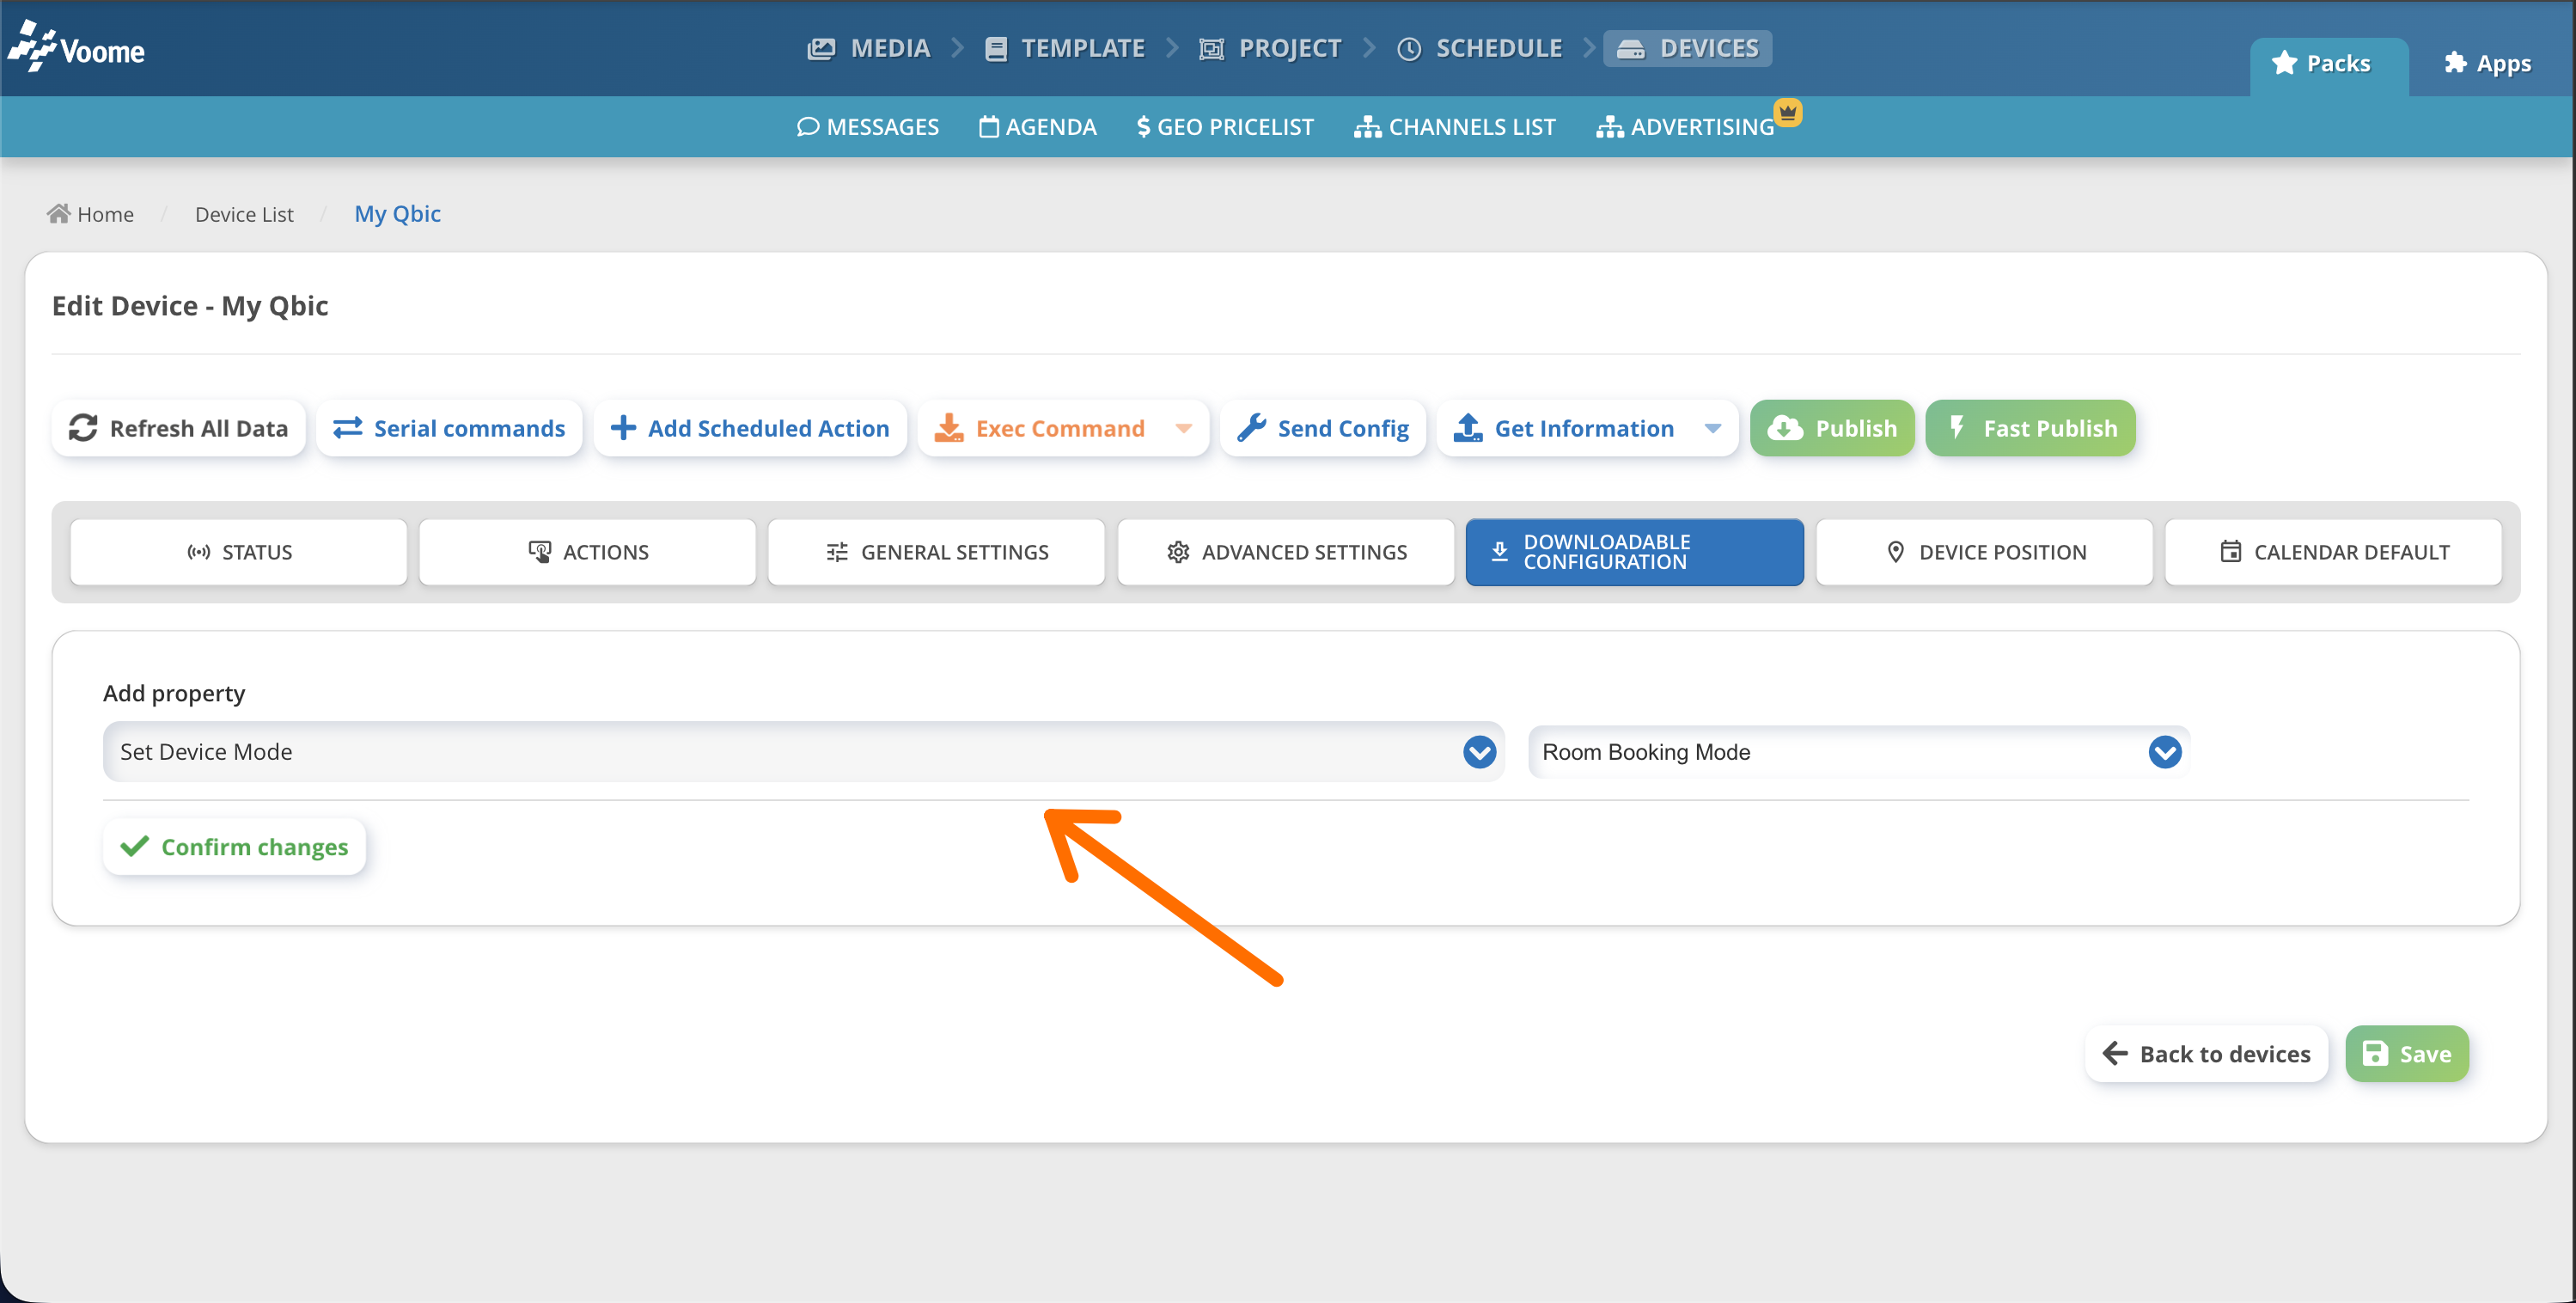
This is an advanced section. If you feel you need to edit it, please contact support.
🗃️ Tab: Device Position
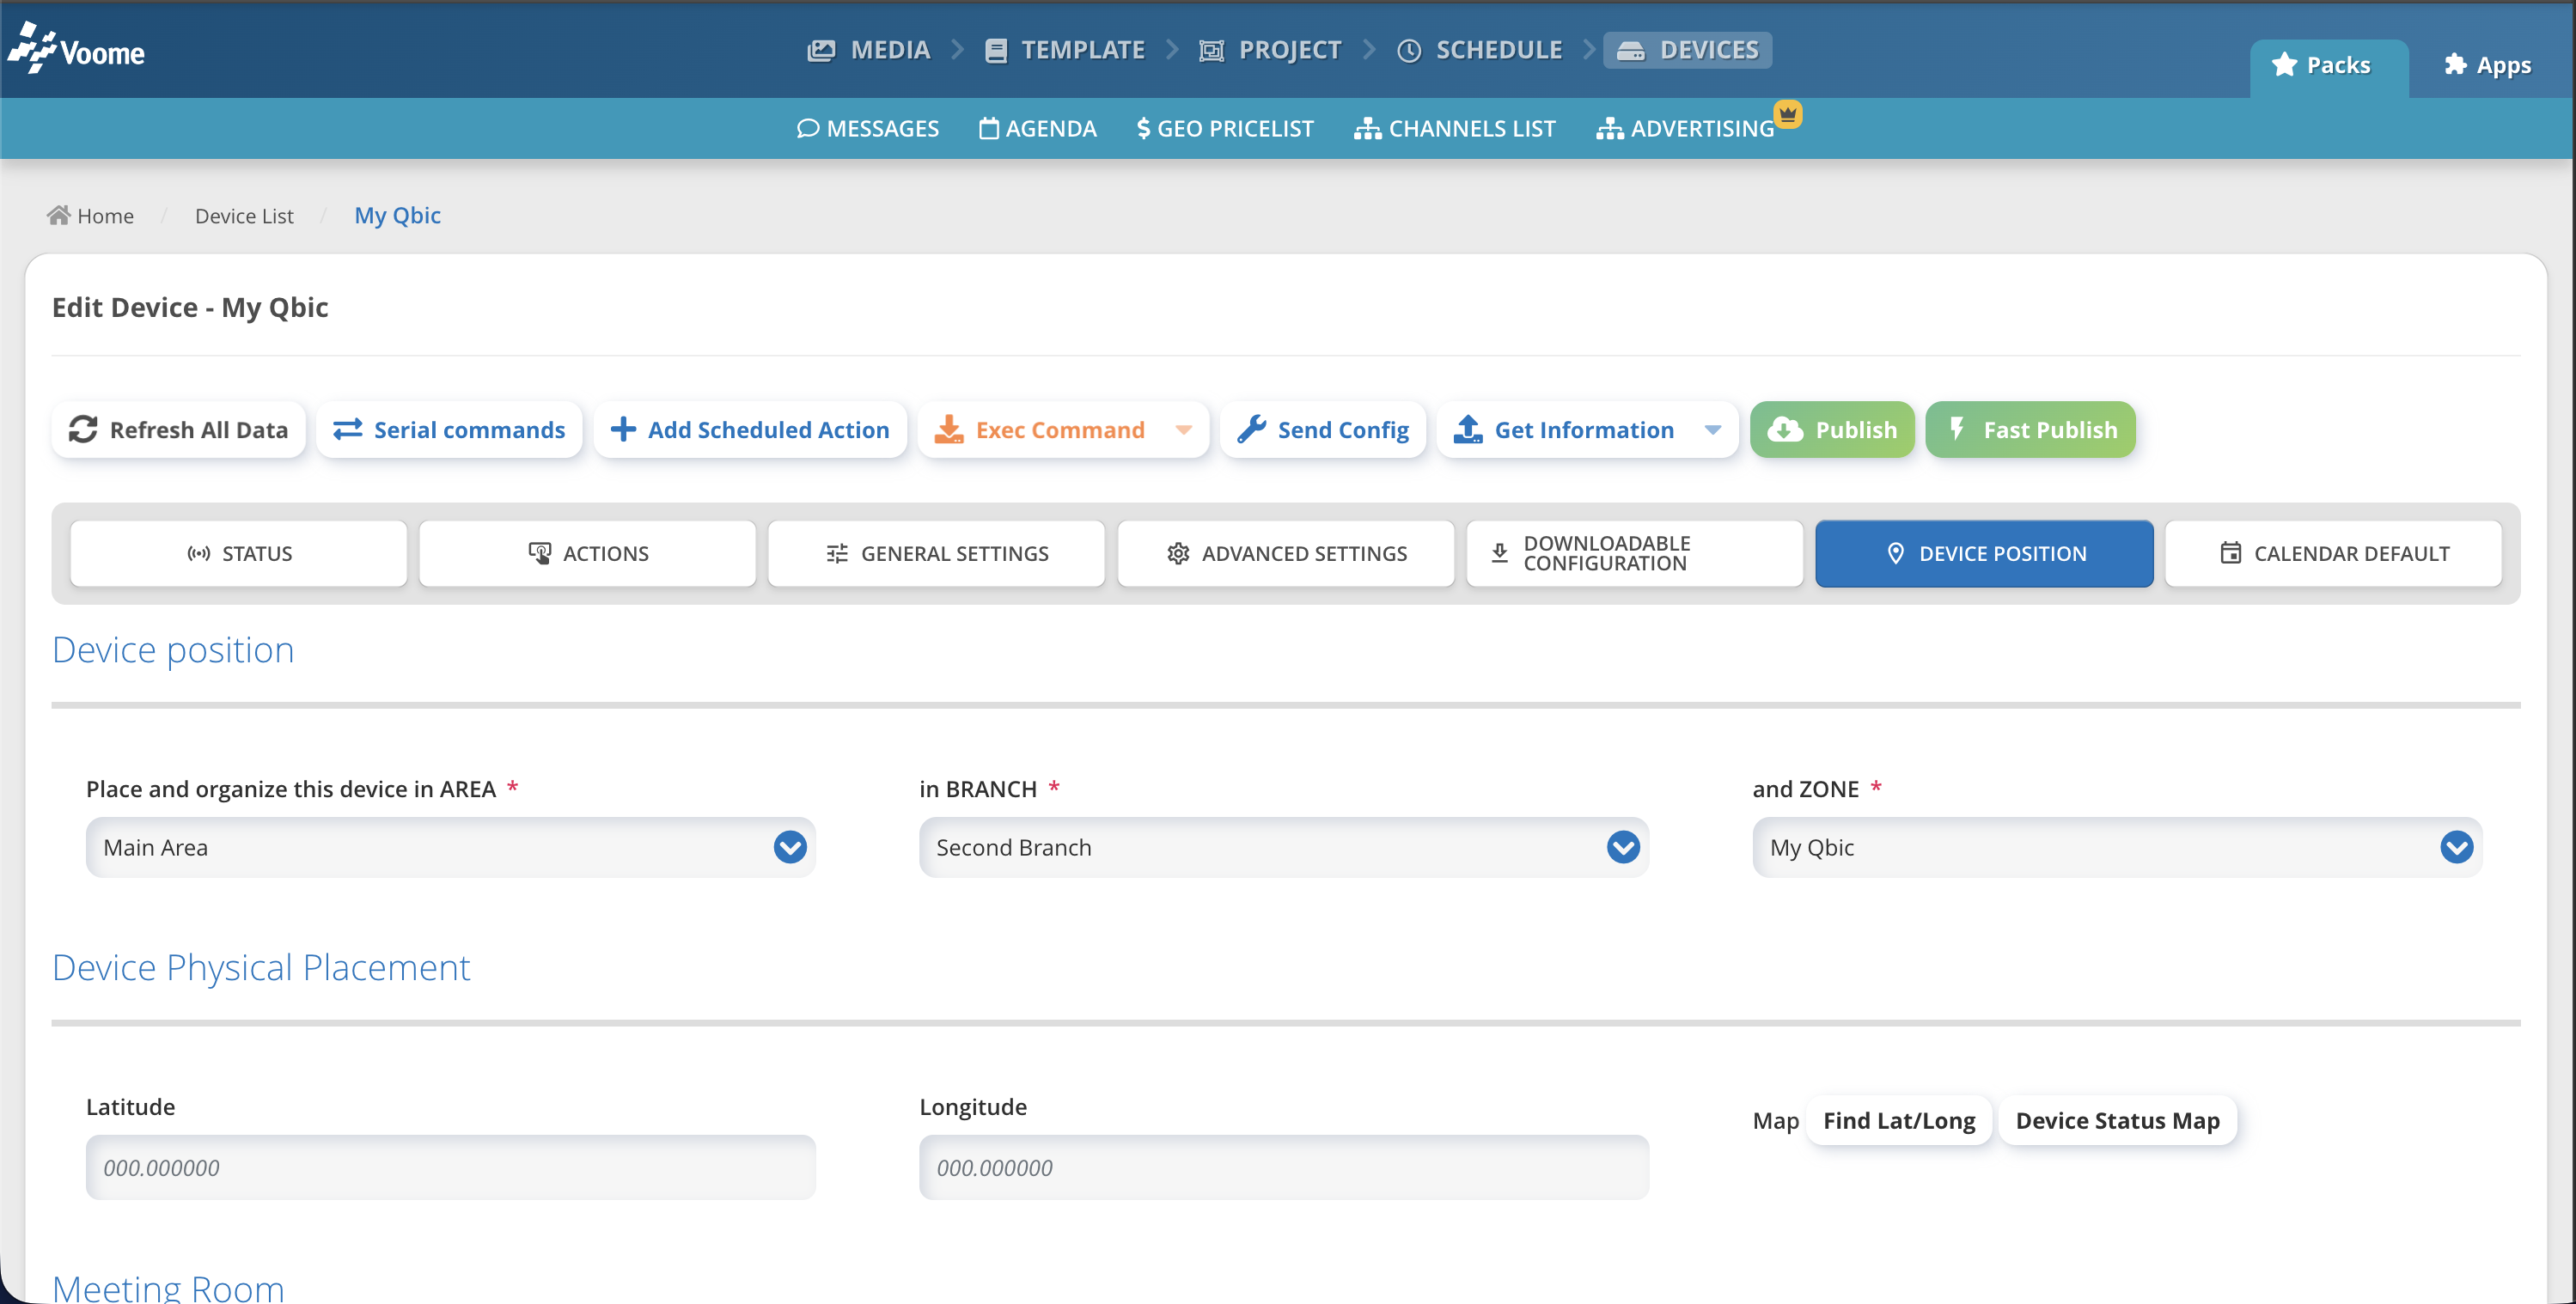
🎯 Useful actions in this tab:
- 📍 Change the
Device Locationwithin the network Area/Branch/Zone. - 📍 Enter the
Device Coordinates(latitude and longitude) to show the device's position on the homepage map. - 📍 Meeting Room (booking): once a device is associated during the booking resource process, it also appears here for reference.
- 📍 Set a point of interest relationship to build directions and wayfinding. Define how this device relates to other points of interest (e.g. from the current monitor, point of interest X is located to the north-east ↗️).
🗃️ Tab: Calendar Default
🎯 Useful actions in this tab:
Set what the device shows once its scheduled content has finished.
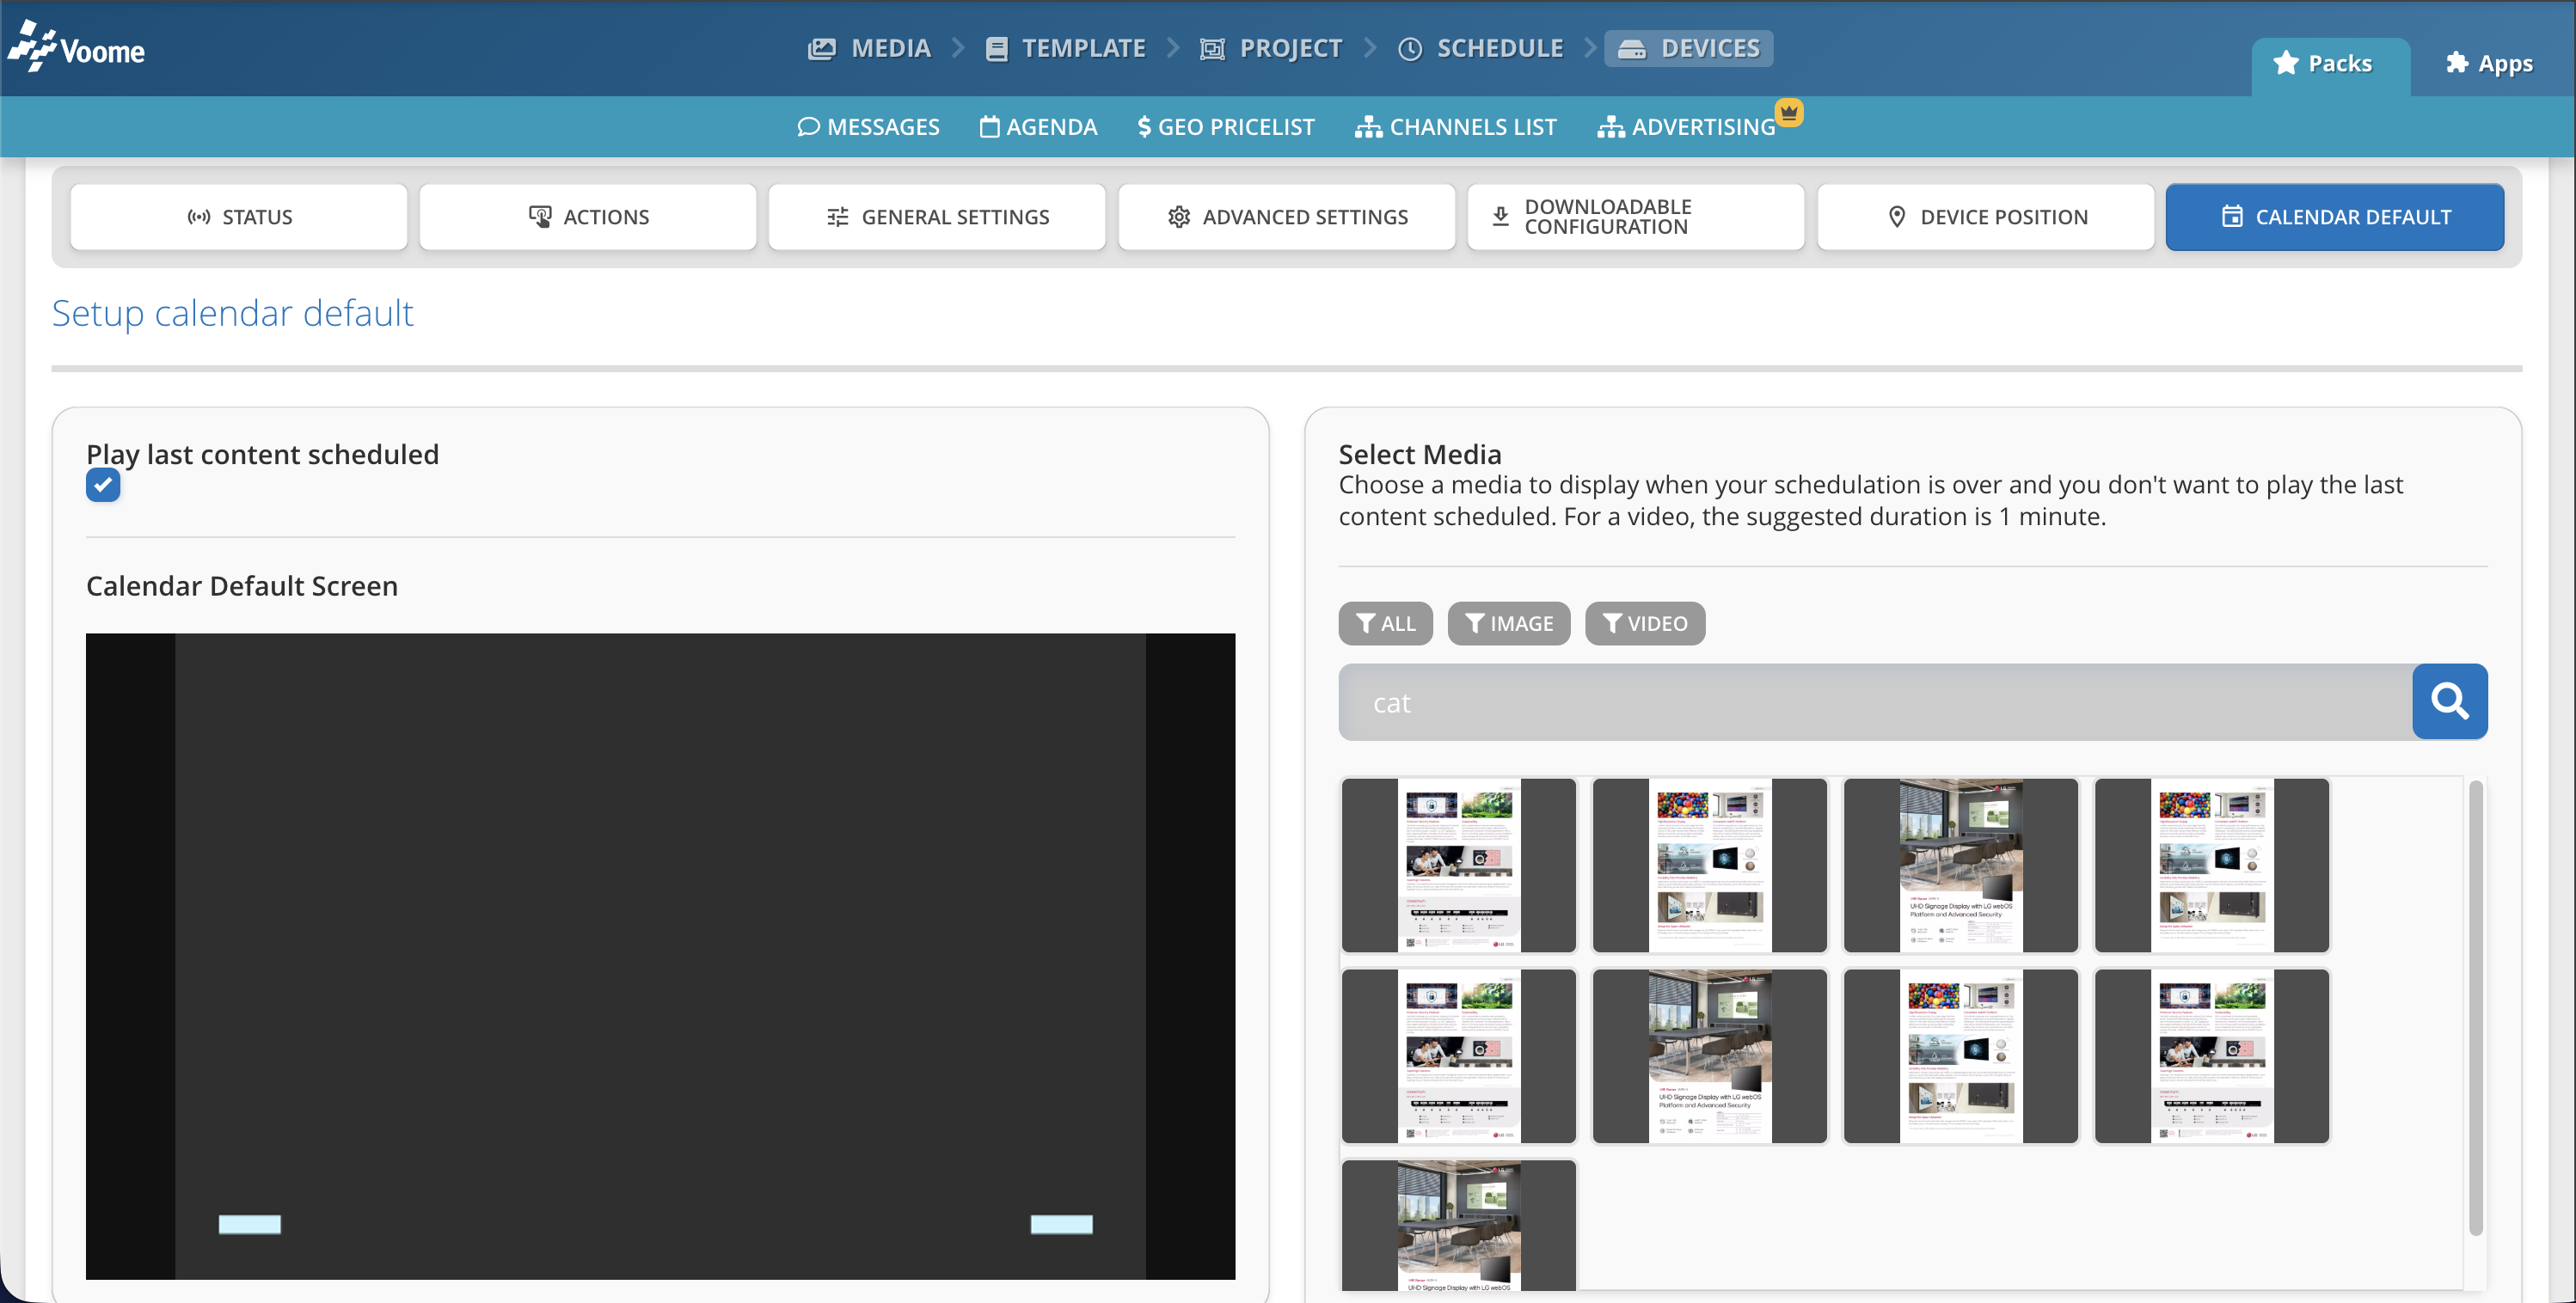
- Show a black screen.
- Select Media: show a specific media instead of a blank screen (e.g. your own logo).
- Play last scheduled content: when the scheduled content ends, only the most recent section keeps playing on the monitor.
-
In the example below, with this configuration only the
Wildlifeproject would be played.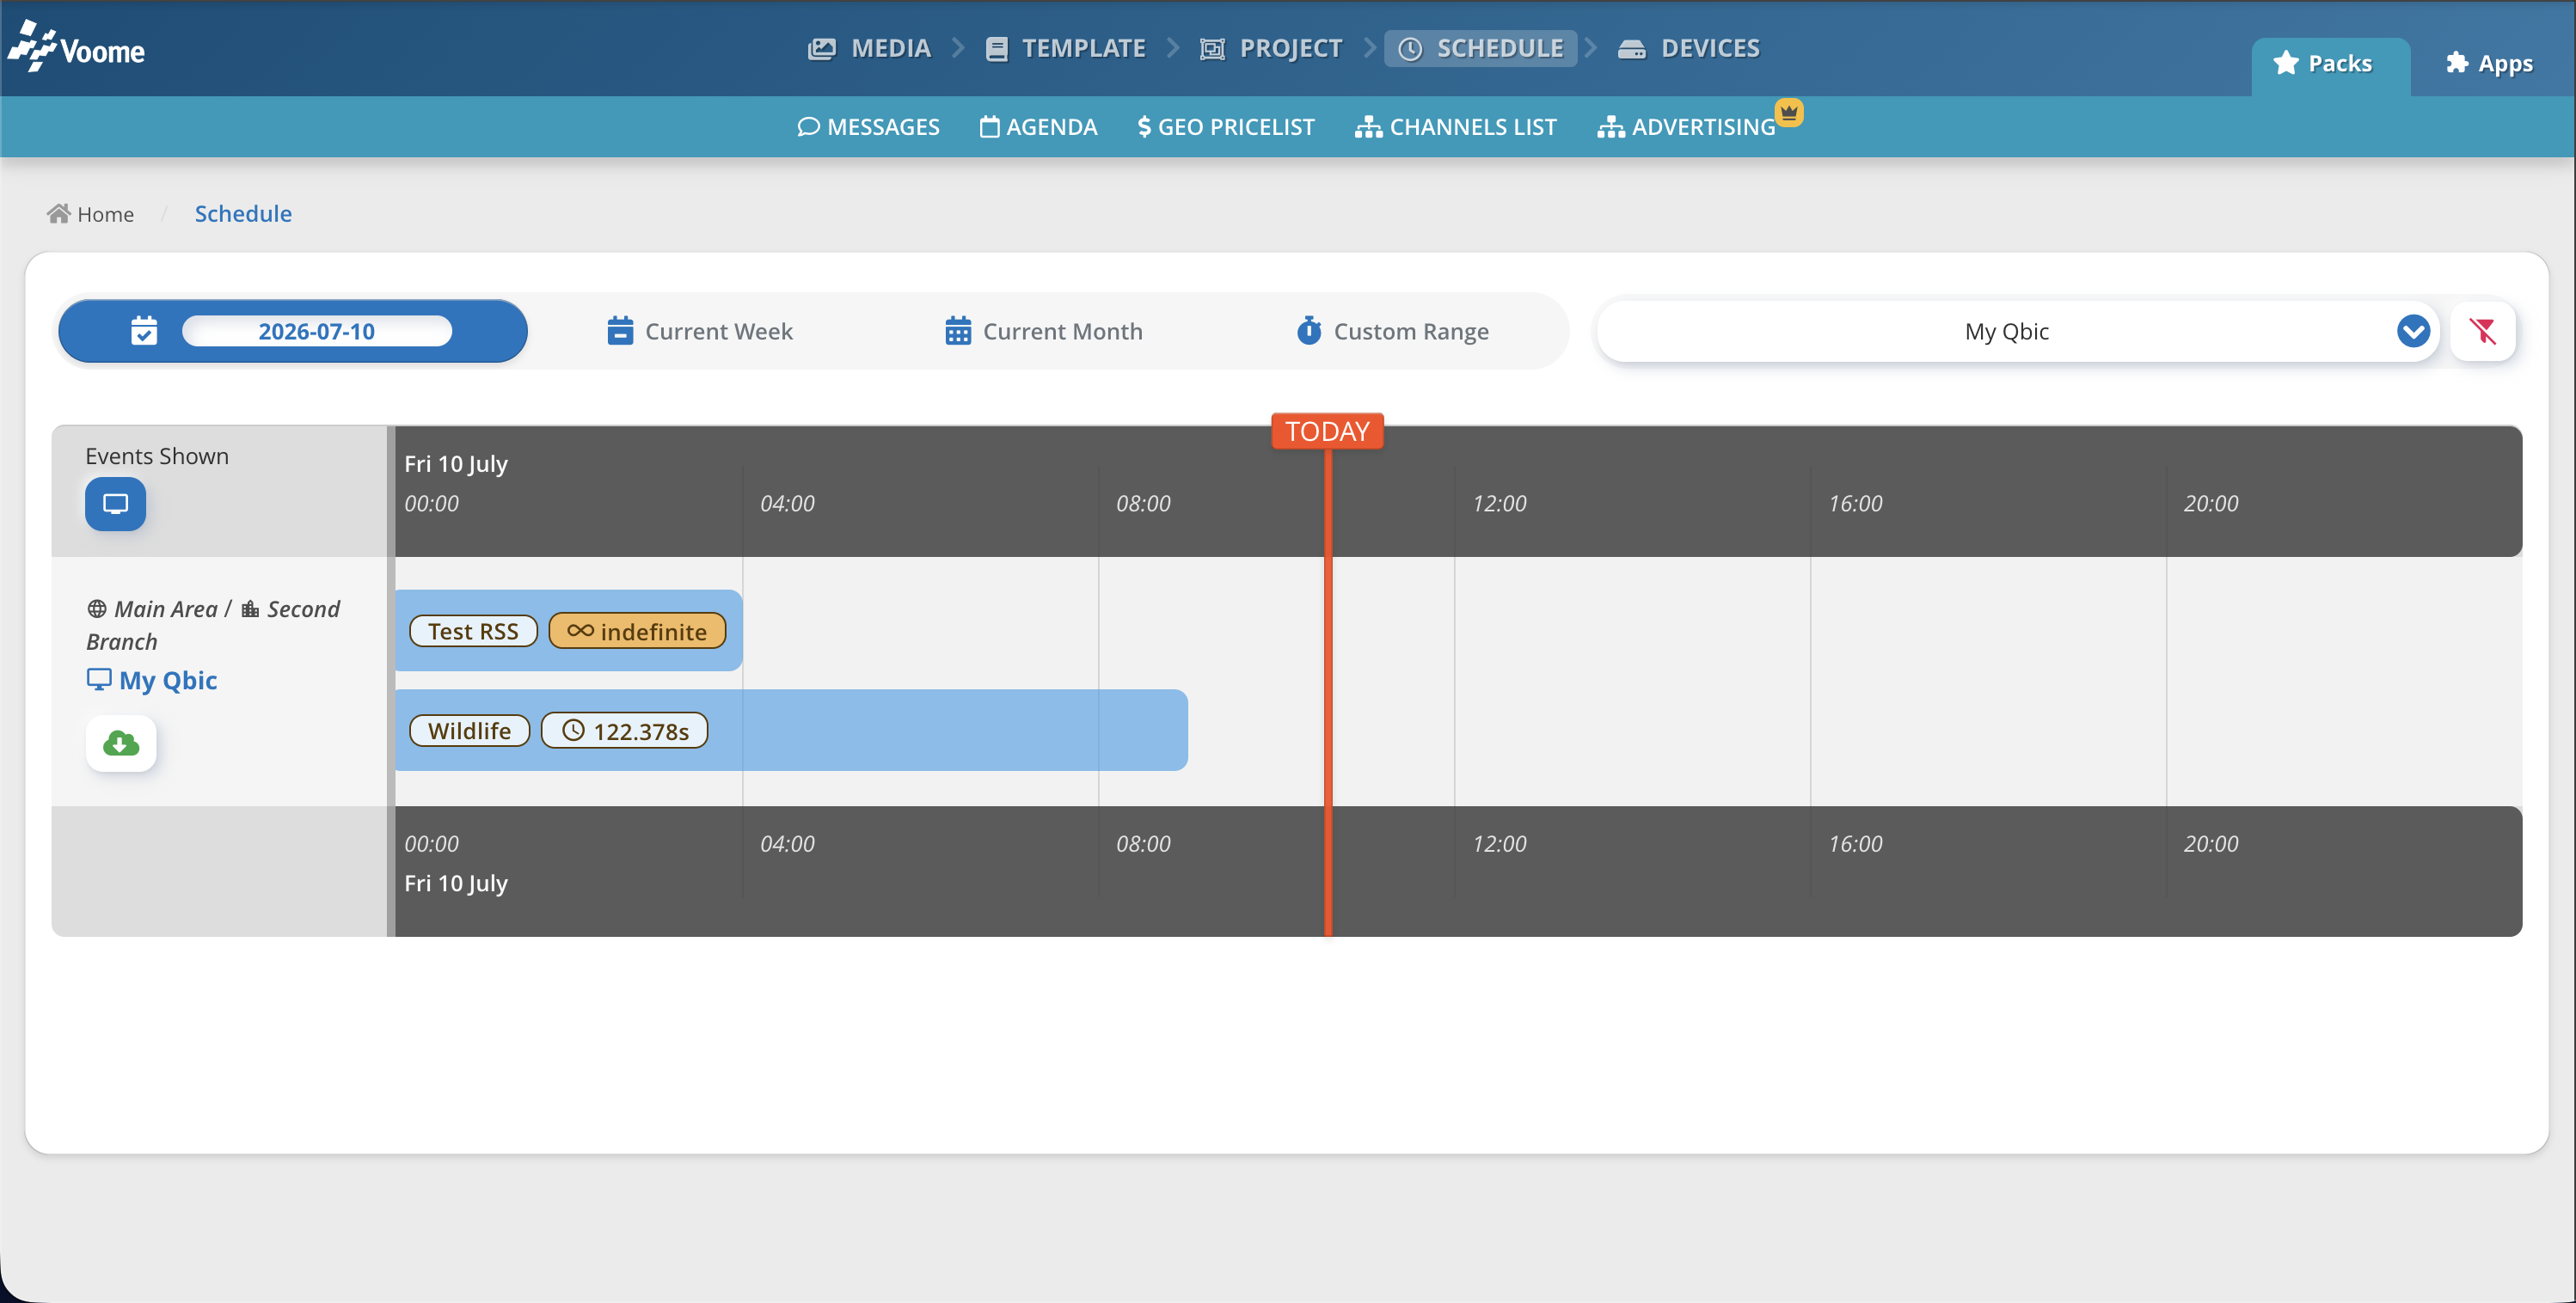
-
In the example below, with this configuration both the
Wildlifeproject and thePlaylistwould be played.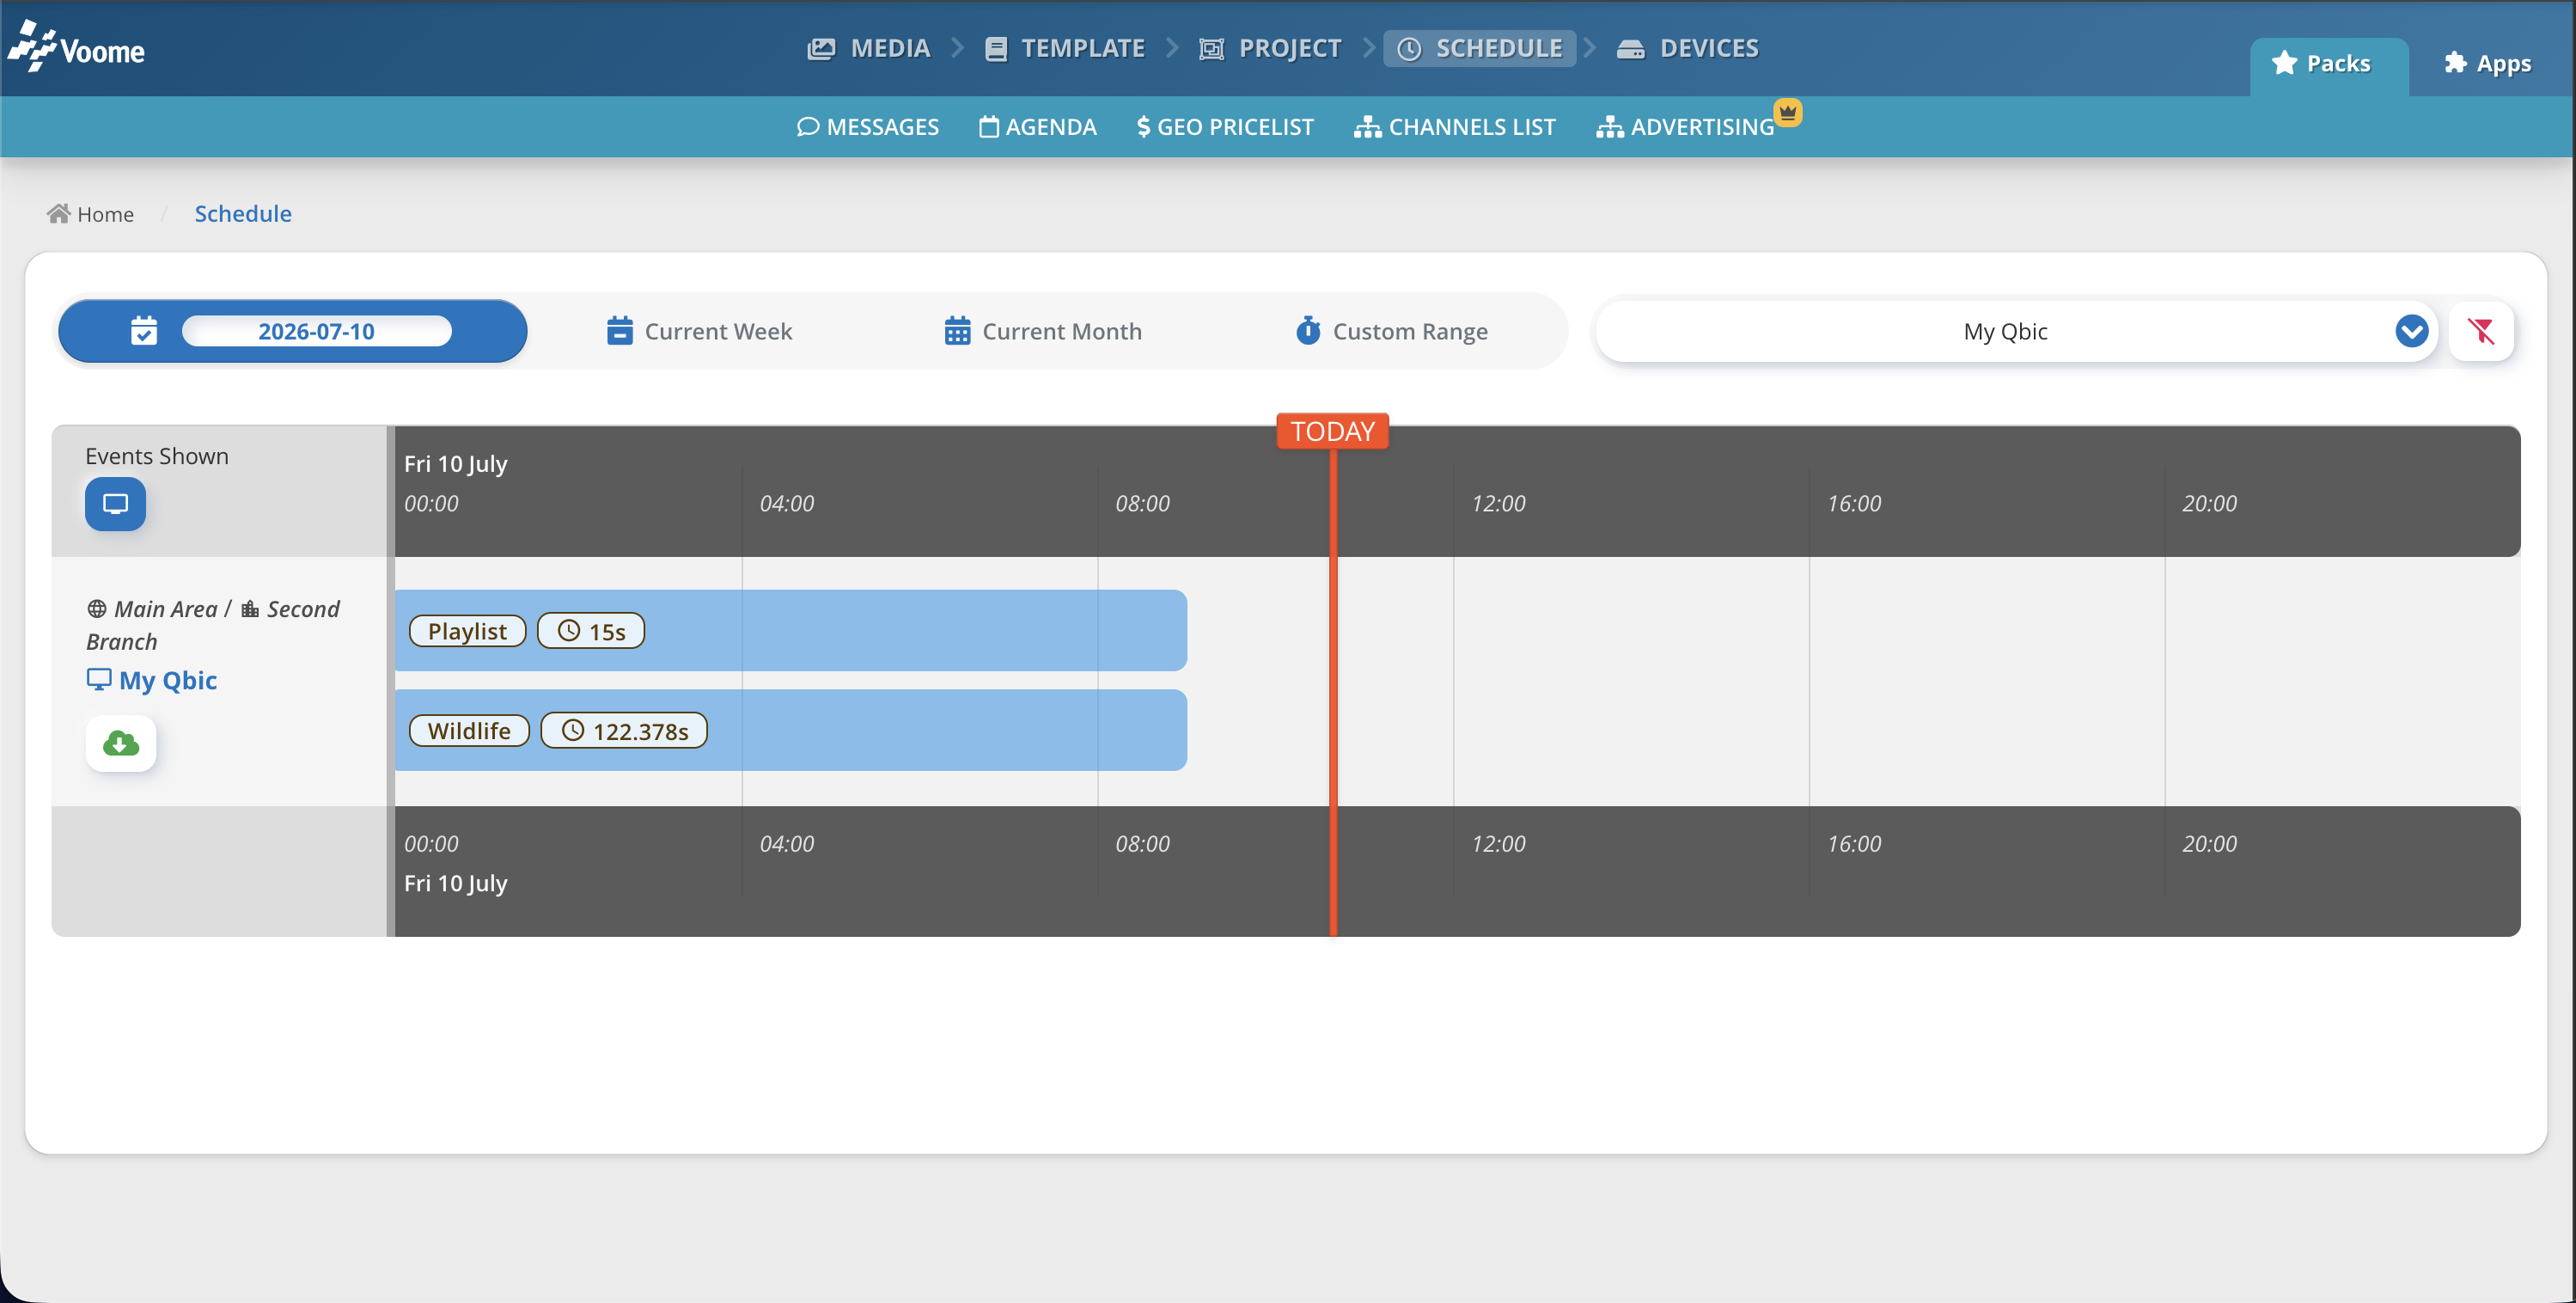
-