Projects
A project is where it all comes together: you take a template and fill its regions (zones) with your media, text, and other elements to create the content that will actually play.
You can start a project from a Template (see section Template) or by Creating a Blank Project.
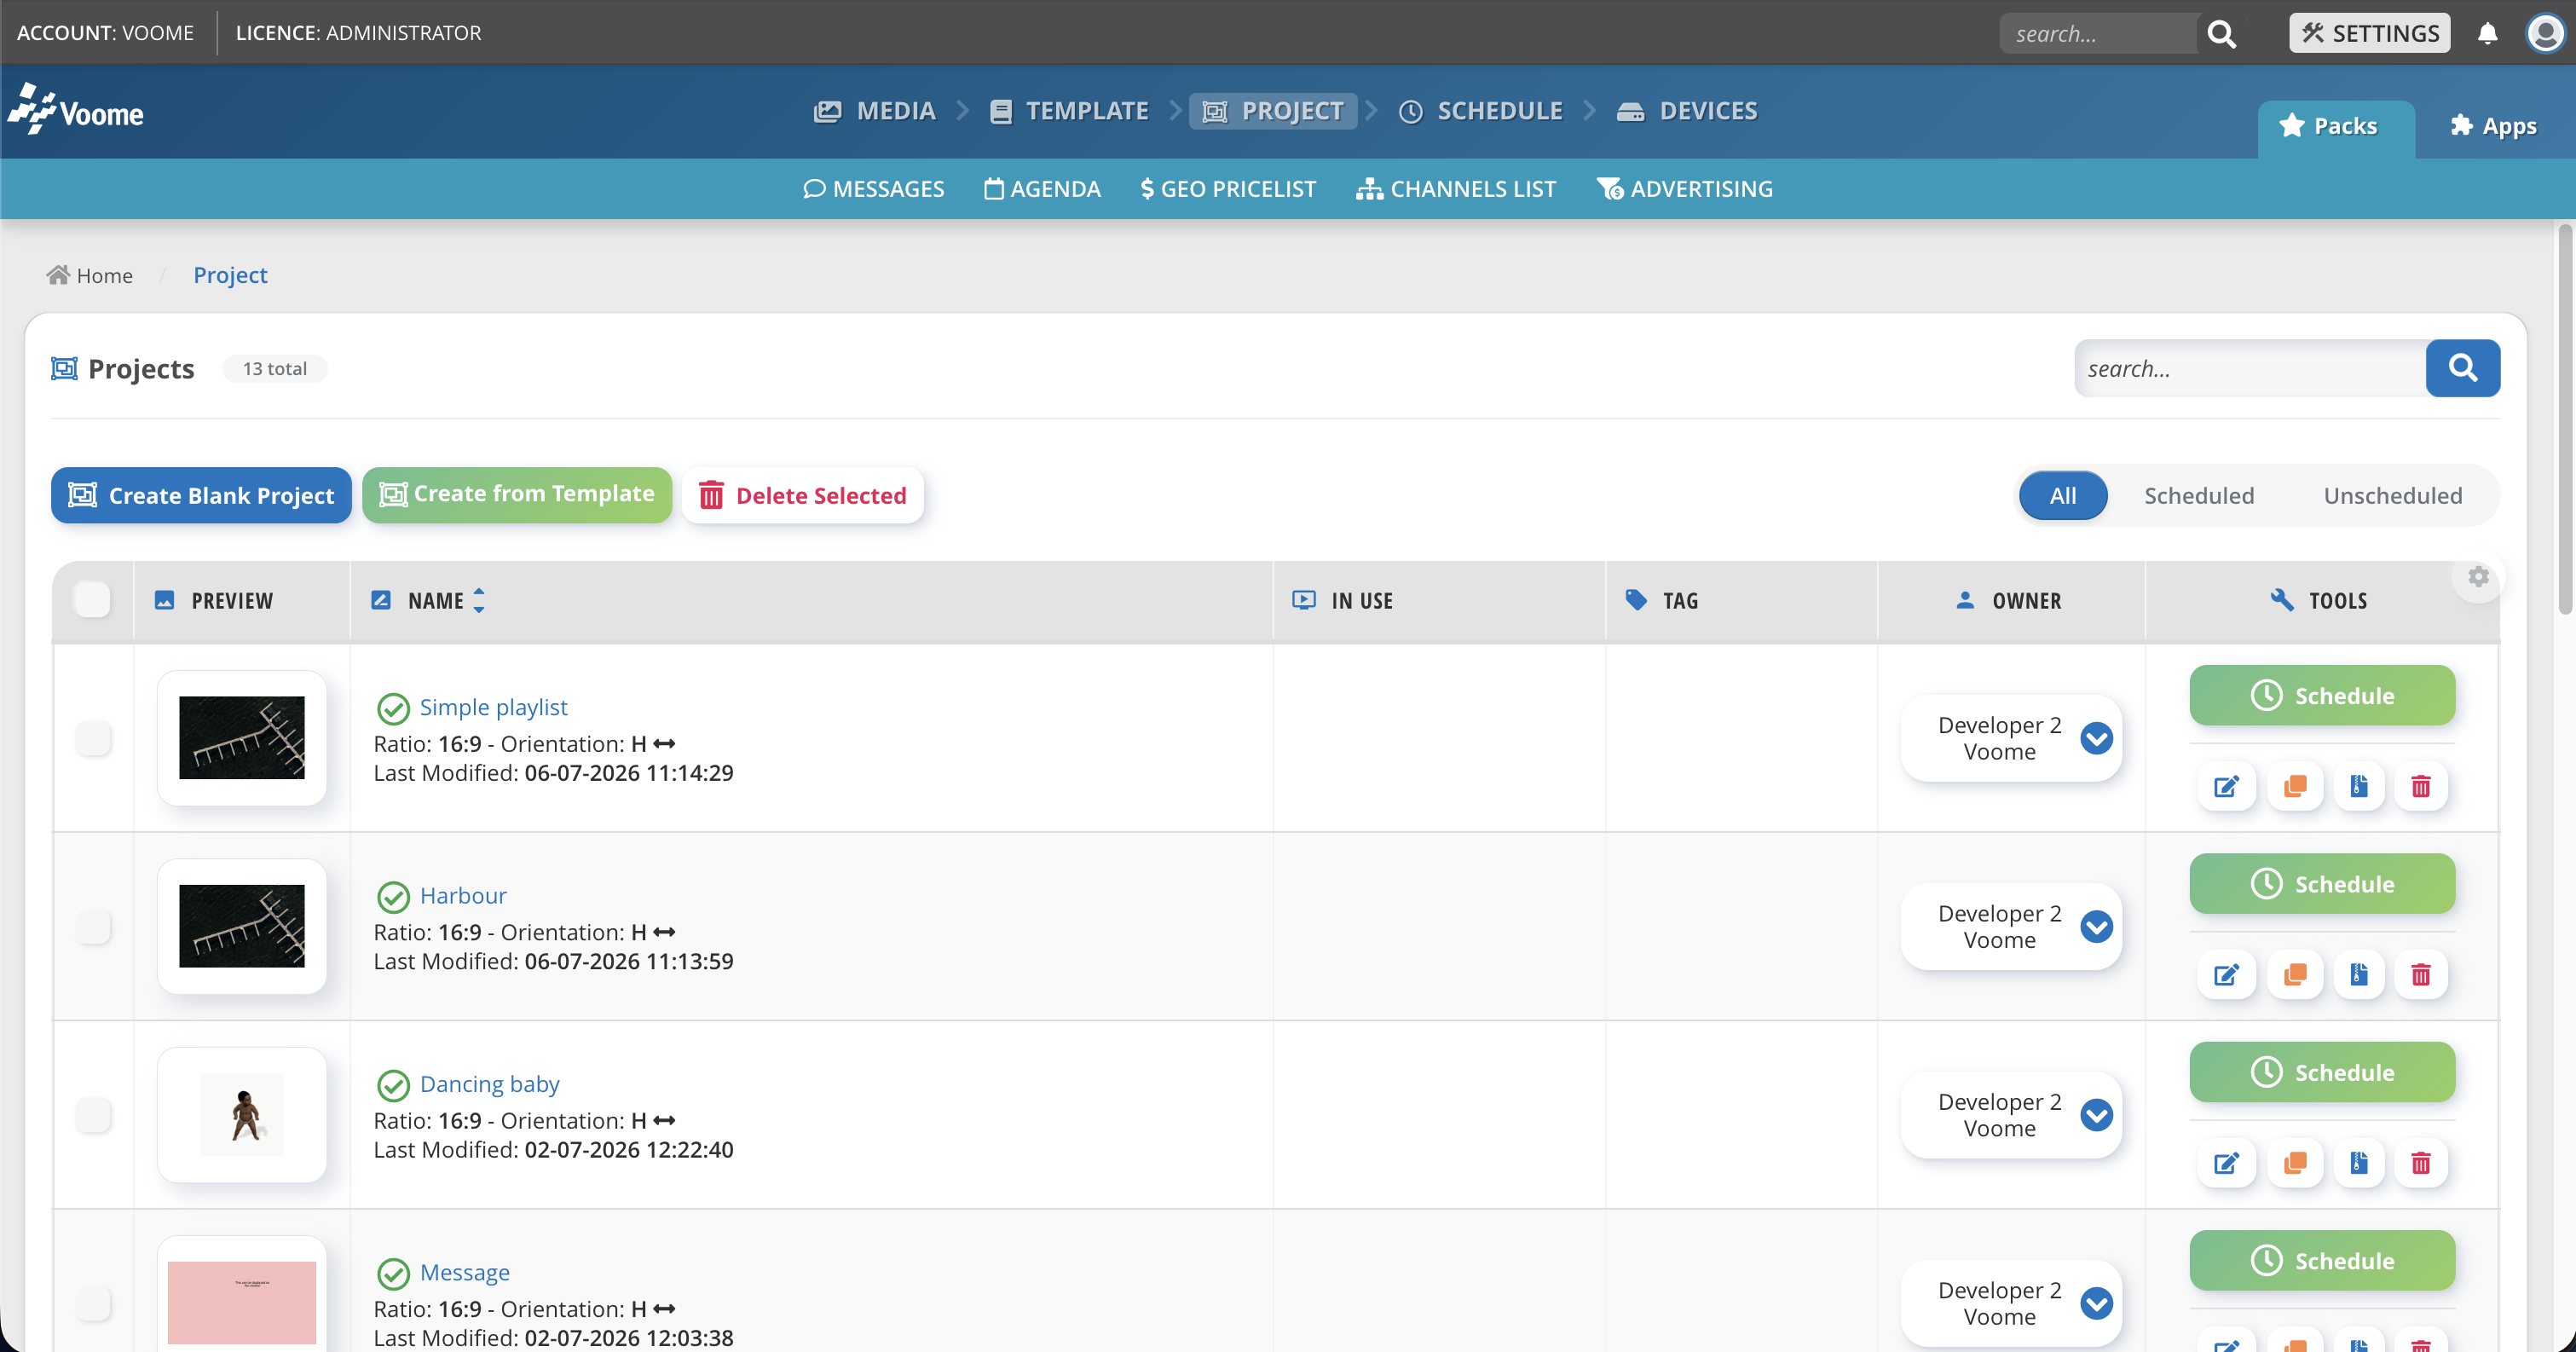
You can only see your own projects in the table list, along with projects associated with your group. To change the owner of a project, click on Owner and select the new owner. If you need to hand a project over to someone else in your account and cannot see them in the owner list, please contact your admin.
❓How to create a Blank Project
- Click Create Blank Project.
- Add and arrange elements: text, playlists, widgets, and more (see Layers for the full catalog).
- Preview the result, then save your project.
❓How to create a Project from a Template
- Click Create from Template (or go to Template Section) and select the template to base it on.
- The template becomes a new project, which also appears in the projects list.
- Add and arrange elements: text, playlists, widgets, and more (see Layers for the full catalog).
- Preview the result, then save your project.
The Project Editor
When you open a project (whether it was created from scratch or from a template) you are shown the project editor interface.
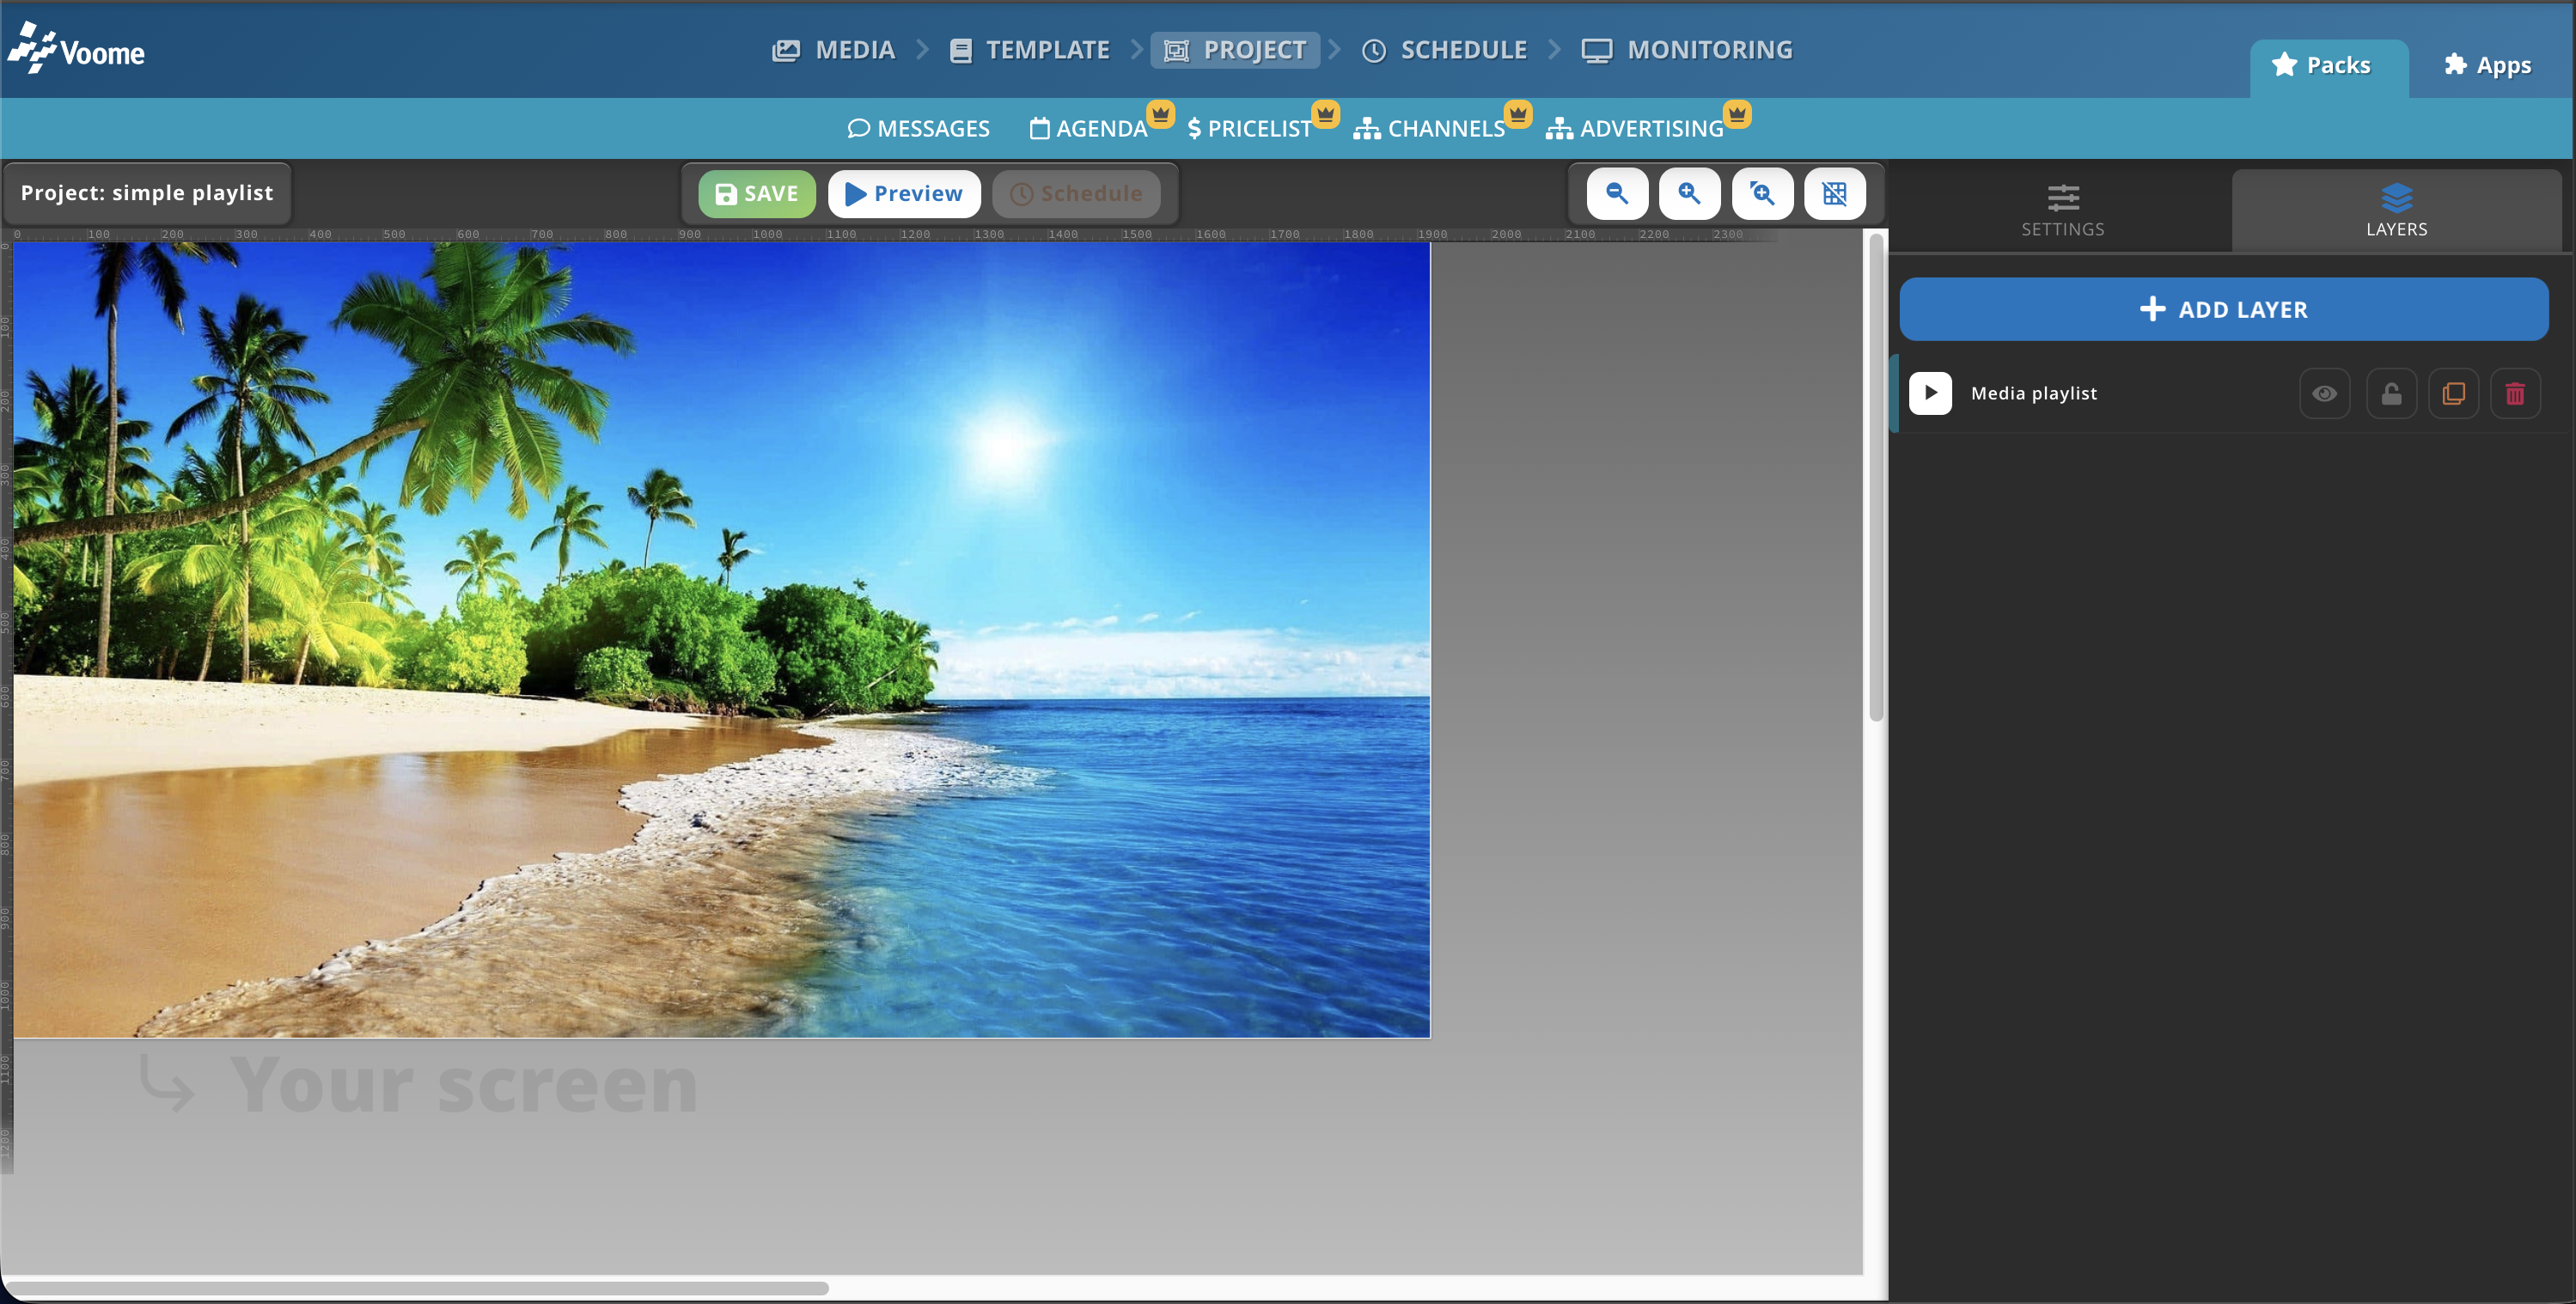
👈🏼 Left Section - Canvas
The left/center section, named CANVAS, represents the actual pixels that will be pushed to the monitors.
- At the top you can see the canvas toolbar:

- On the left you can find the name of the project that is currently open.
- In the center, use the toolbar to save the project once you are ready, preview it, and schedule it (only available after saving).
- On the right, find two zoom buttons and a center-zoom button that fits the canvas to your screen dimensions, and a Grid Button (click it multiple times to cycle through the various grid formats and to hide it from the canvas).
- Click a layer on the left to drag it across the screen and resize it (simply grab and pull the squares on each side of a layer).
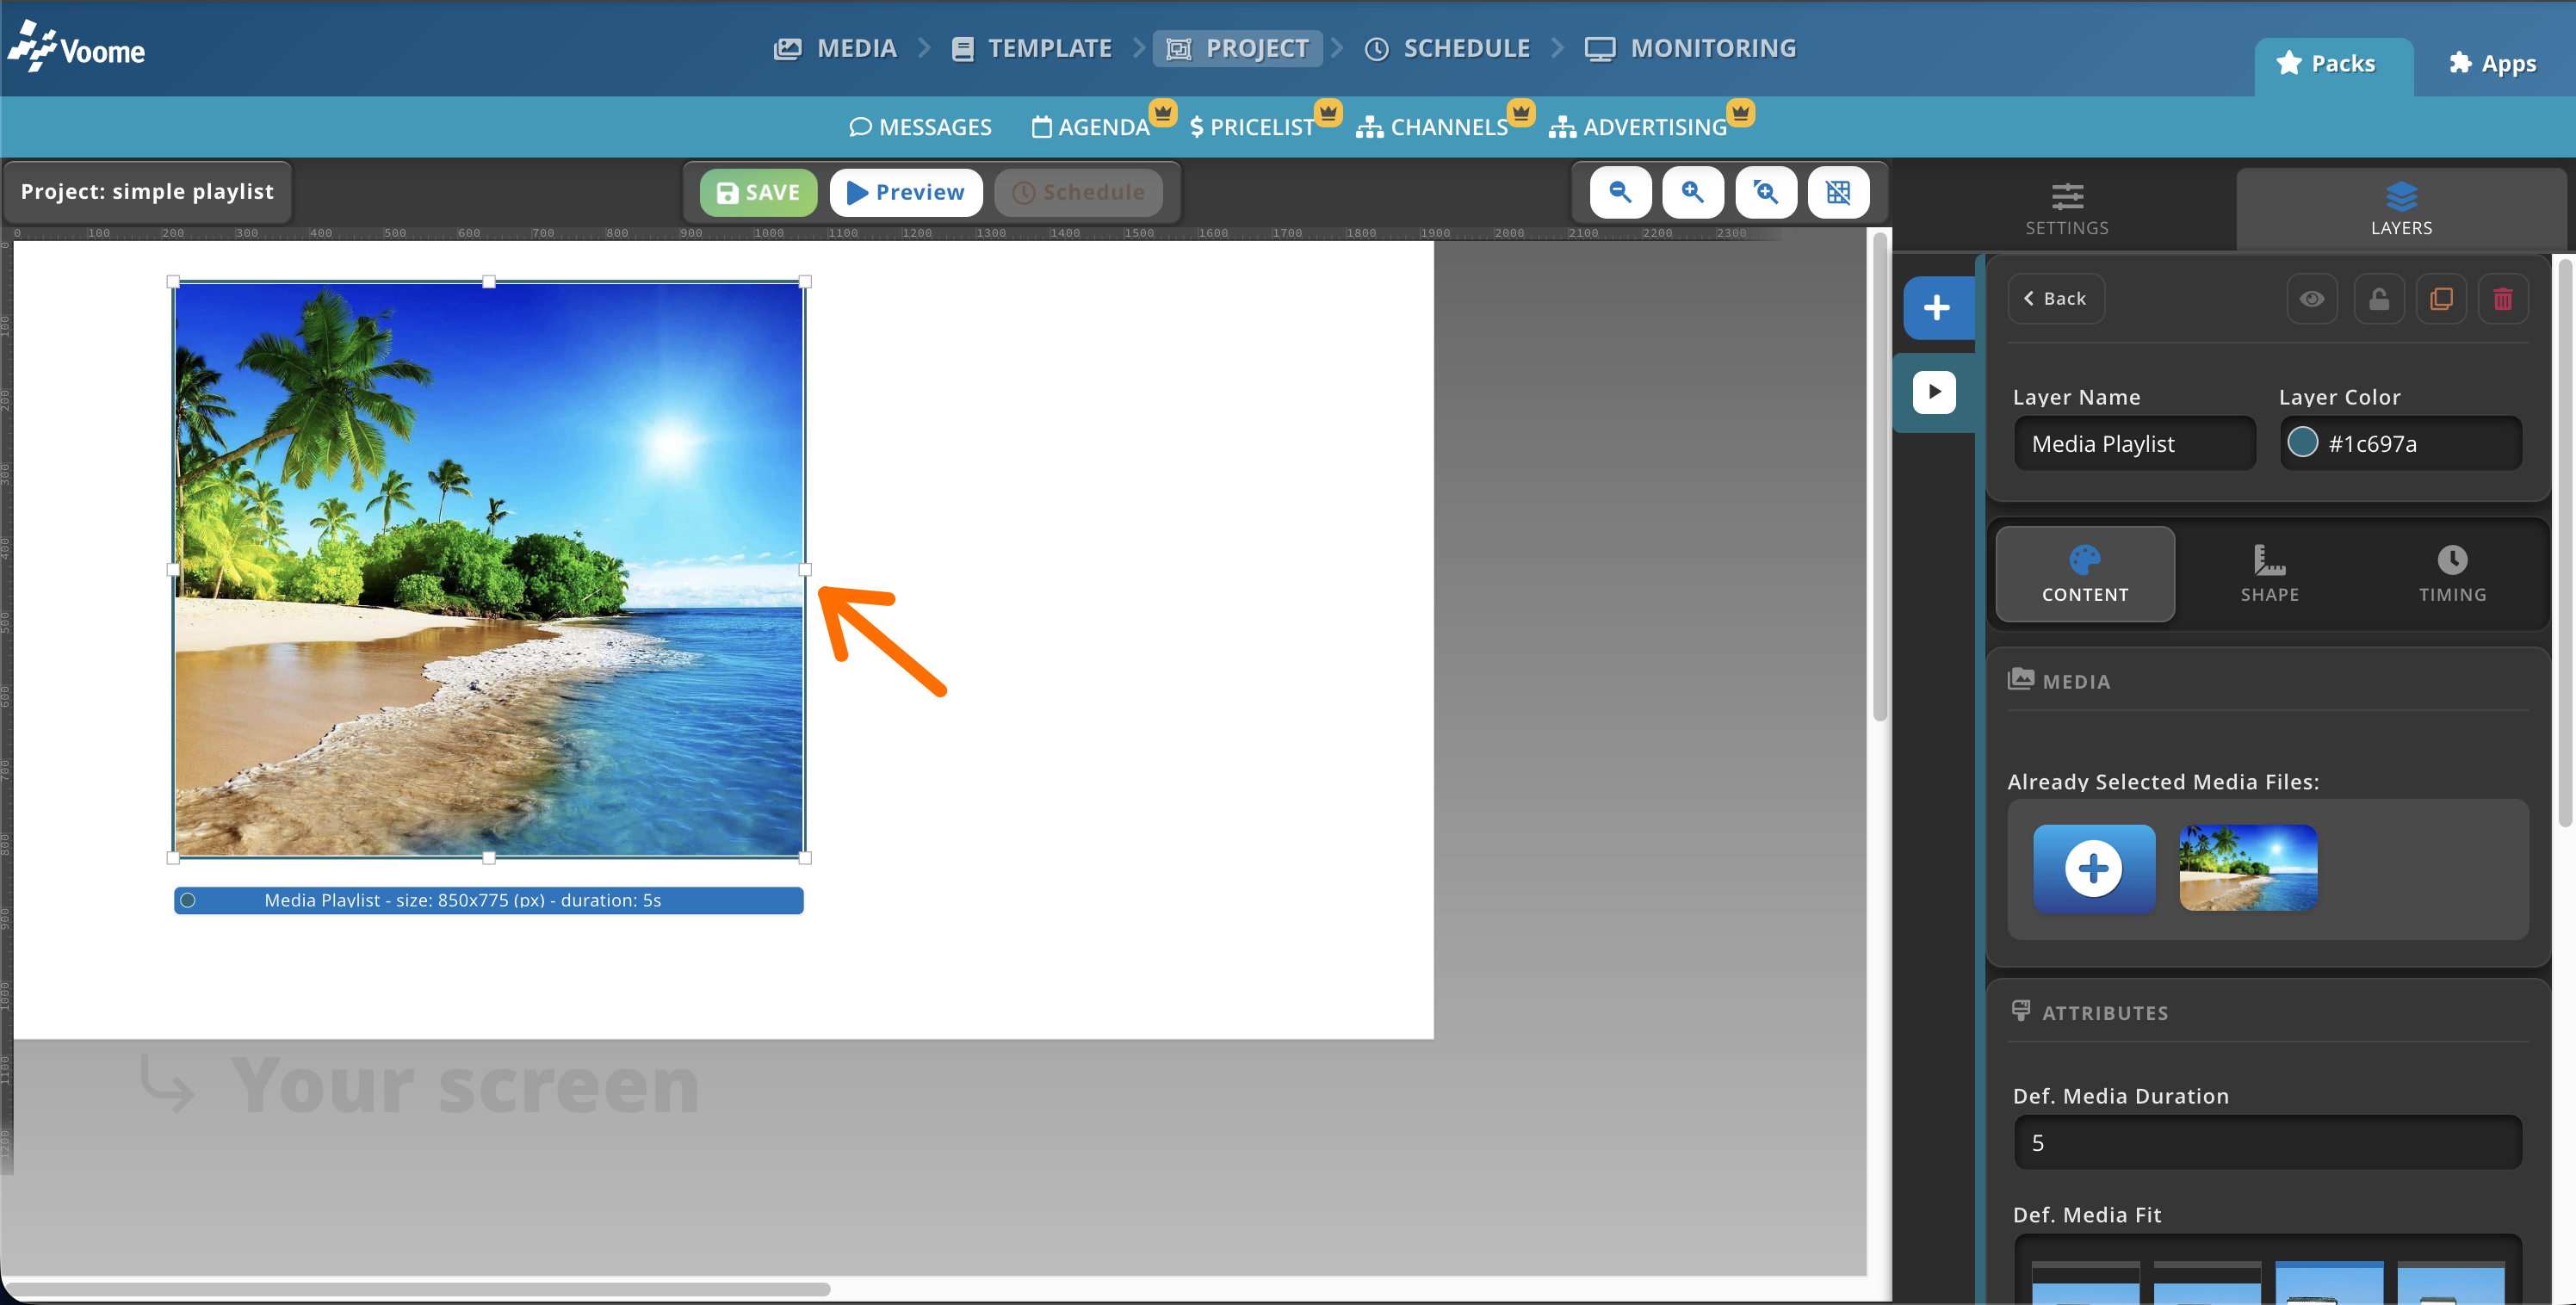
👉🏼 Right Sidebar - Settings
The right sidebar, named the Project Settings menu, helps you configure the project settings and layers.
- 📐 CANVAS tab: define the canvas dimensions you see on the left (here set to 1920x1080) and the background color of the canvas.
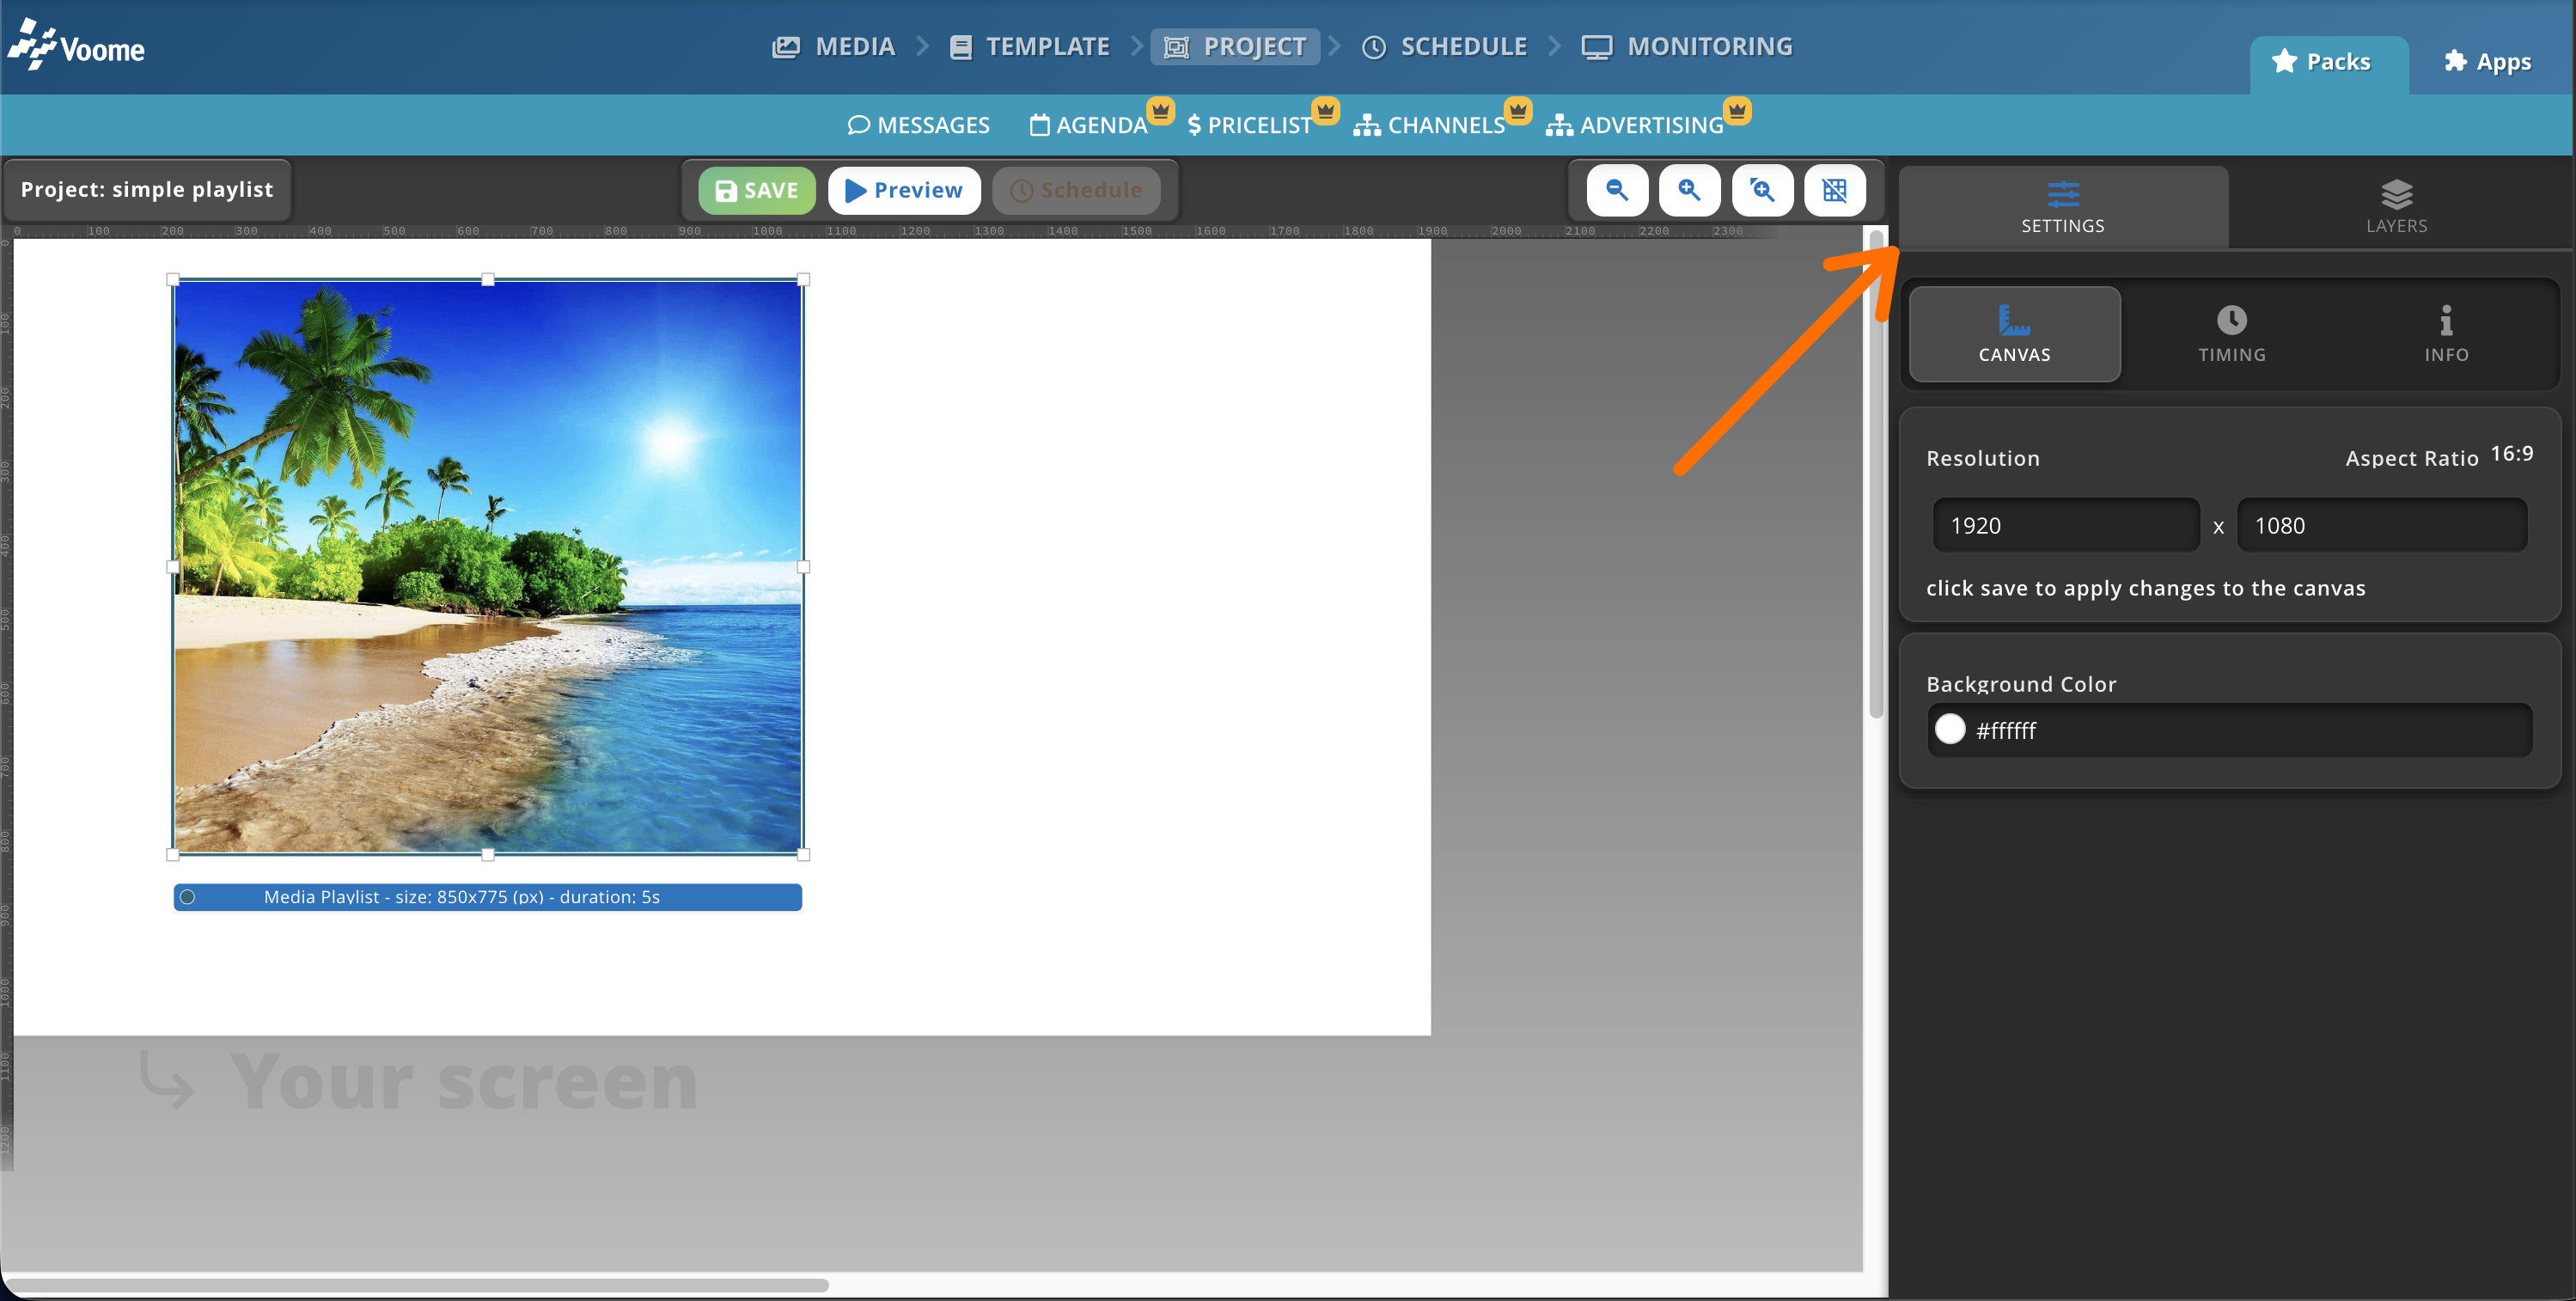
- ⏱️ TIMING tab: define how this project behaves once scheduled (see the Schedule section for full details).
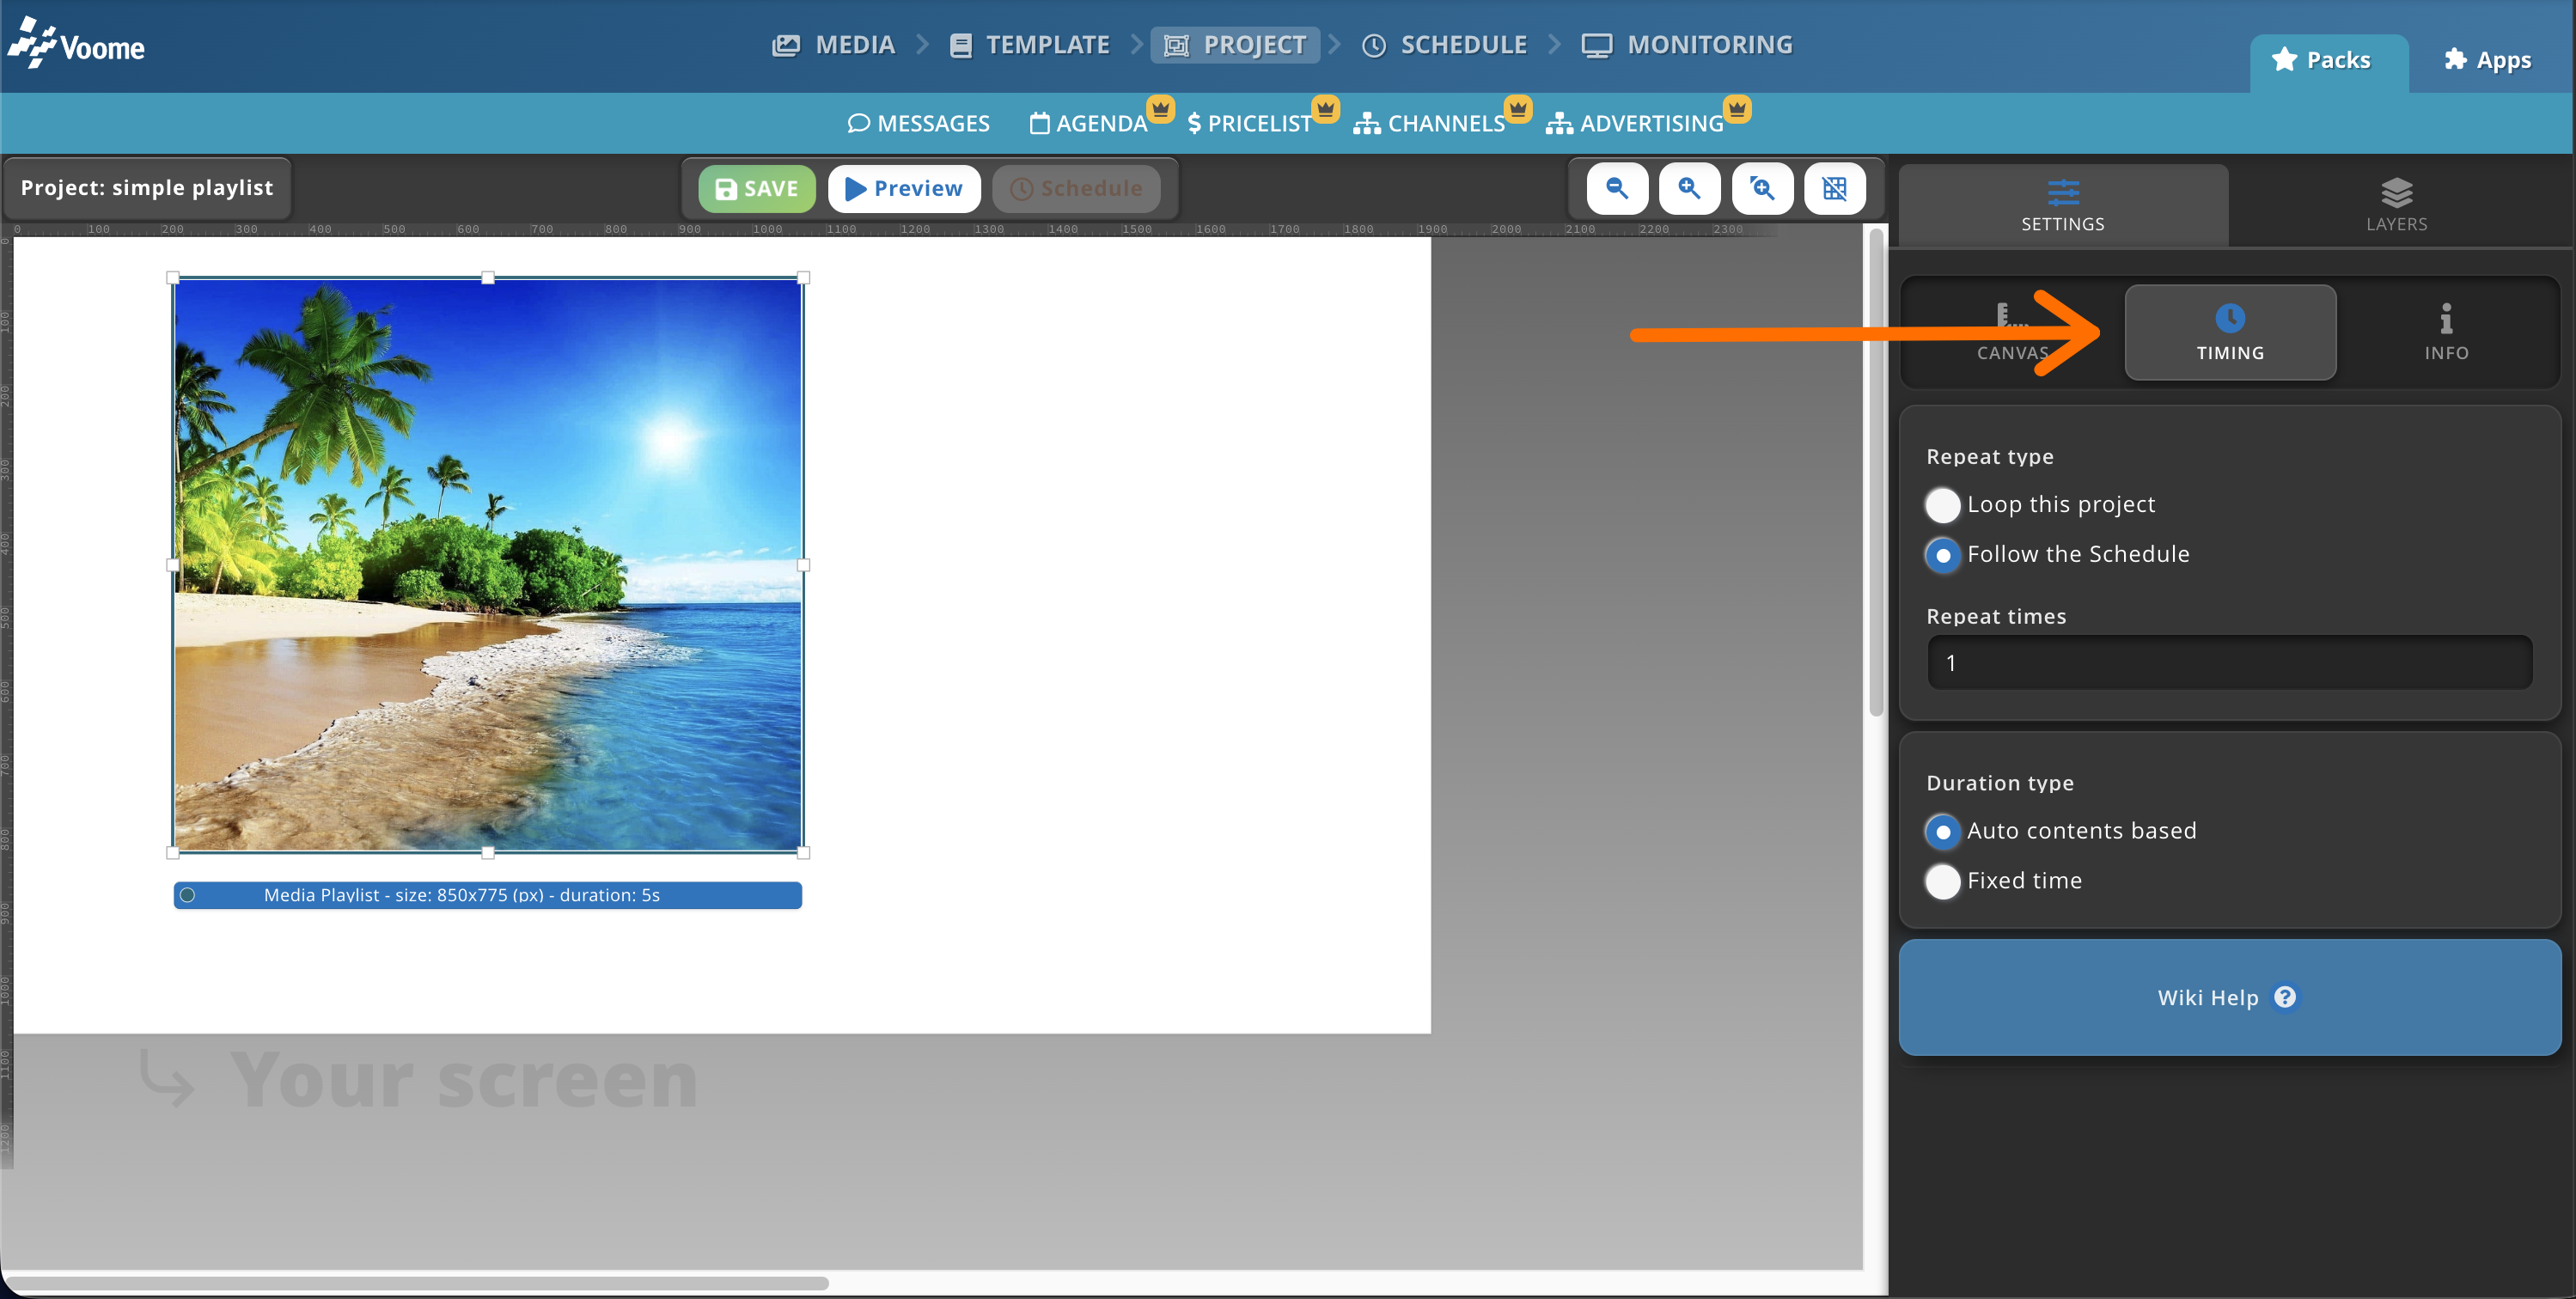
- 🔄 Repeat type "follow the schedule": when the project is shown, it plays for the maximum time that any layer in the project lasts (e.g. if you have a playlist whose media lasts 40 seconds in total plus several images, the project plays for 40 seconds and then hands over to the next project scheduled in the same zone).
- 🔄 Repeat type "loop this project": once scheduled, the project plays continuously even if its internal media has a fixed length (e.g. if you schedule this project for the whole of tomorrow and it lasts 40 seconds, it loops for the entire day, restarting every 40 seconds, regardless of any other projects scheduled for tomorrow in the same zone).
- ⏳ Duration type "Auto content Based" (default): the length of the project depends on the longest-lasting layer (e.g. if you have two playlists in the project, one lasting 1:20 min and another 30 sec, the total project length is 1:20 min).
Involuntary loop
If the project contains only layers without a time anchor point (such as a web page) and you have set Duration type "Auto content Based", the project length becomes indefinite. This essentially results in a loop state where only this project is shown, despite the fact that you have other projects scheduled in the same zone.
- ⏳ Duration type "Fixed Time": set an arbitrary length for this project, useful for layers that have no inner length such as a web page.
Content cut-off
If you have a playlist lasting 60 seconds within the project and you set a fixed time of 30 seconds, the playlist is cut off and only the first 30 seconds are shown.
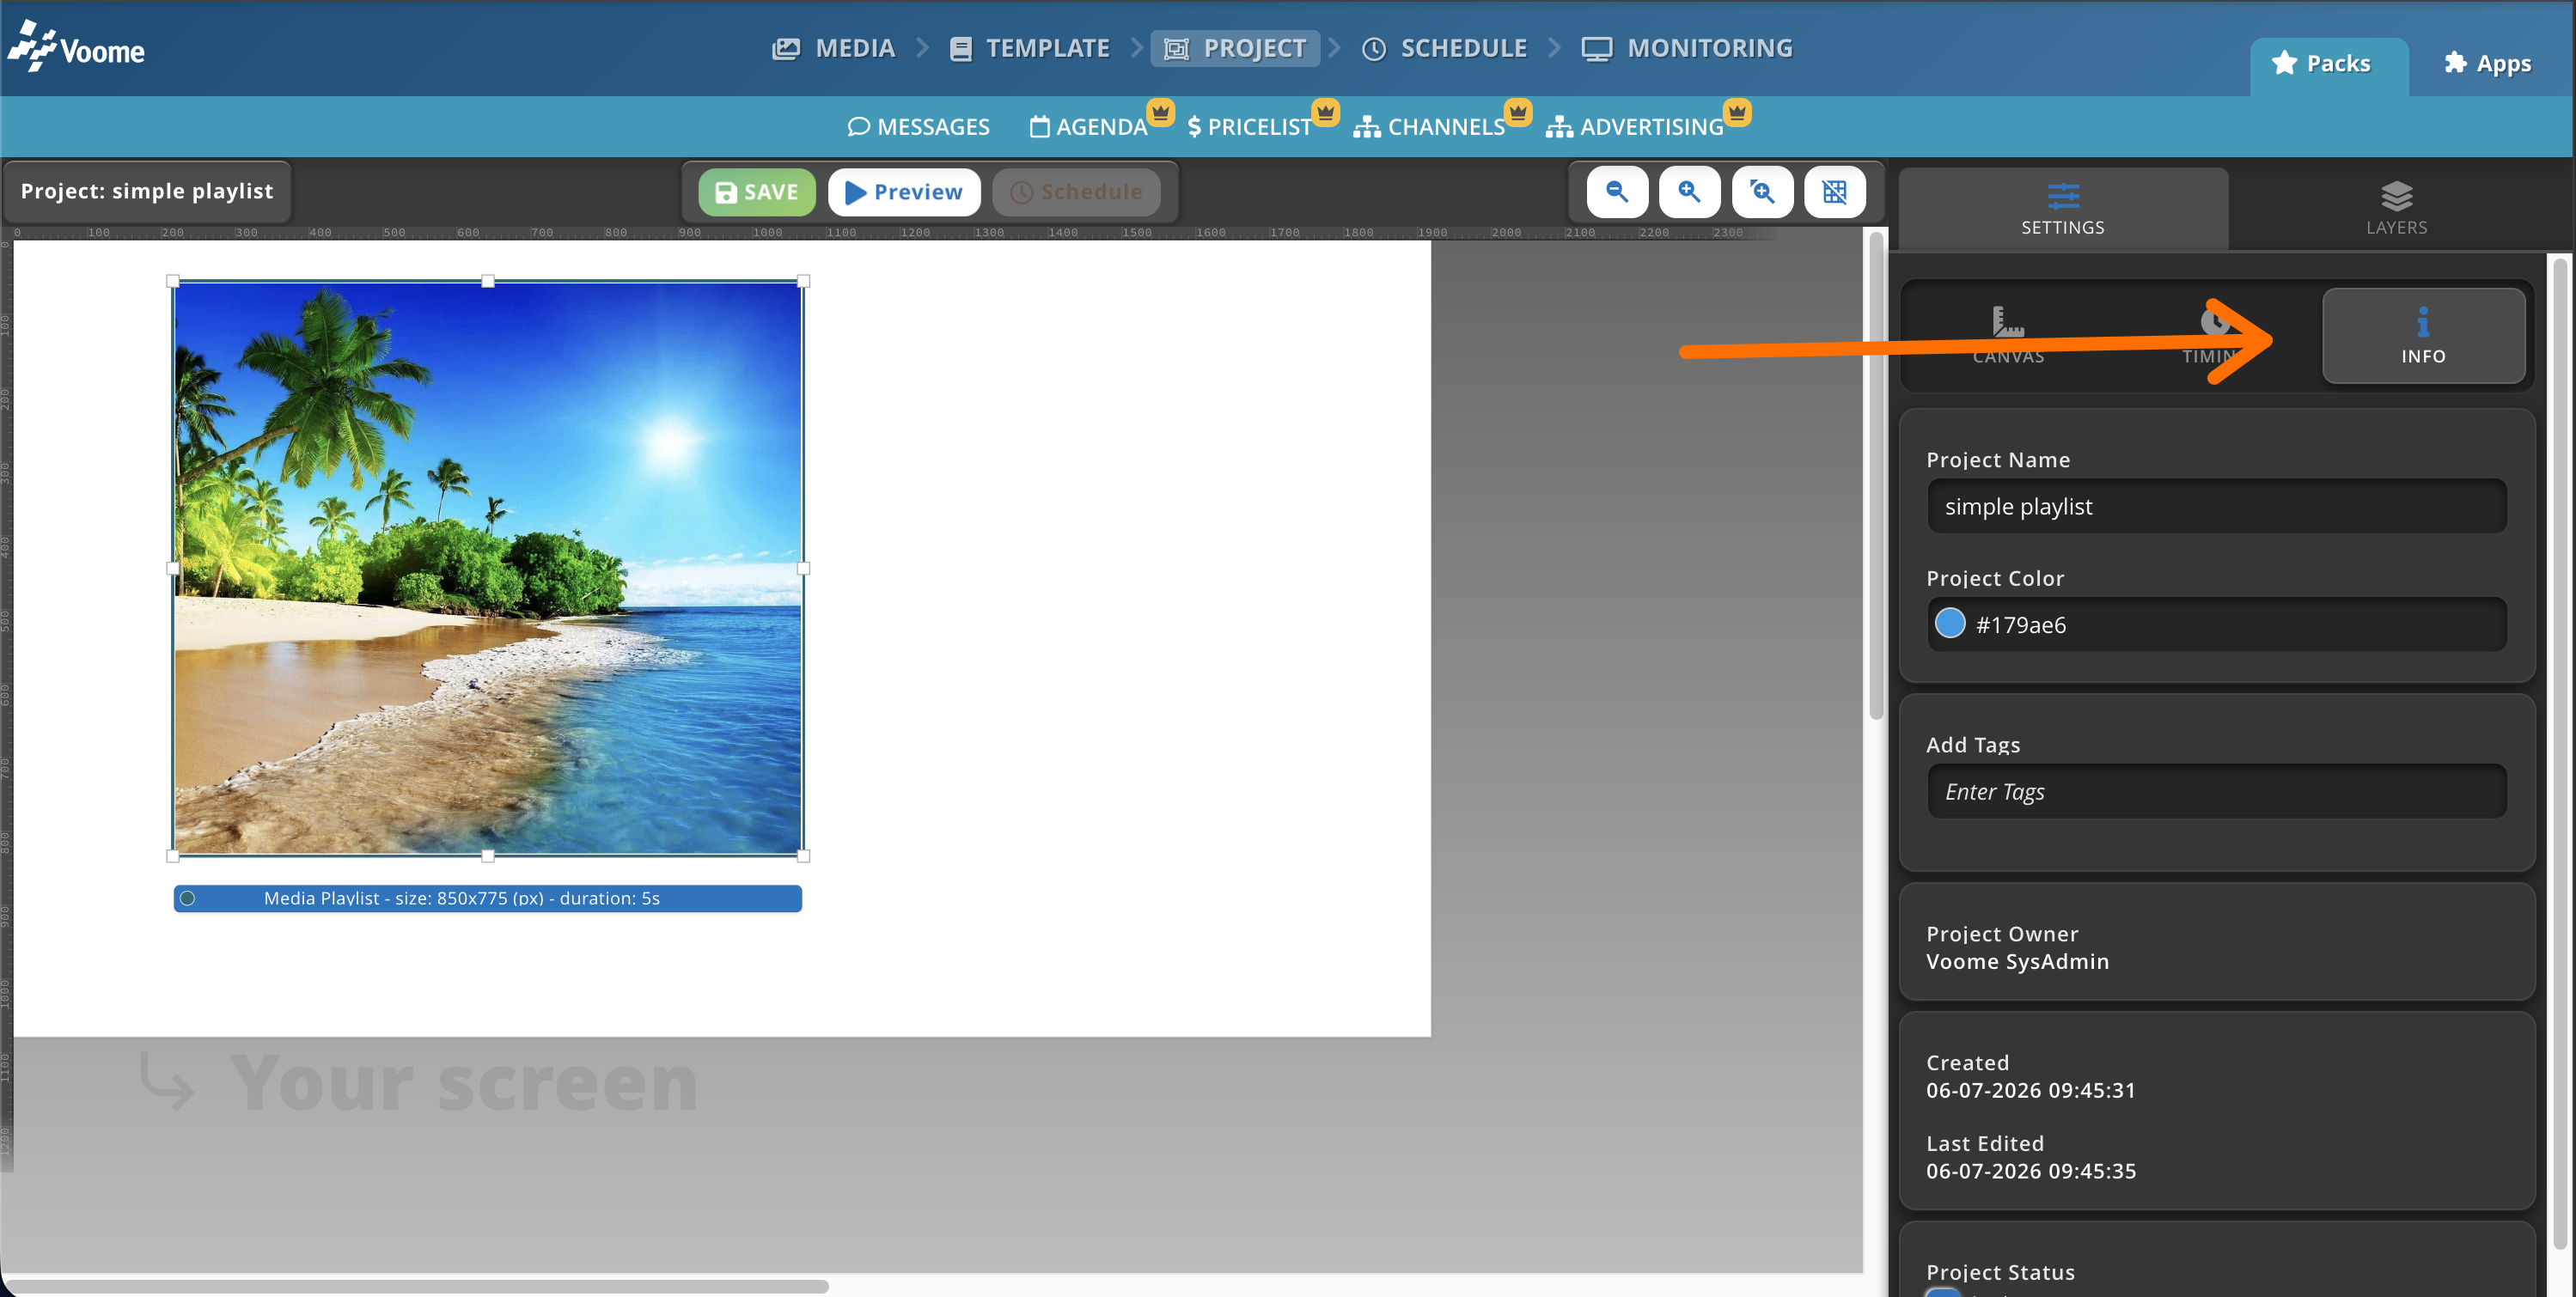
- ℹ️ Info tab: view and edit the project name, the project color (the one displayed in the Schedule section), and add multiple tags to the project so you can find it faster in the project table view. This tab also shows other information about the project, such as the owner and when it was created.
👉🏼 Right Sidebar - Layers
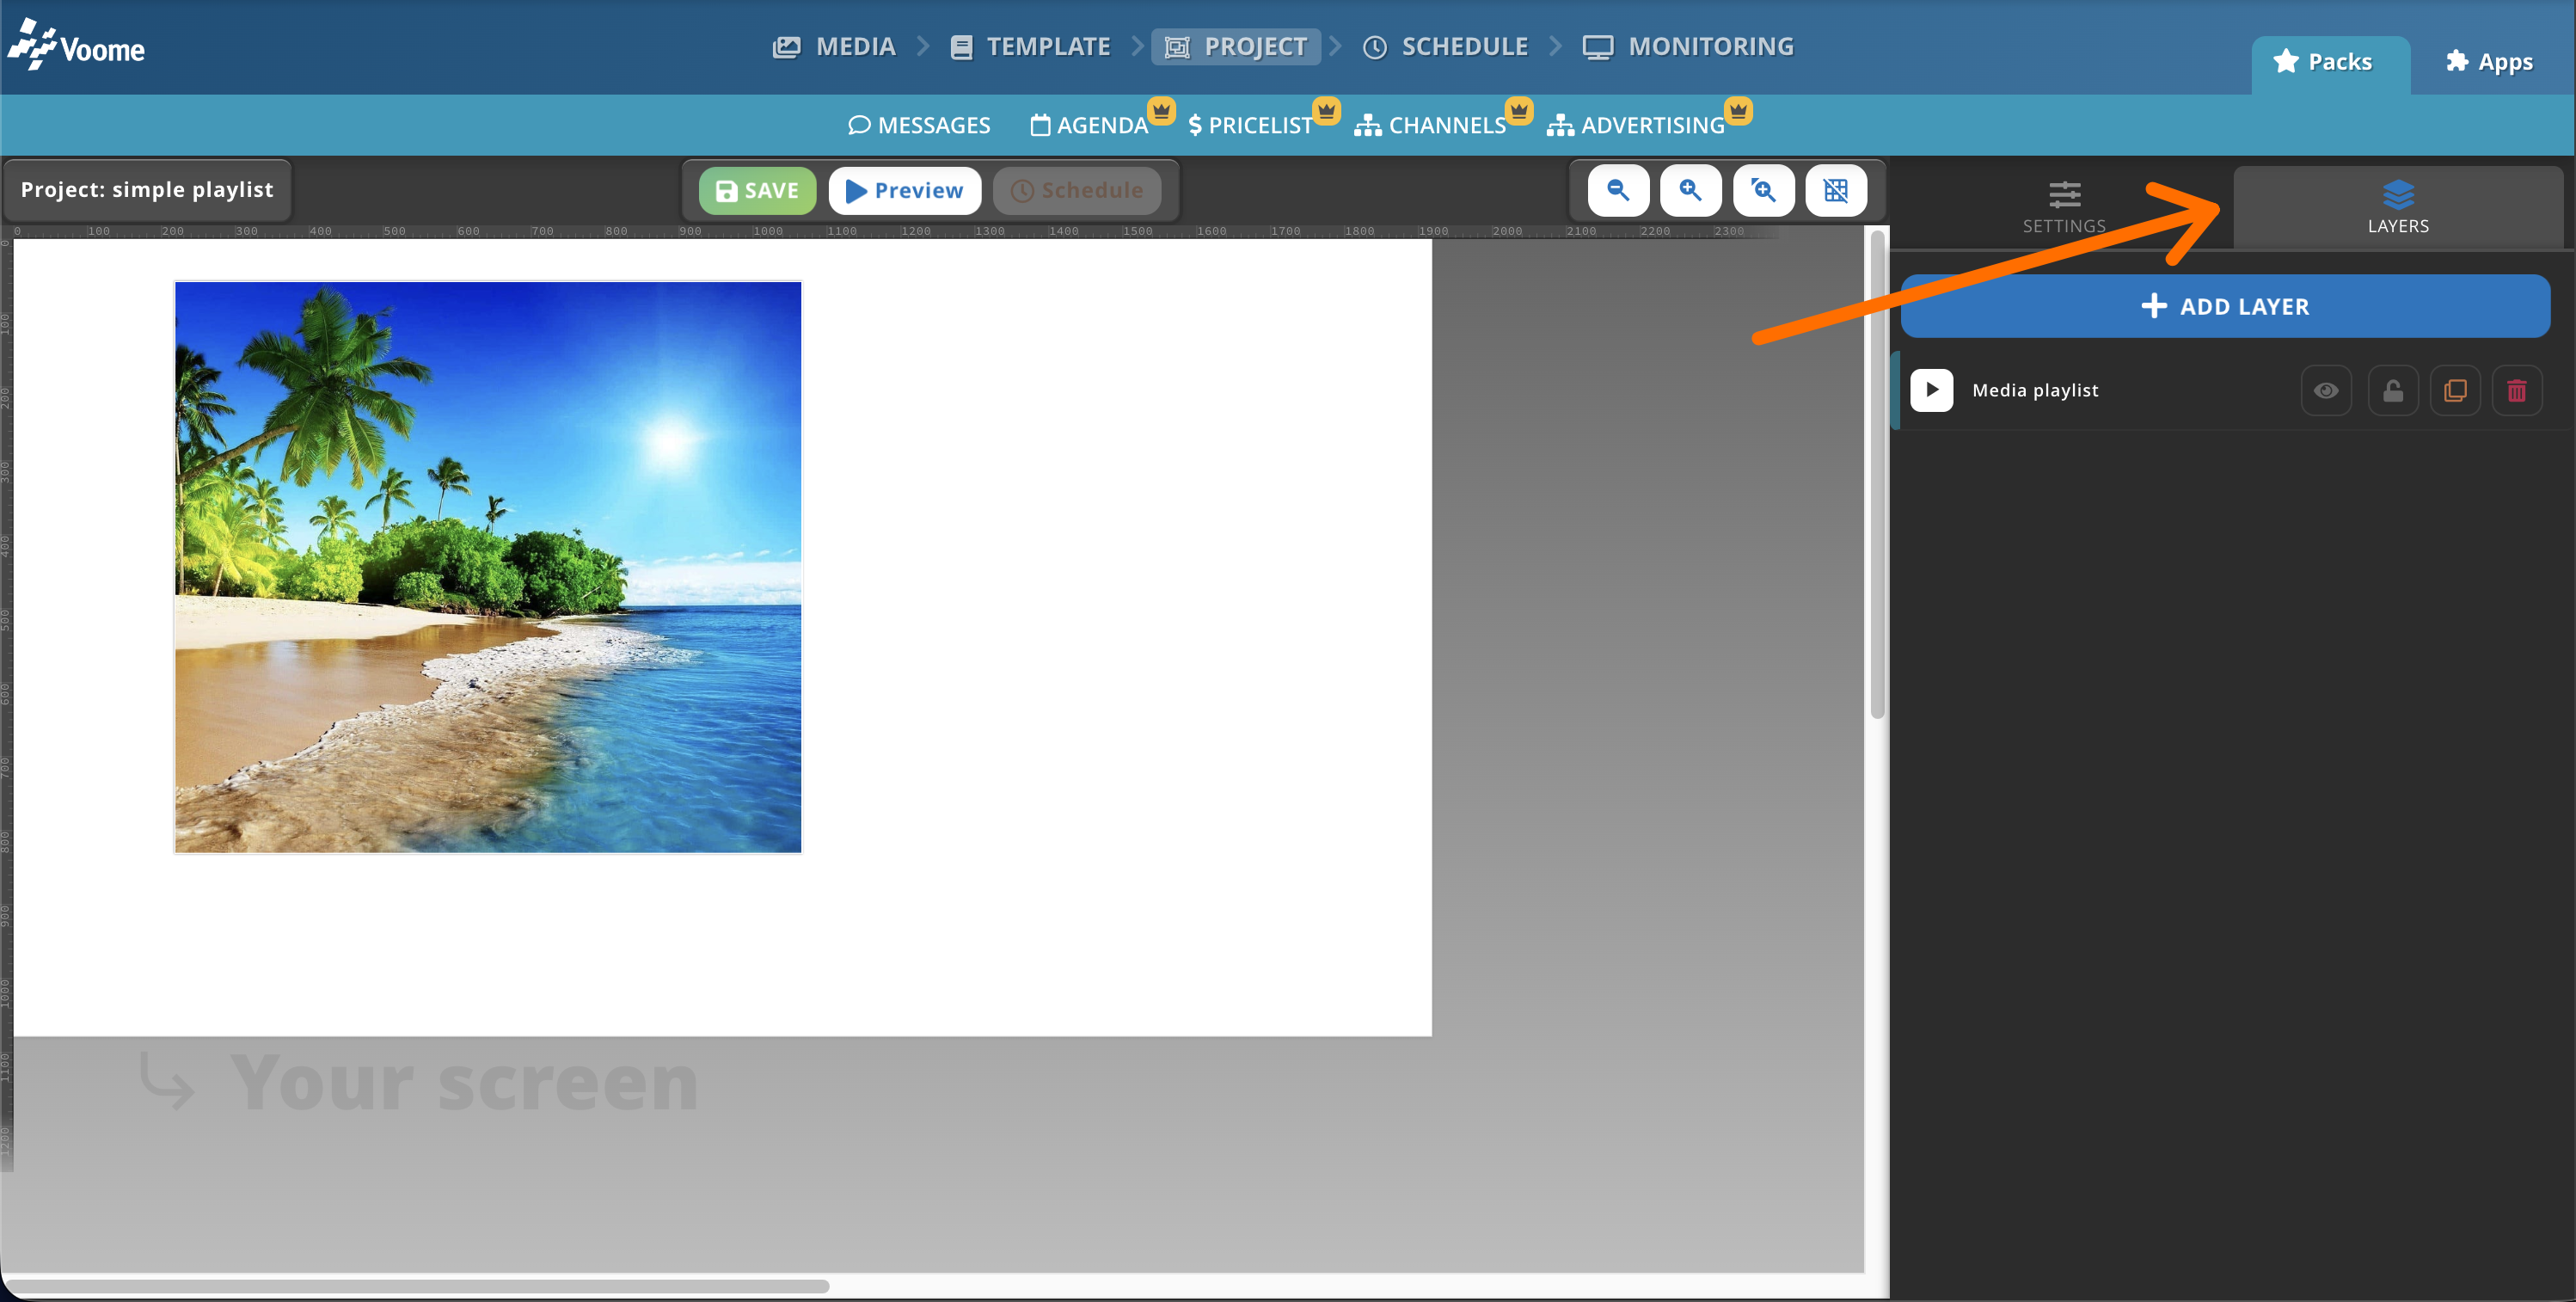
The Layers tab lists all the layers currently set in the project.
✏️ Layer Actions
To enter a layer's settings, click the layer in the CANVAS on the left or in the layer list on the right. Both inside and outside the layer you can:
- 👁️ Hide/Show the layer
- 🔐 Lock the layer's position and editing
- 👥 Clone the layer
- 🗑️ Delete the layer
✏️ Edit a Layer
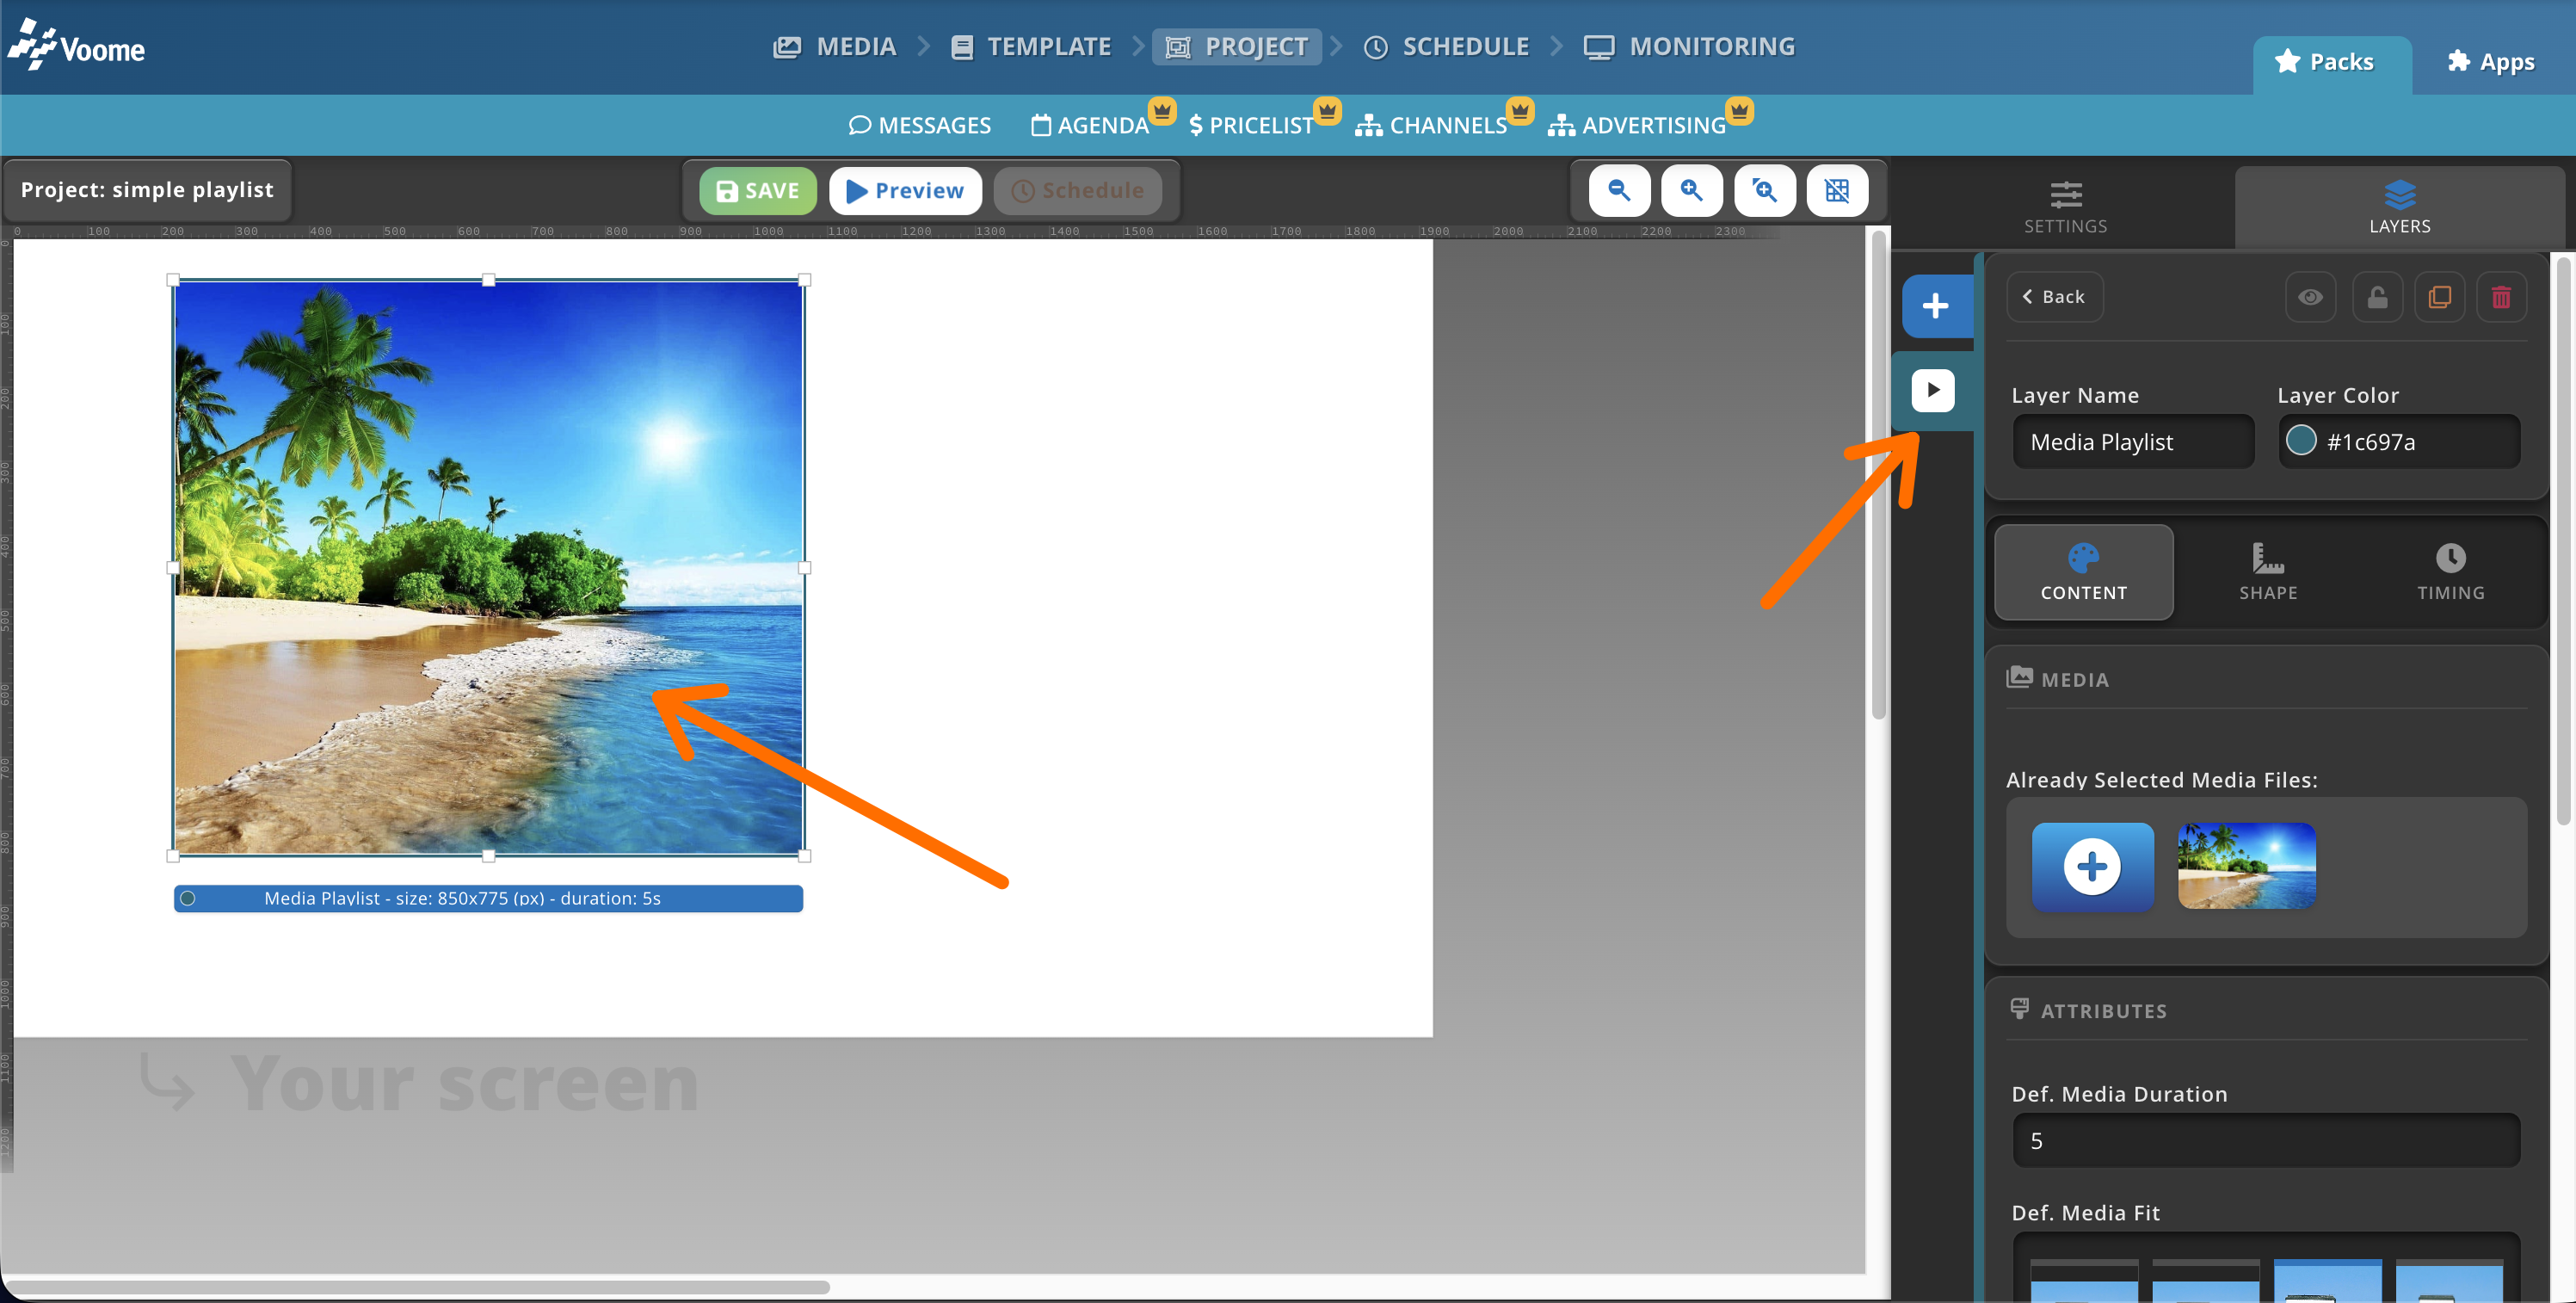
Every layer always has the same structure: Content, Shape, Timing, and Sublayers (if the layer is composite).
- 🖼️ Content: define the specifics of the layer (what goes inside the square on the canvas). In a playlist, for example, define which content the playlist consists of, the playlist transition type, the media fit, and so on.
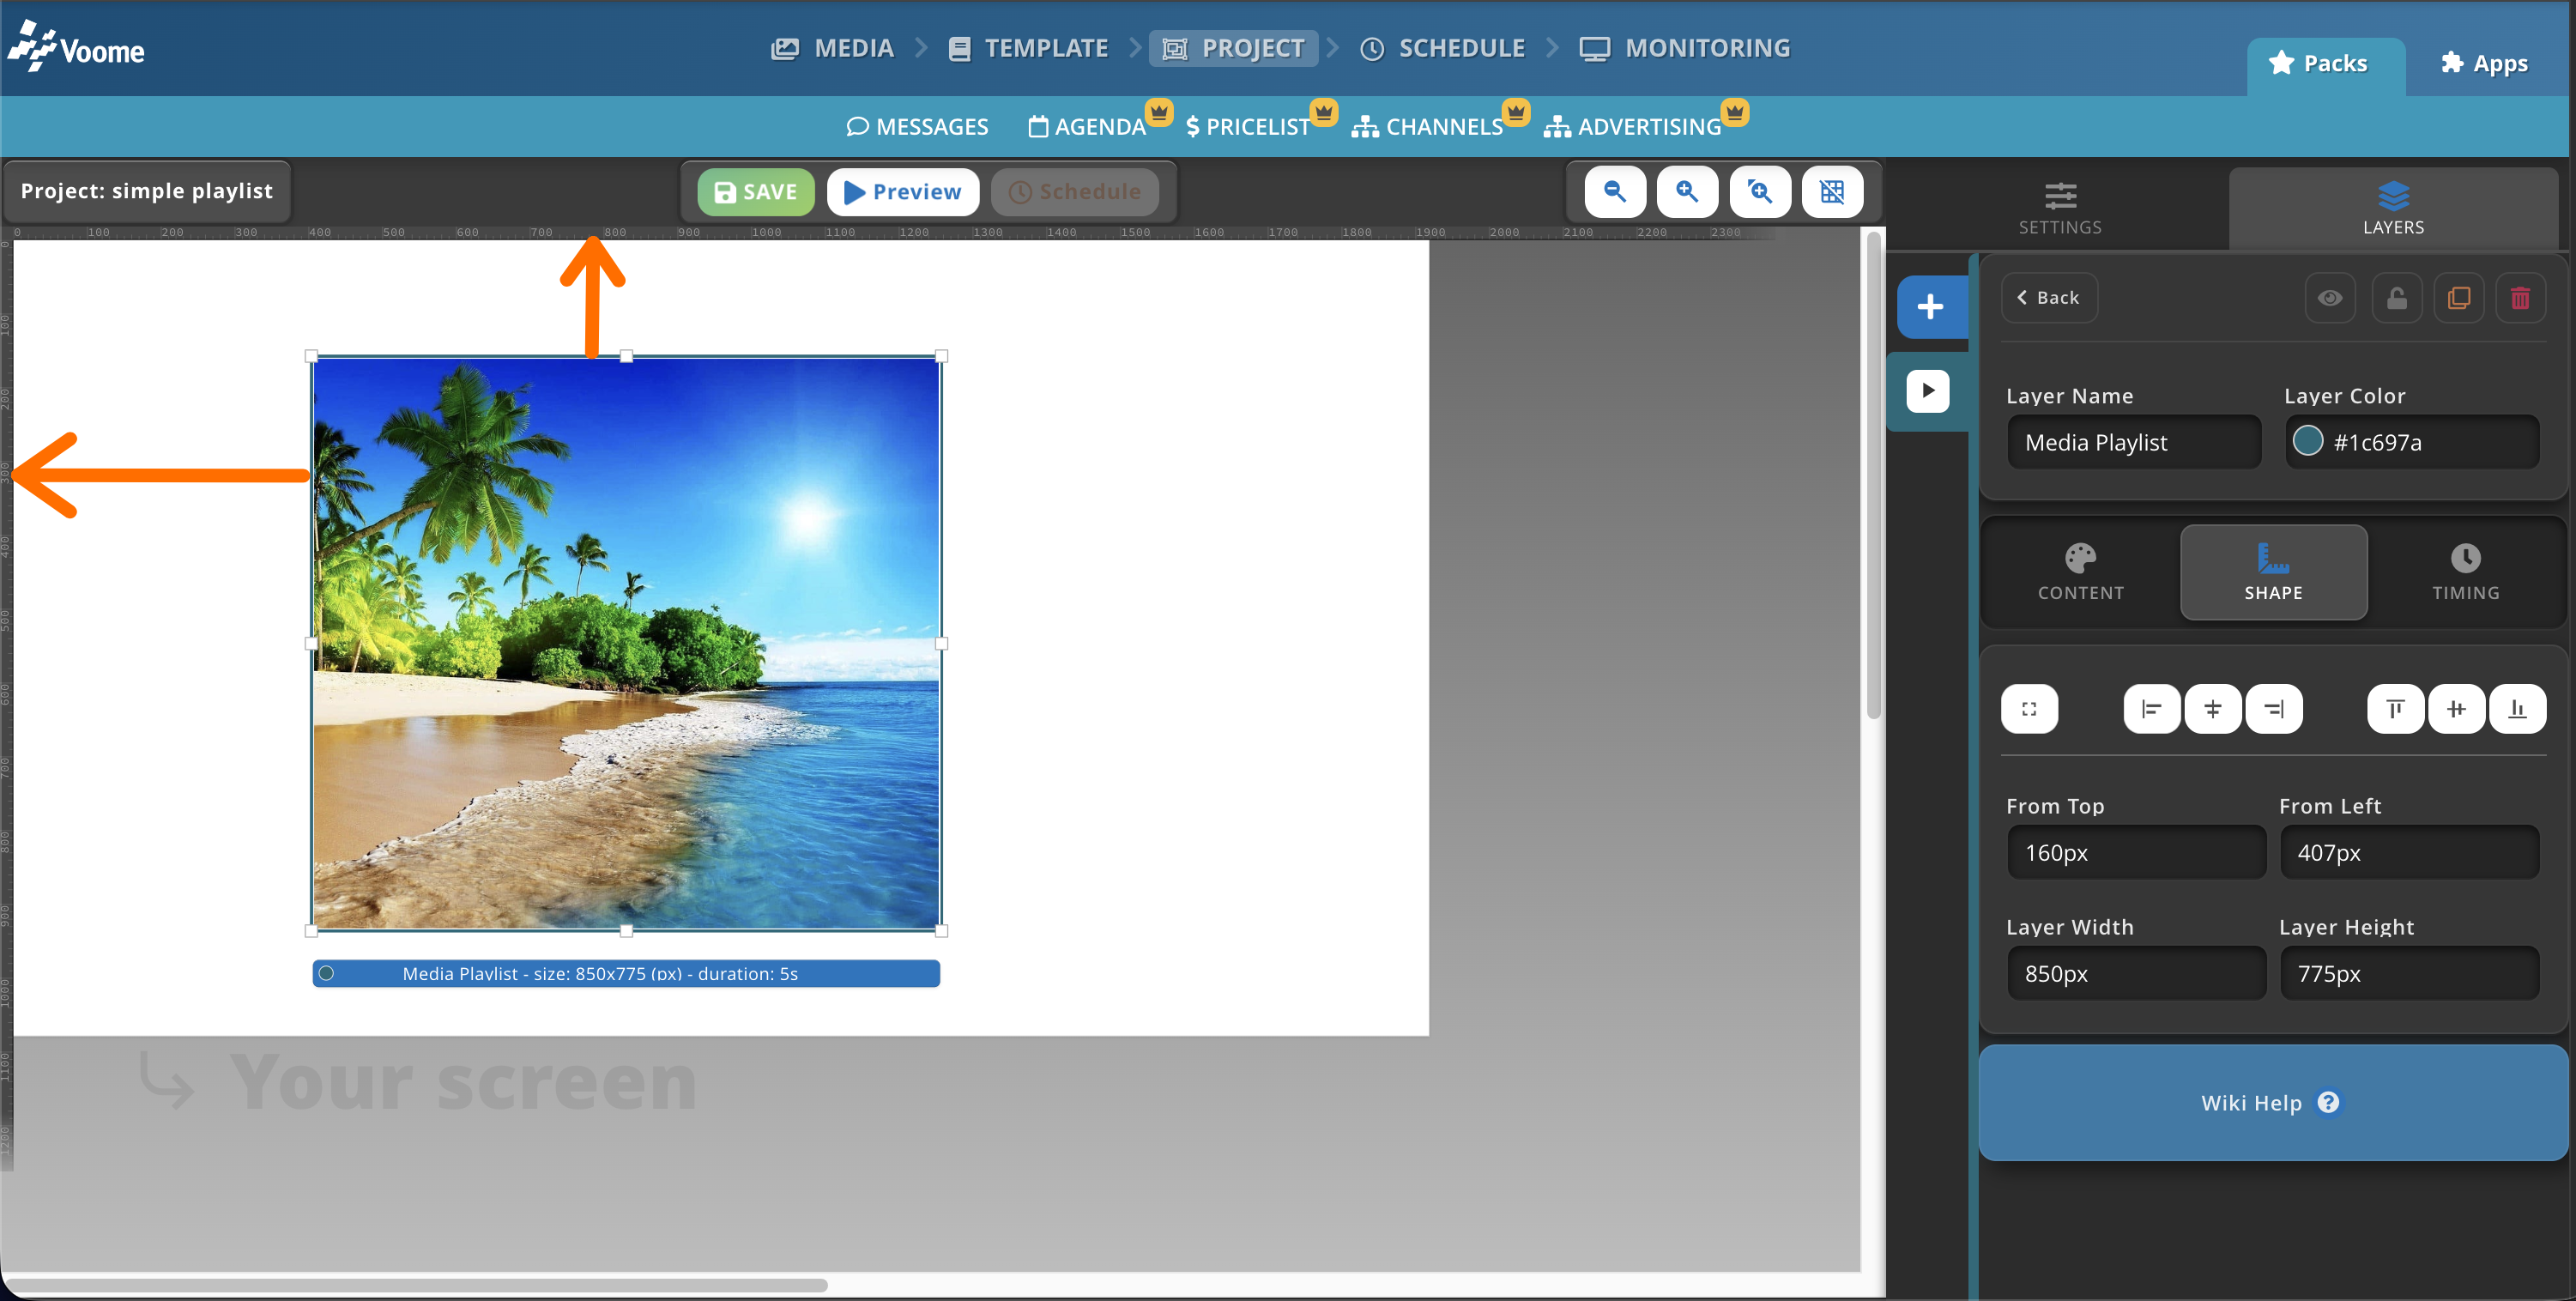
- 📐 Shape: define the position of the layer within the canvas (where the square sits in relation to the canvas).
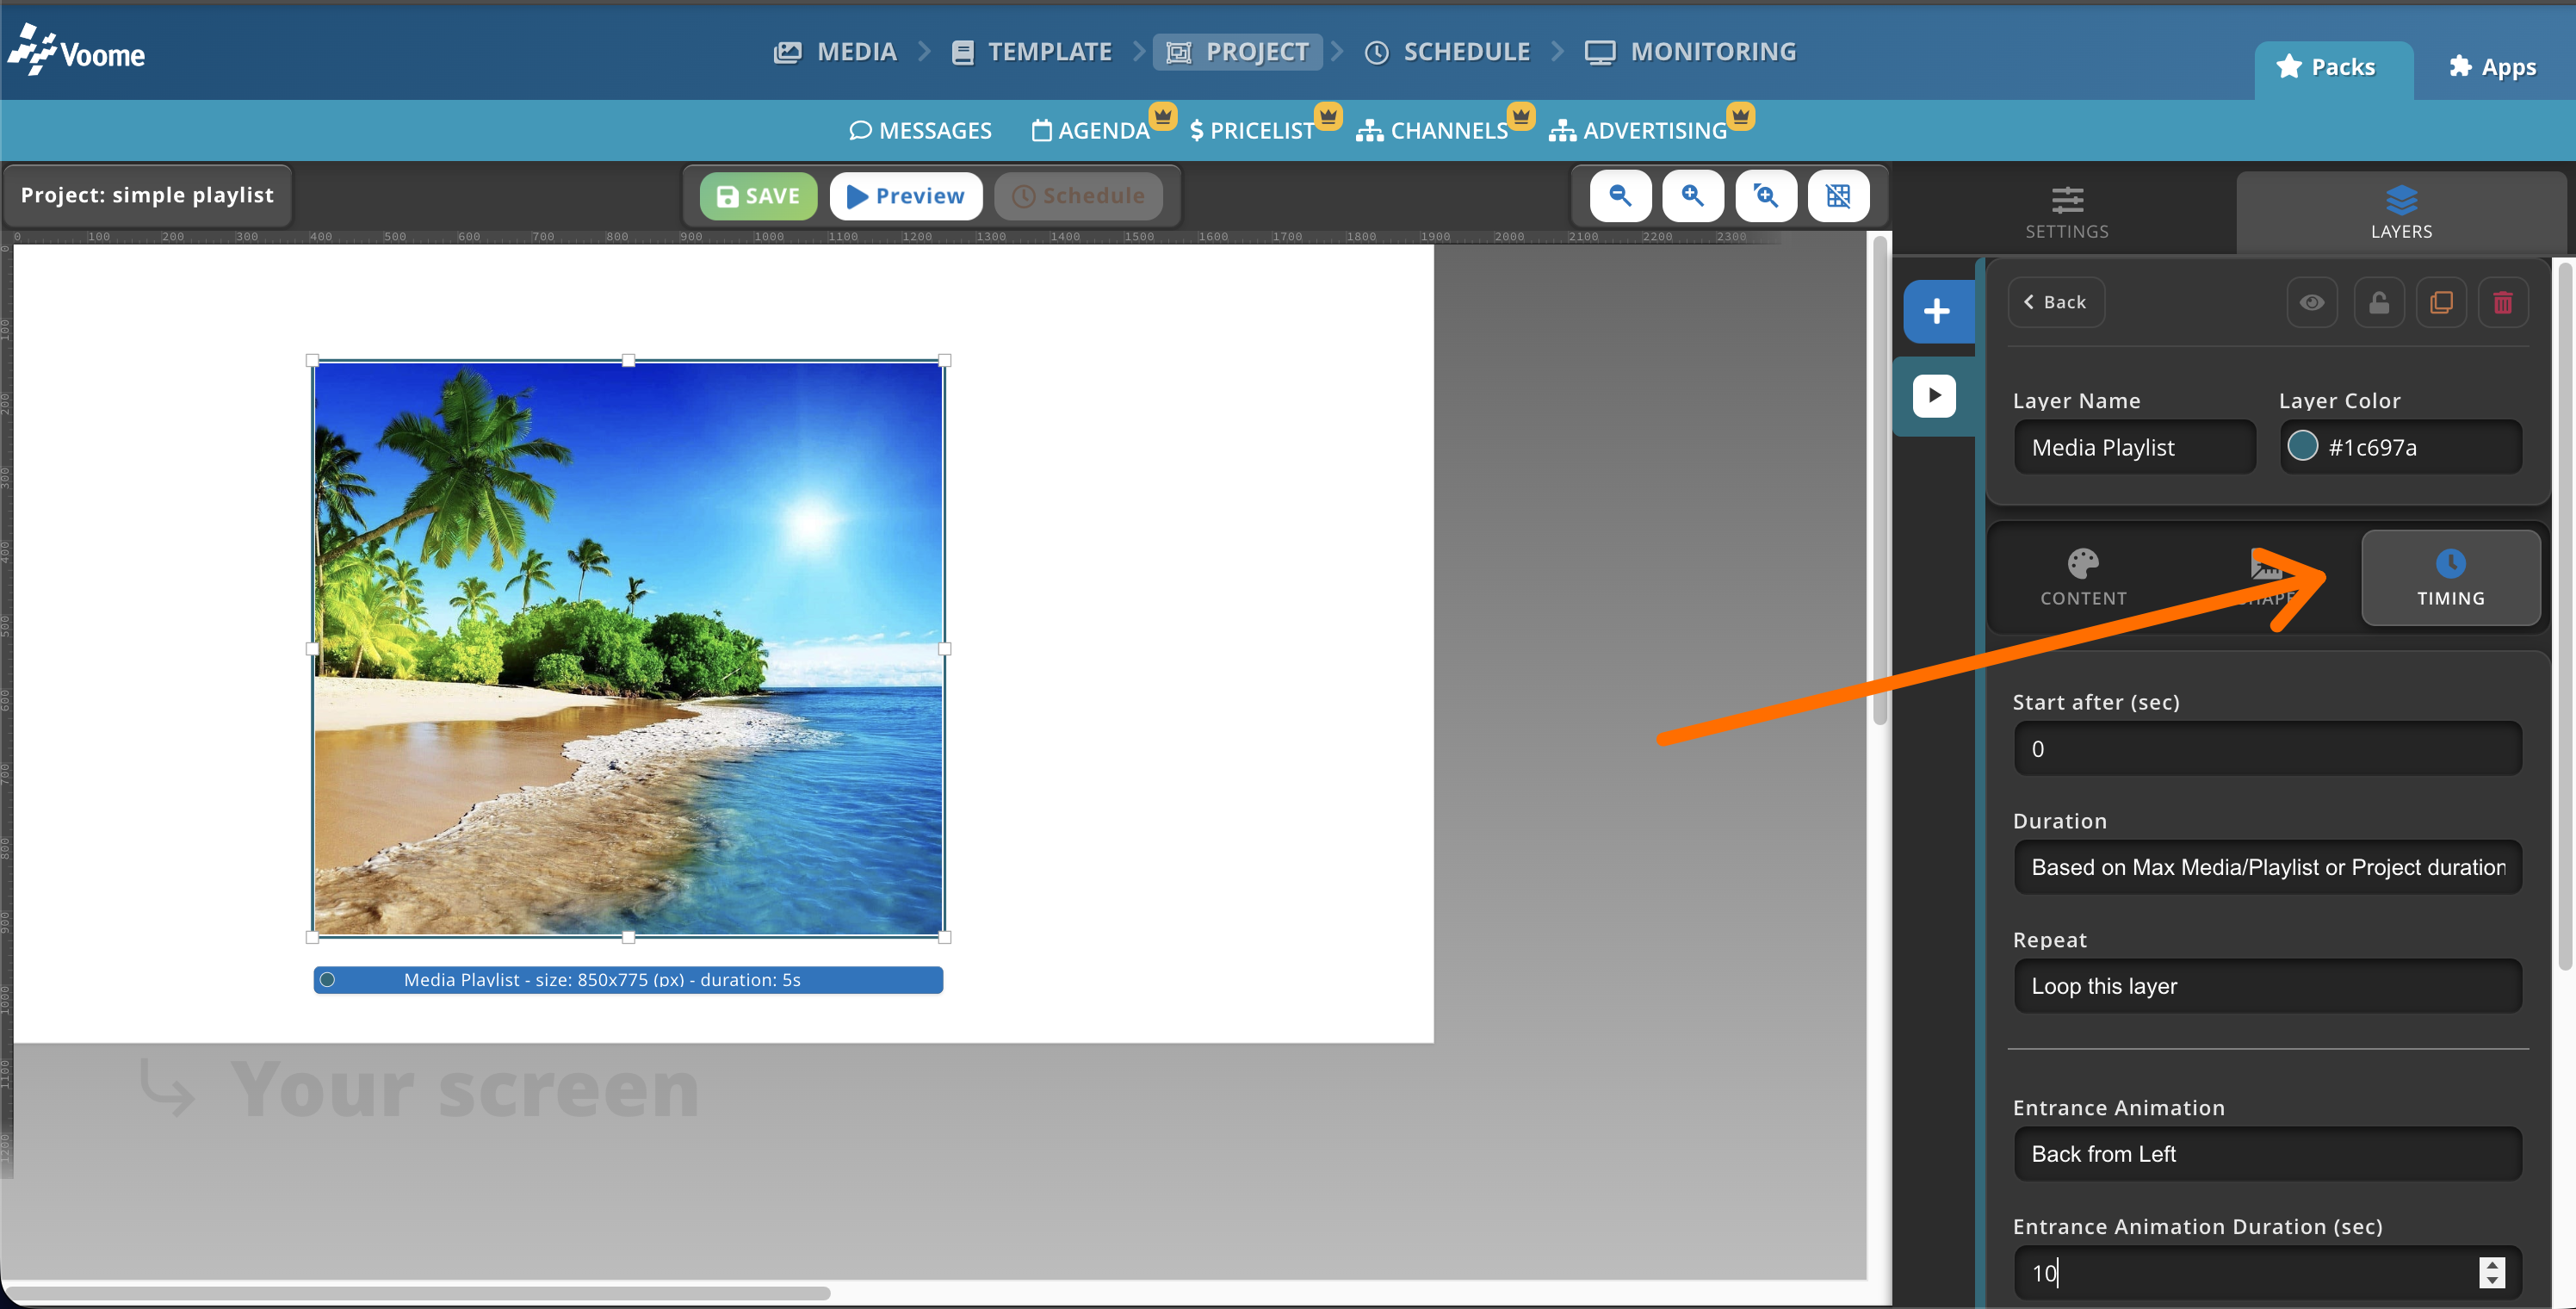
- ⏱️ Timing: define the transitions of the layer (how the square appears and leaves within the canvas).
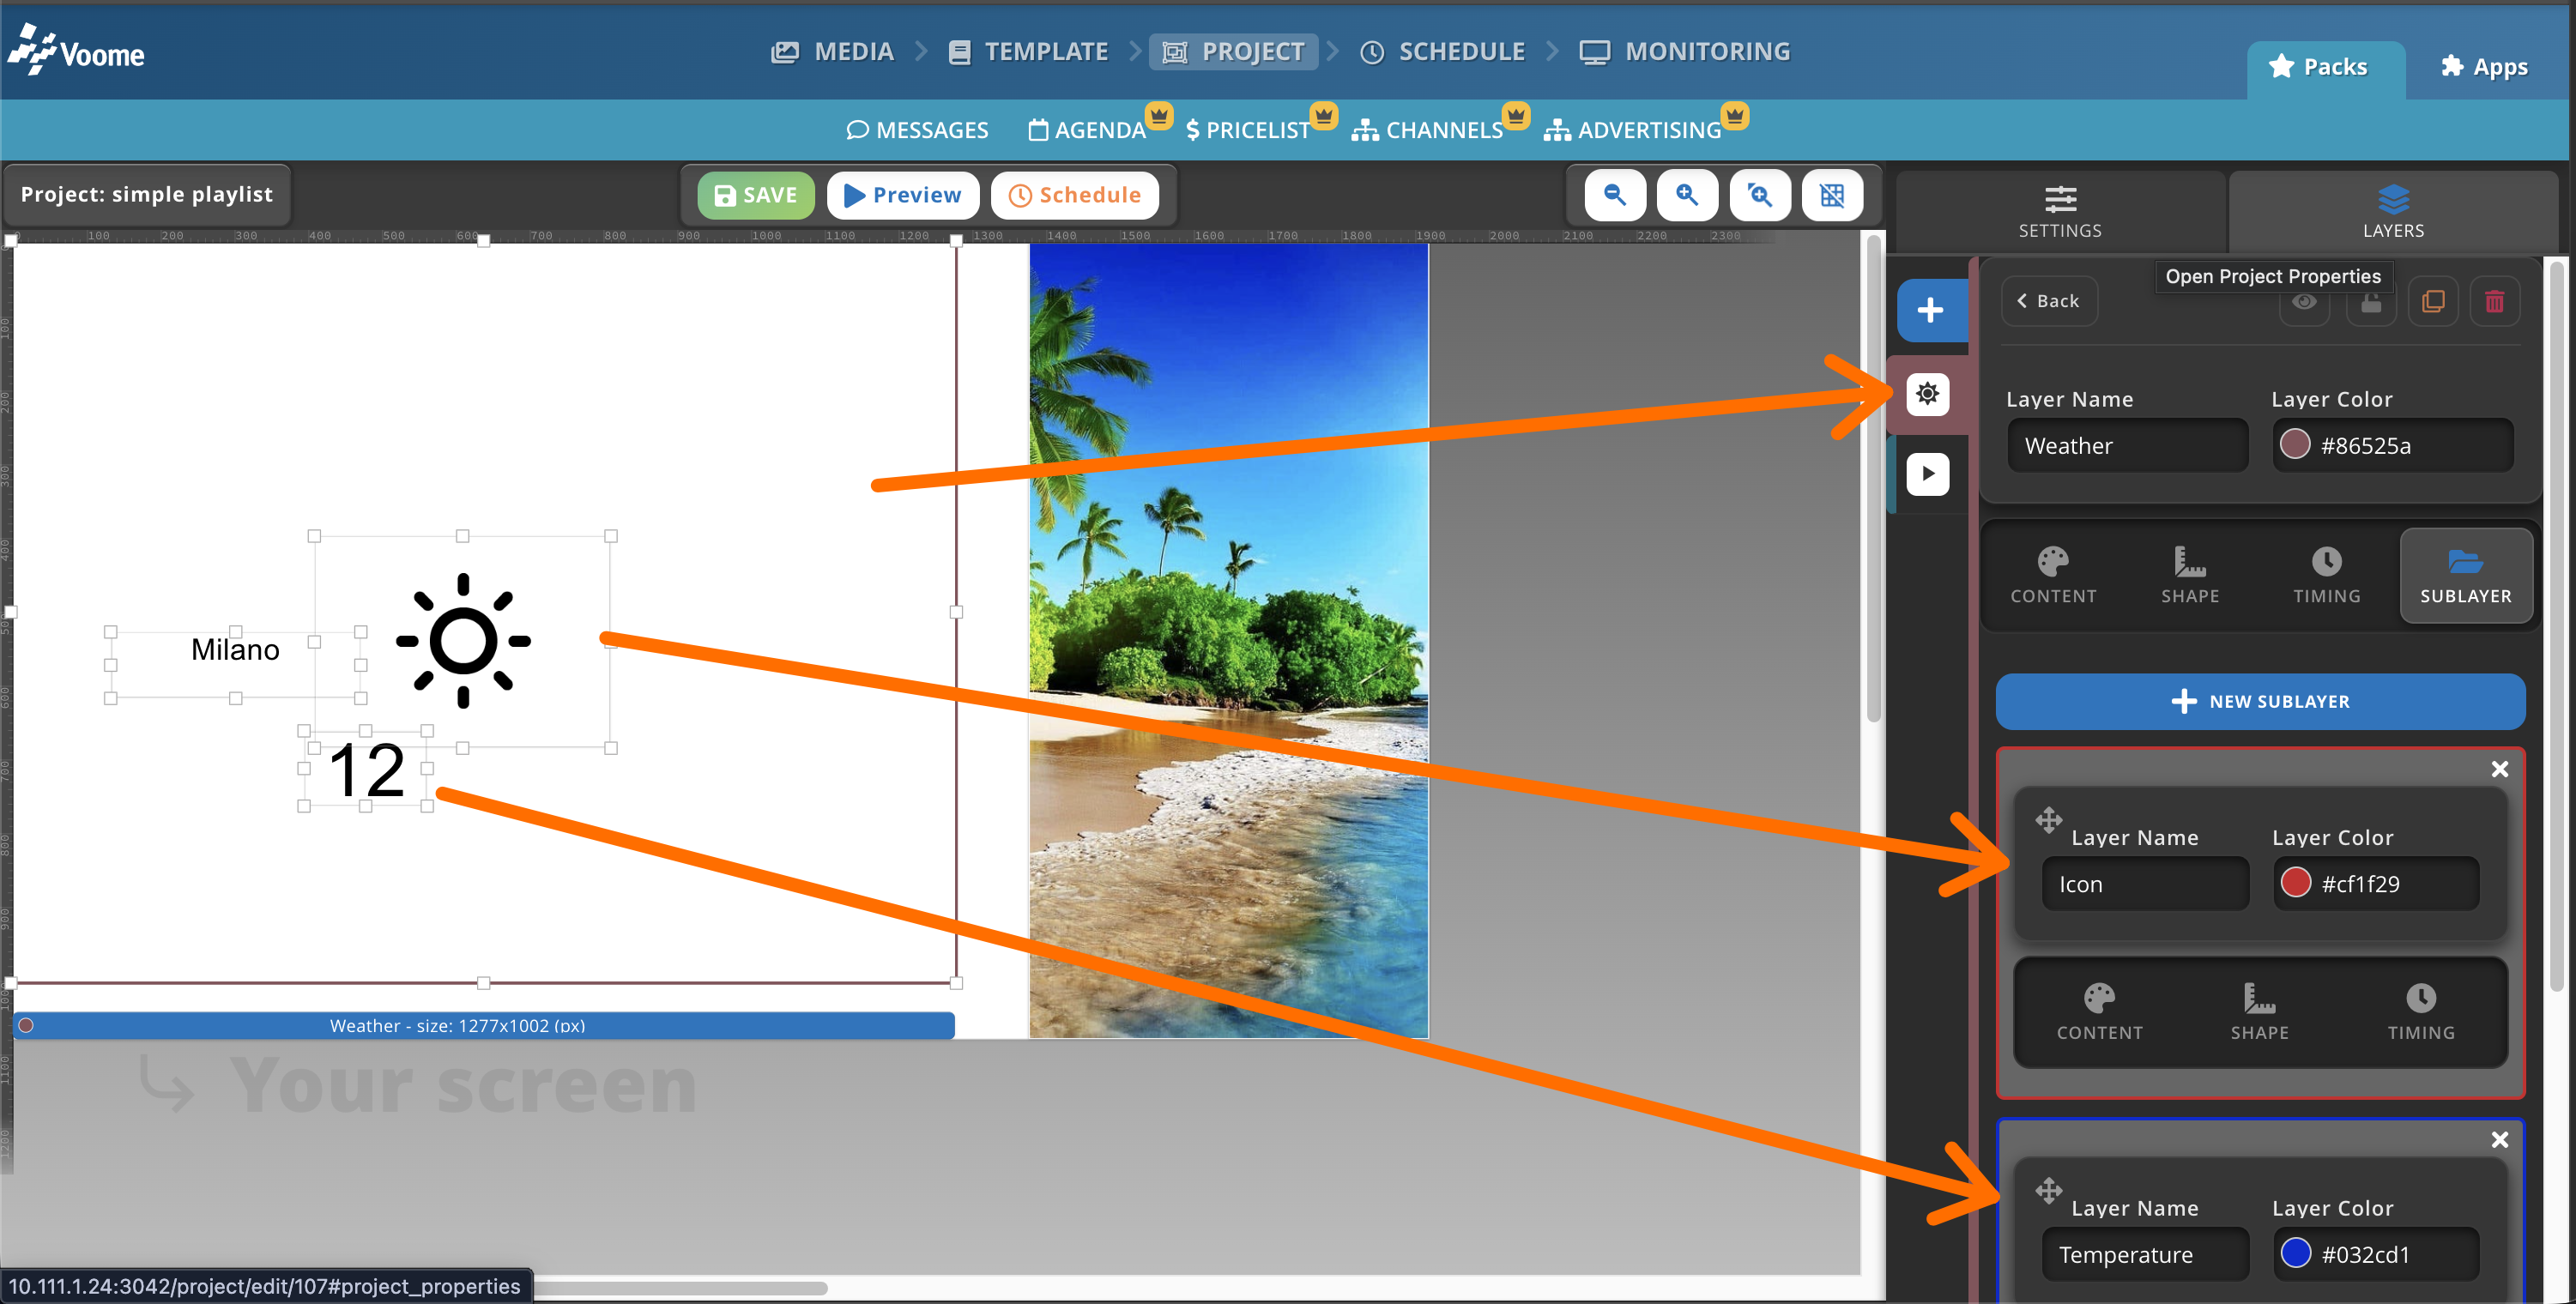
- 🧱 Sub-layers: define the children of the parent layer.
❓How to add a layer
To add a layer, click Add Layer in the project editor view. You are then prompted to choose which layer to add from the list (for the full list, see Layers).