Schedule
Scheduling is how content reaches your screens: you assign projects to a zone and the platform plays them in sequence. For each zone you build a sequence of projects that rotates continuously until you decide otherwise.
This page walks you through the whole process, from pressing SCHEDULE on a project to publishing the result to your devices.
🧑🏼🏫 How to schedule a project
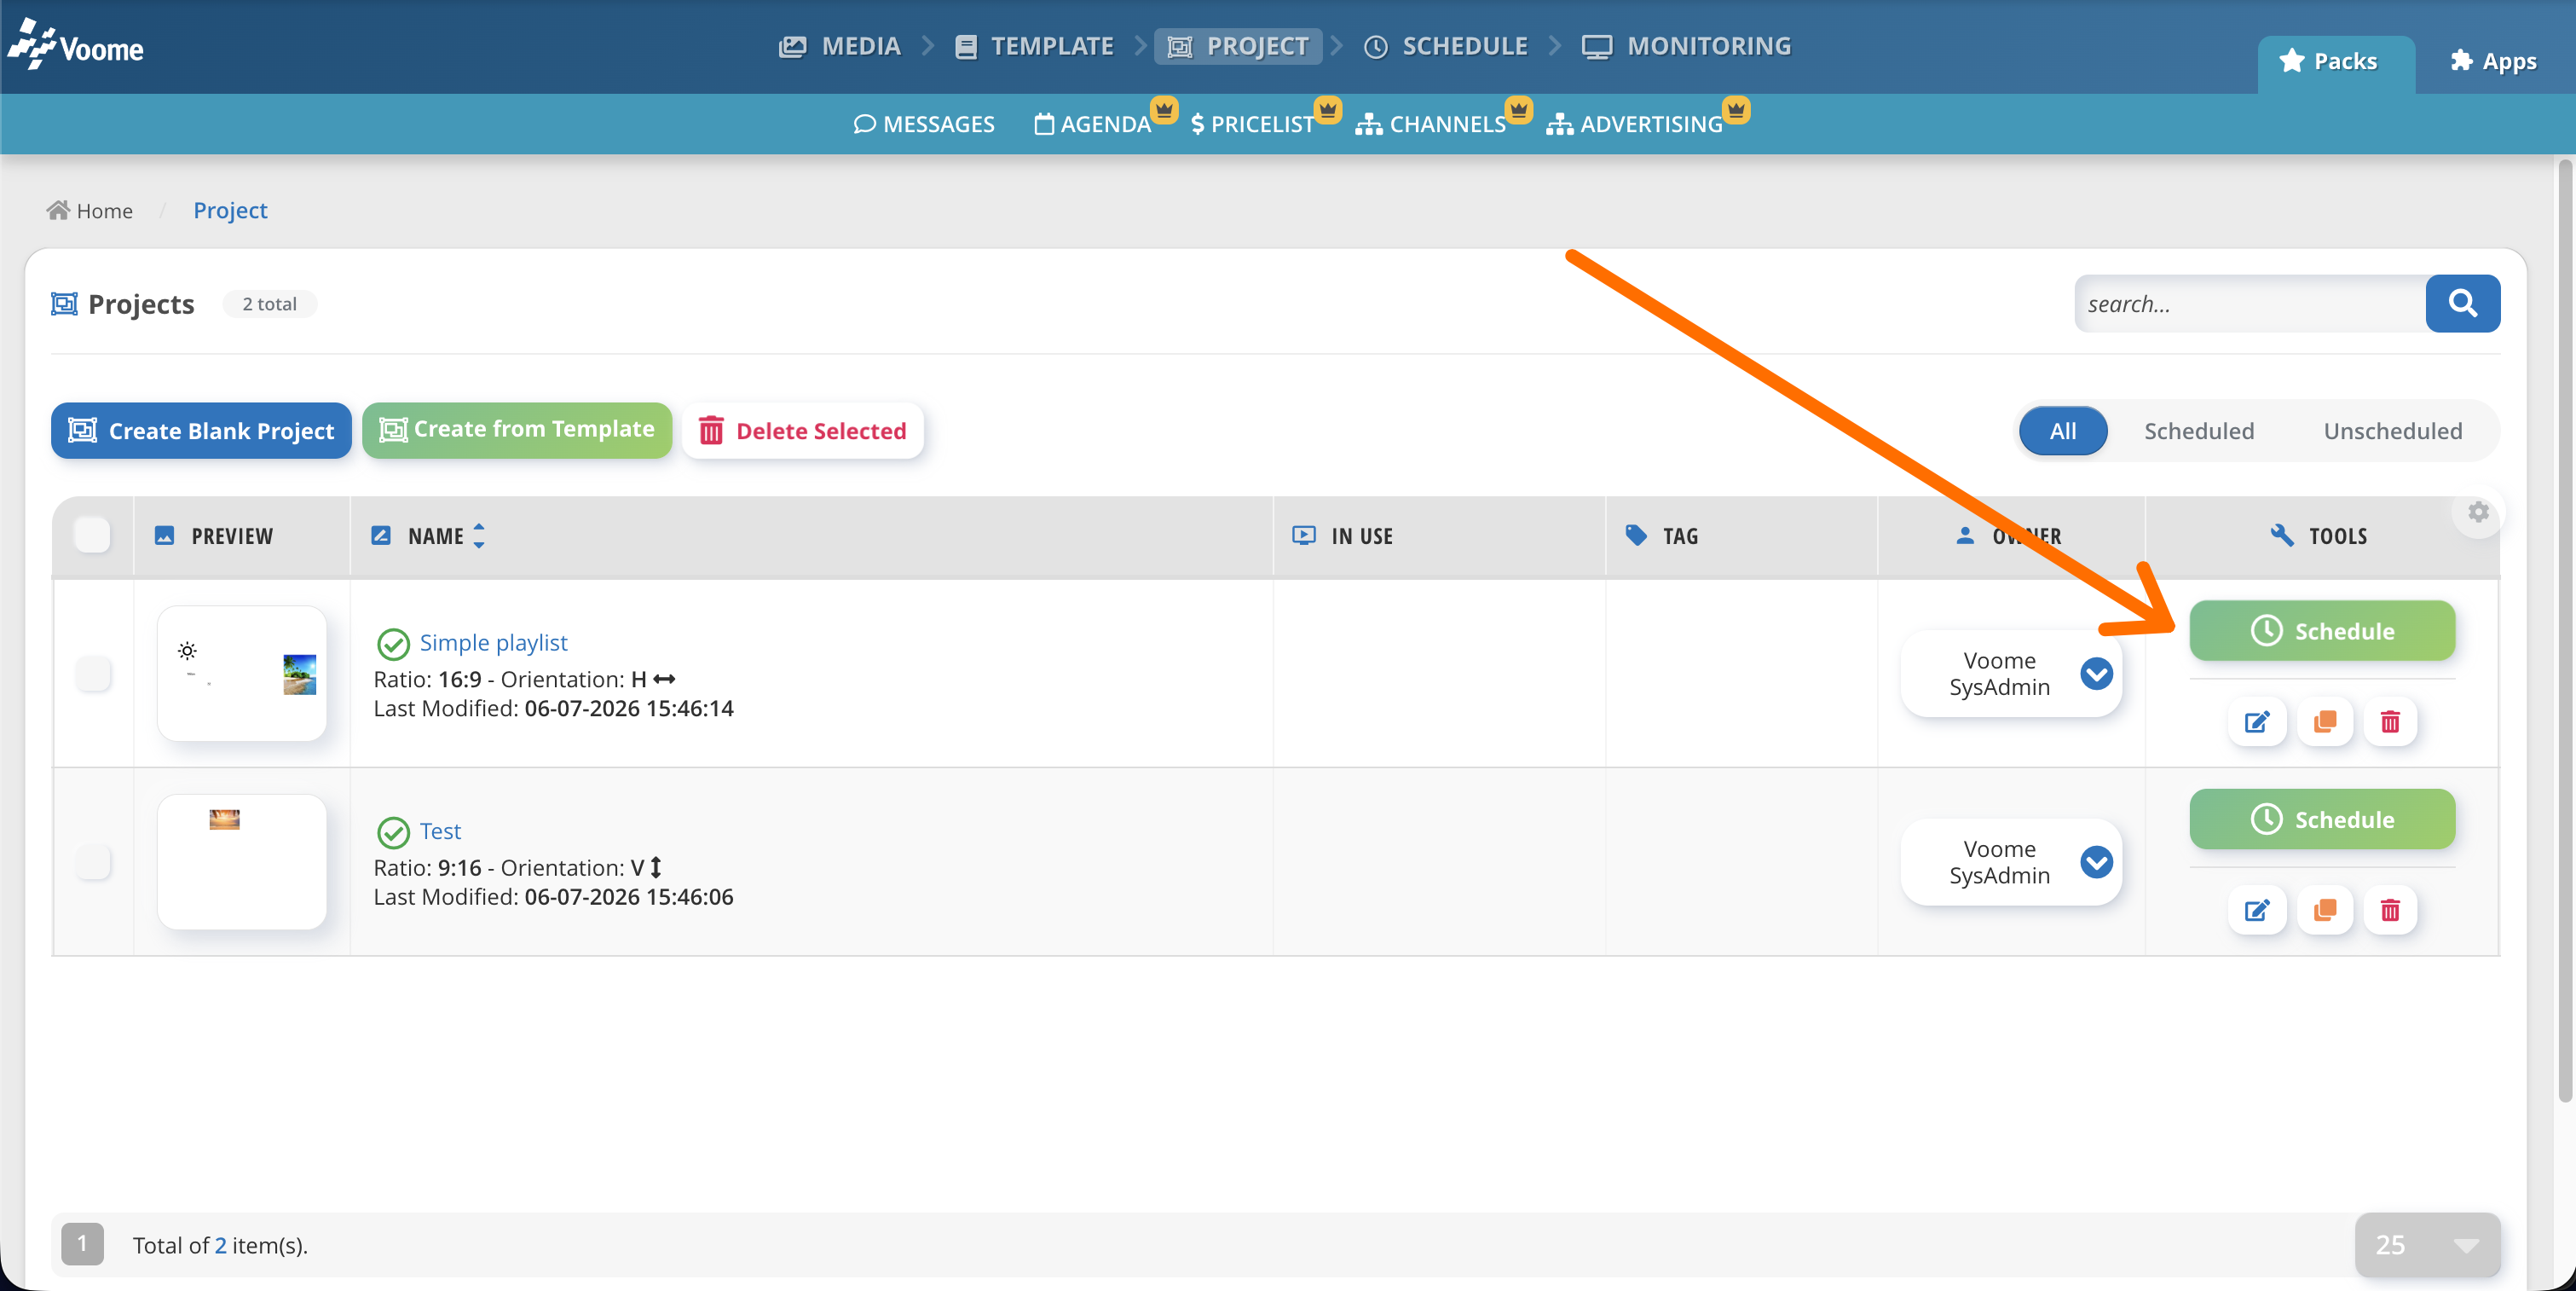
To start the scheduling process, press the SCHEDULE button on a project, either from the projects list or from within the specific project editor (more details in the Projects section).
You will be prompted with two questions:
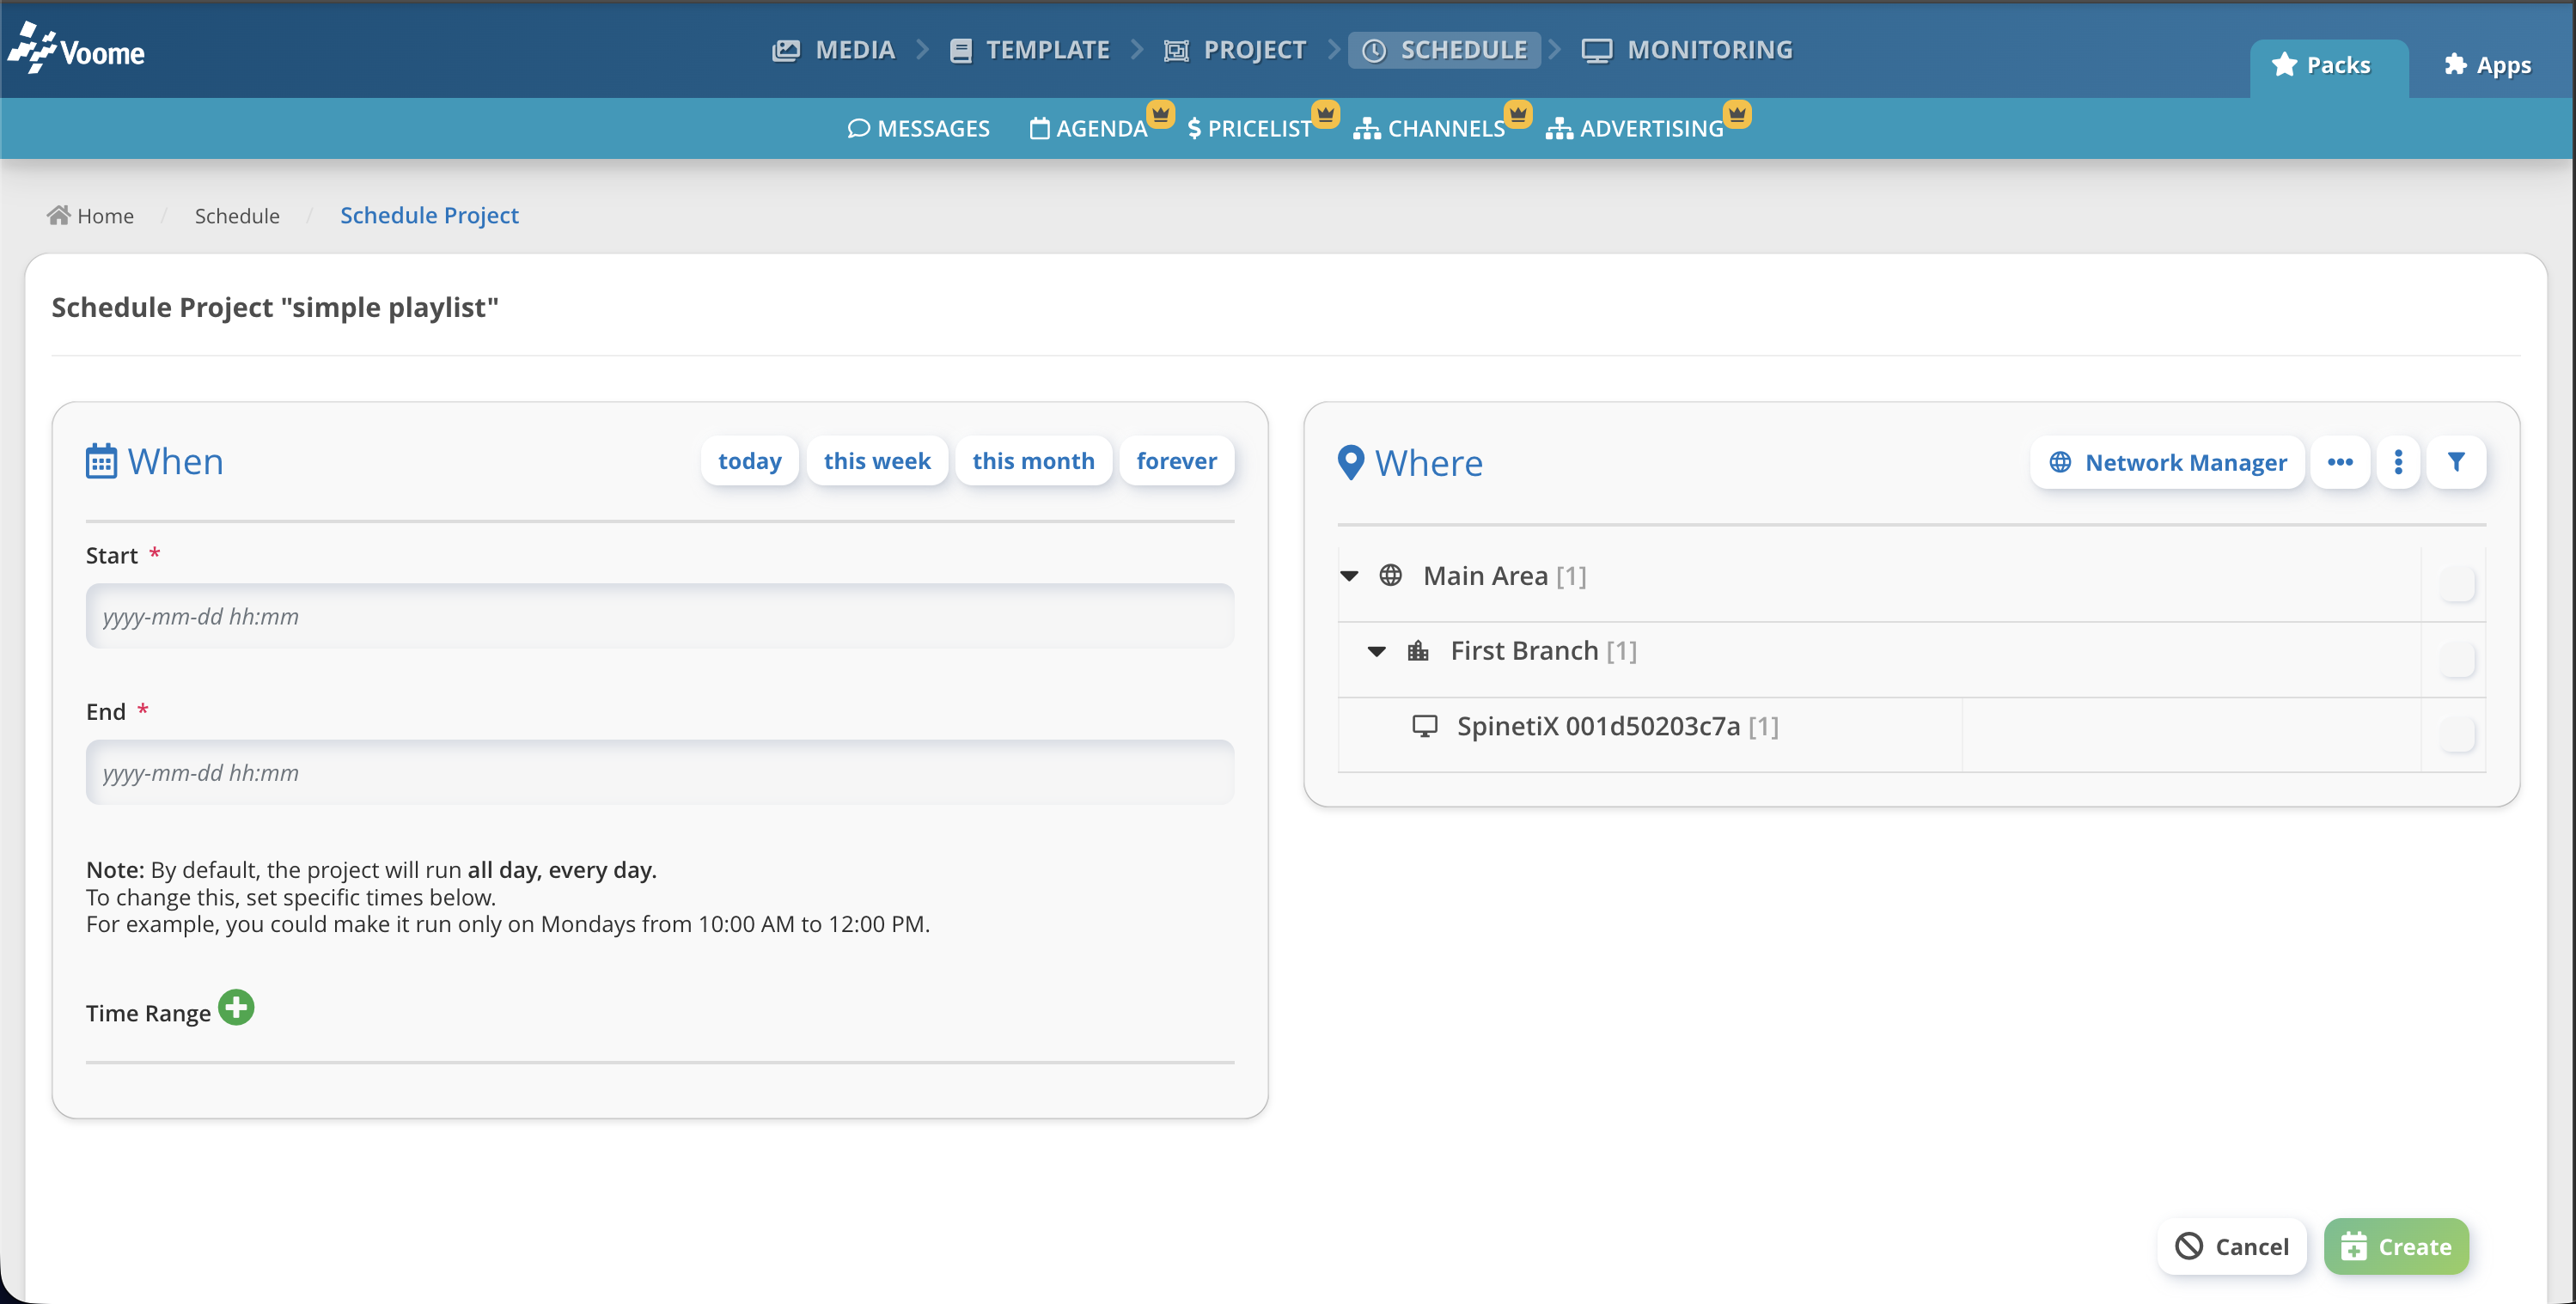
- When do you want to see this project? (on the left 👈🏼)
- Set how long the scheduling timespan lasts. You can specify a start and end date and time, or use one of the presets above (today, this week, this month, forever).
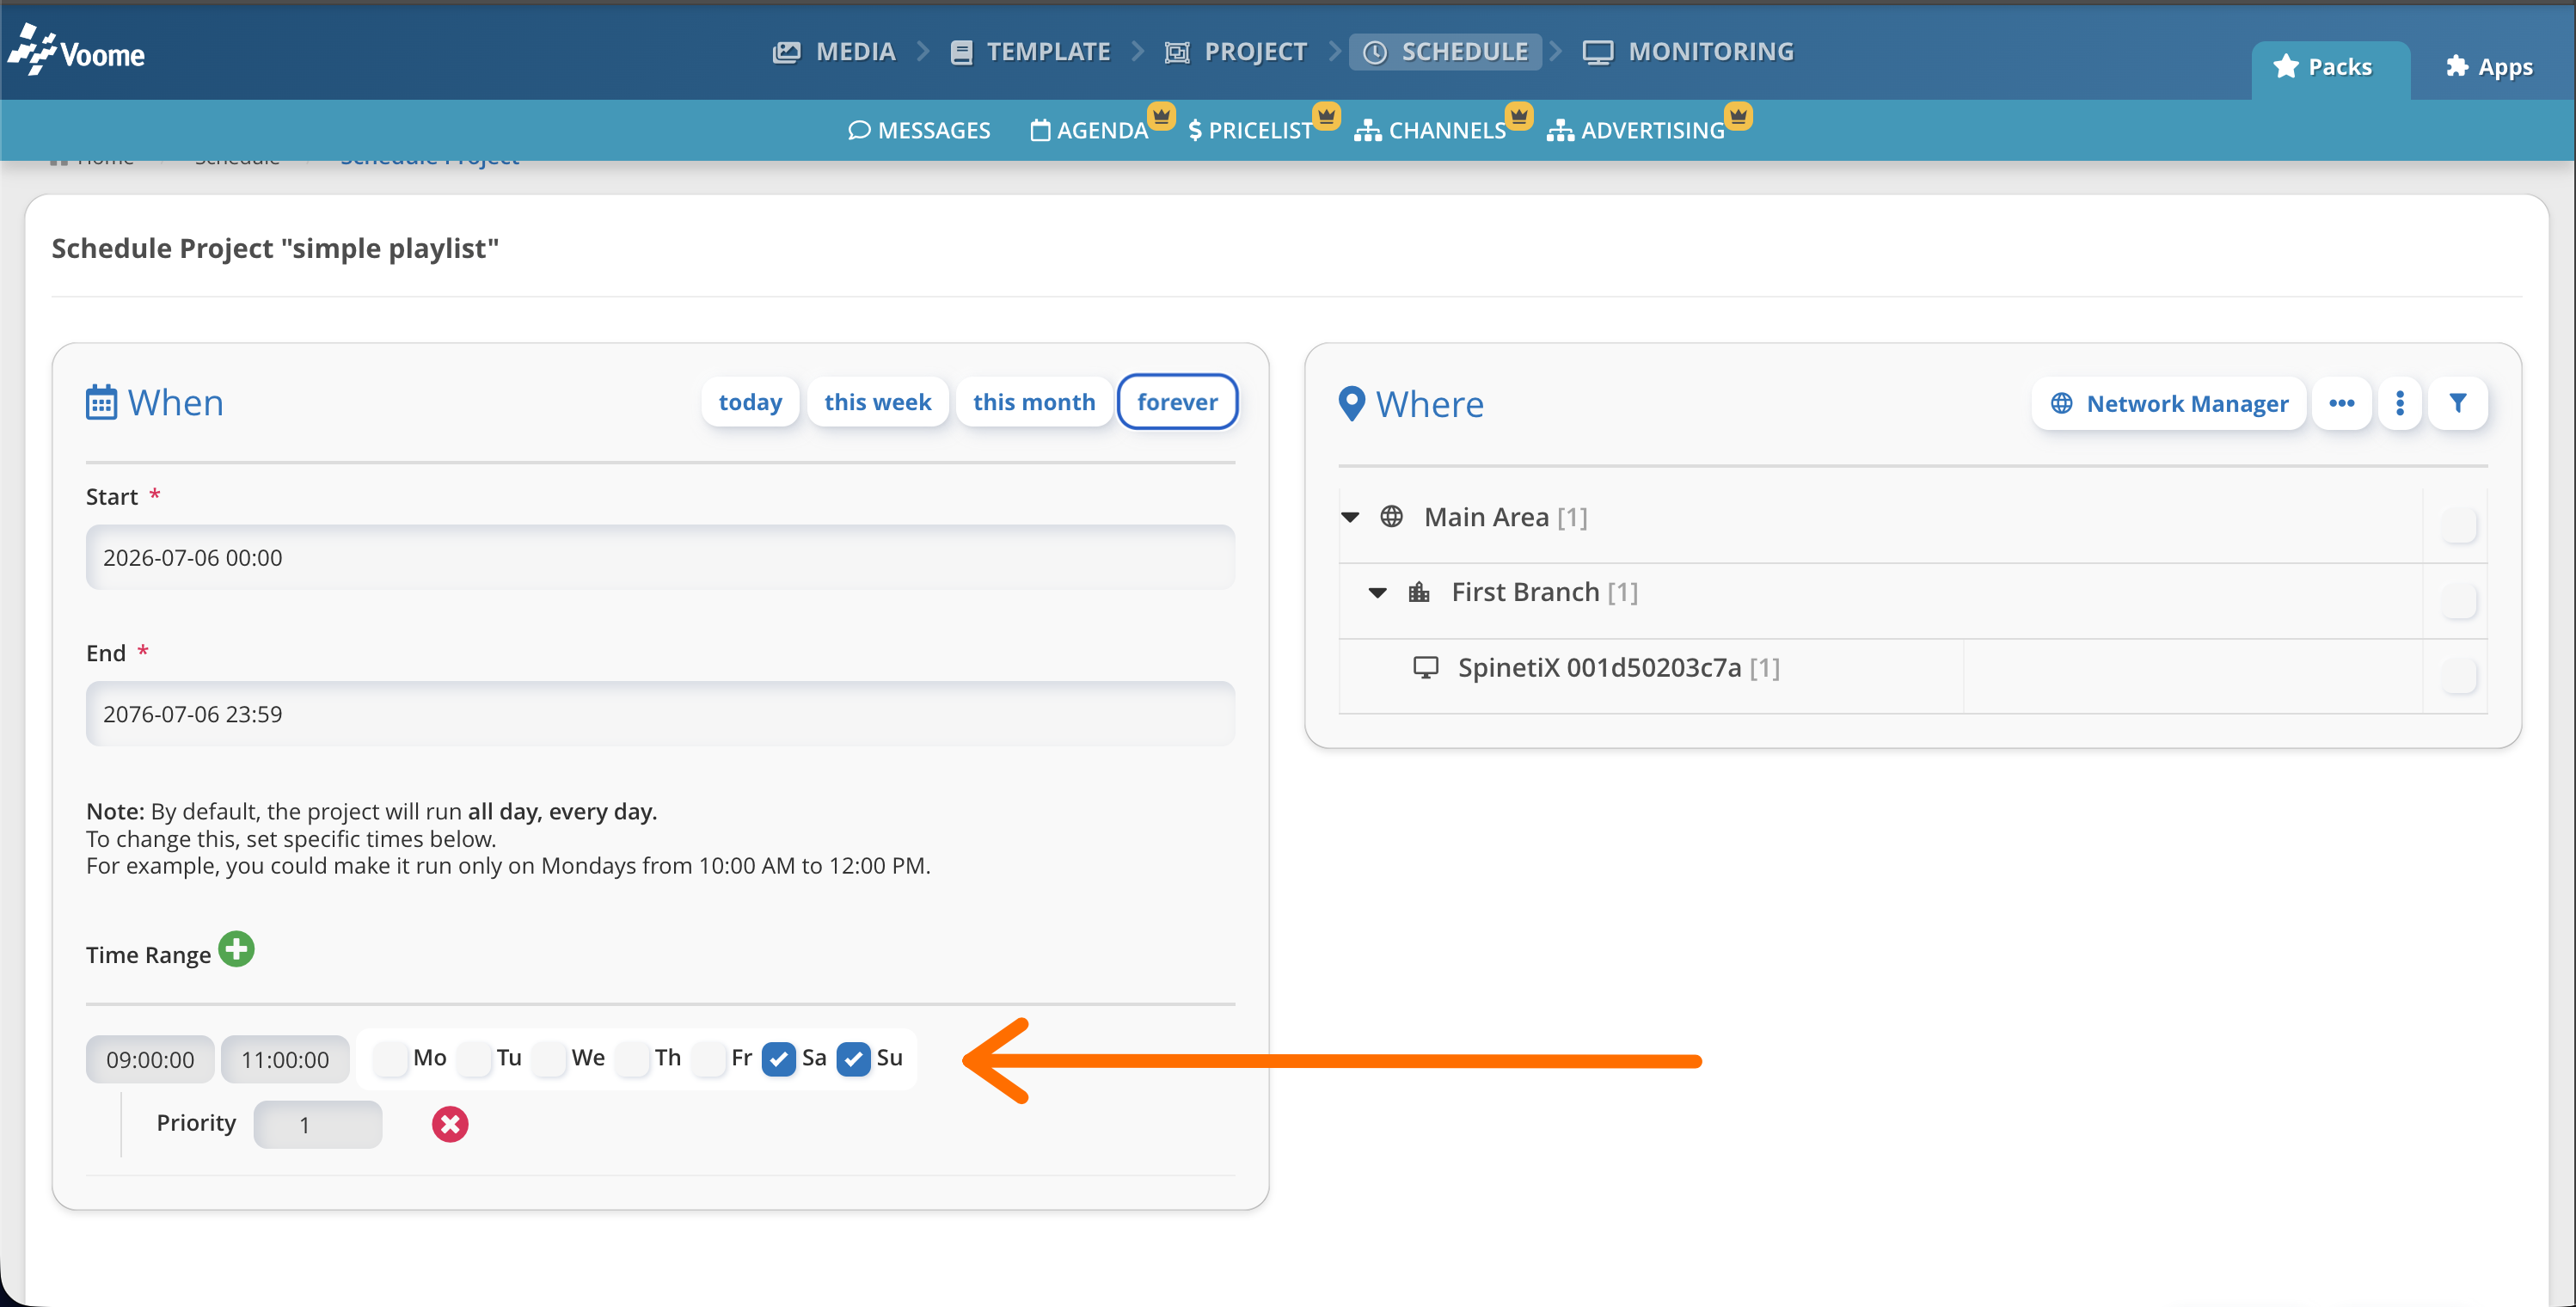
- Within the chosen timespan, you can also select a custom time range.
E.g. within the next 50 years (scheduled above), I want this project shown only on Saturdays and Sundays from 9:00 am to 11:00 am.
- Where do you want to see this project? (on the right 👉🏼)
- Here you can see all the areas/branches/zones granted to your user's group (see more in the Network Manager section).
- Select the checkbox for the area/branch/zone where you want to create the new schedule.
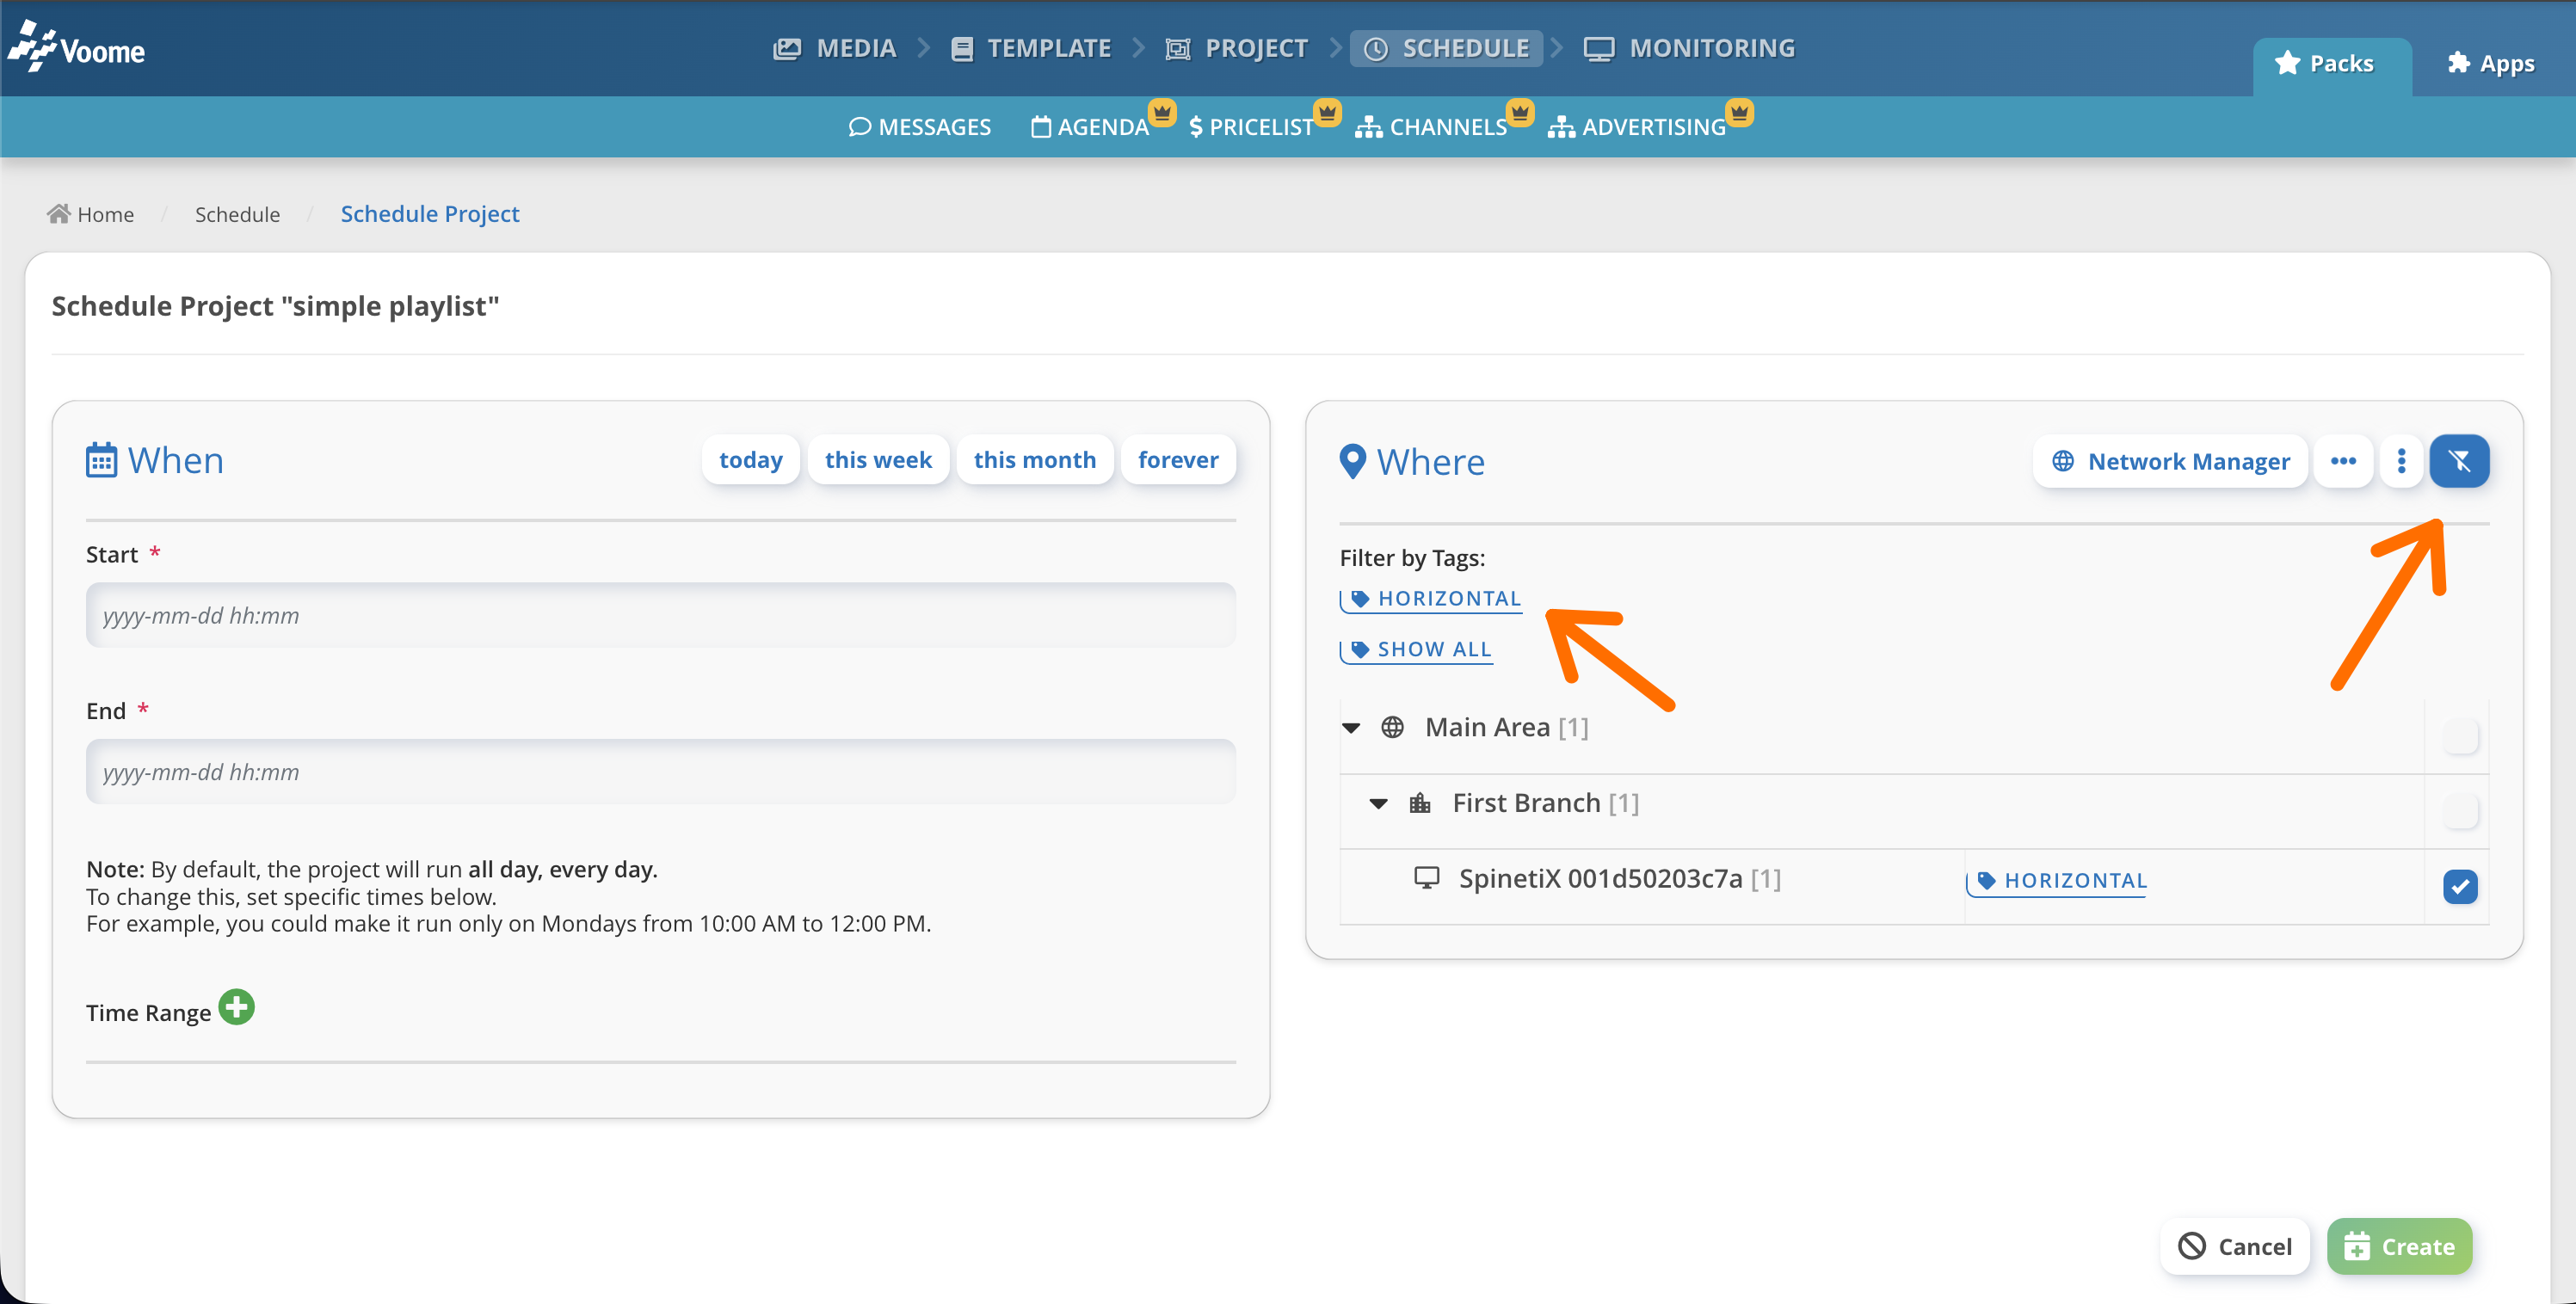
- Select multiple zones by tag: if you have set tags on your devices, click the filter button (top-right corner) to select, in one click, all the devices with a specific tag.
E.g. if you want to create this schedule for all the "horizontal" (tagged) devices across the entire network.
⏳ The Scheduling: Timeline
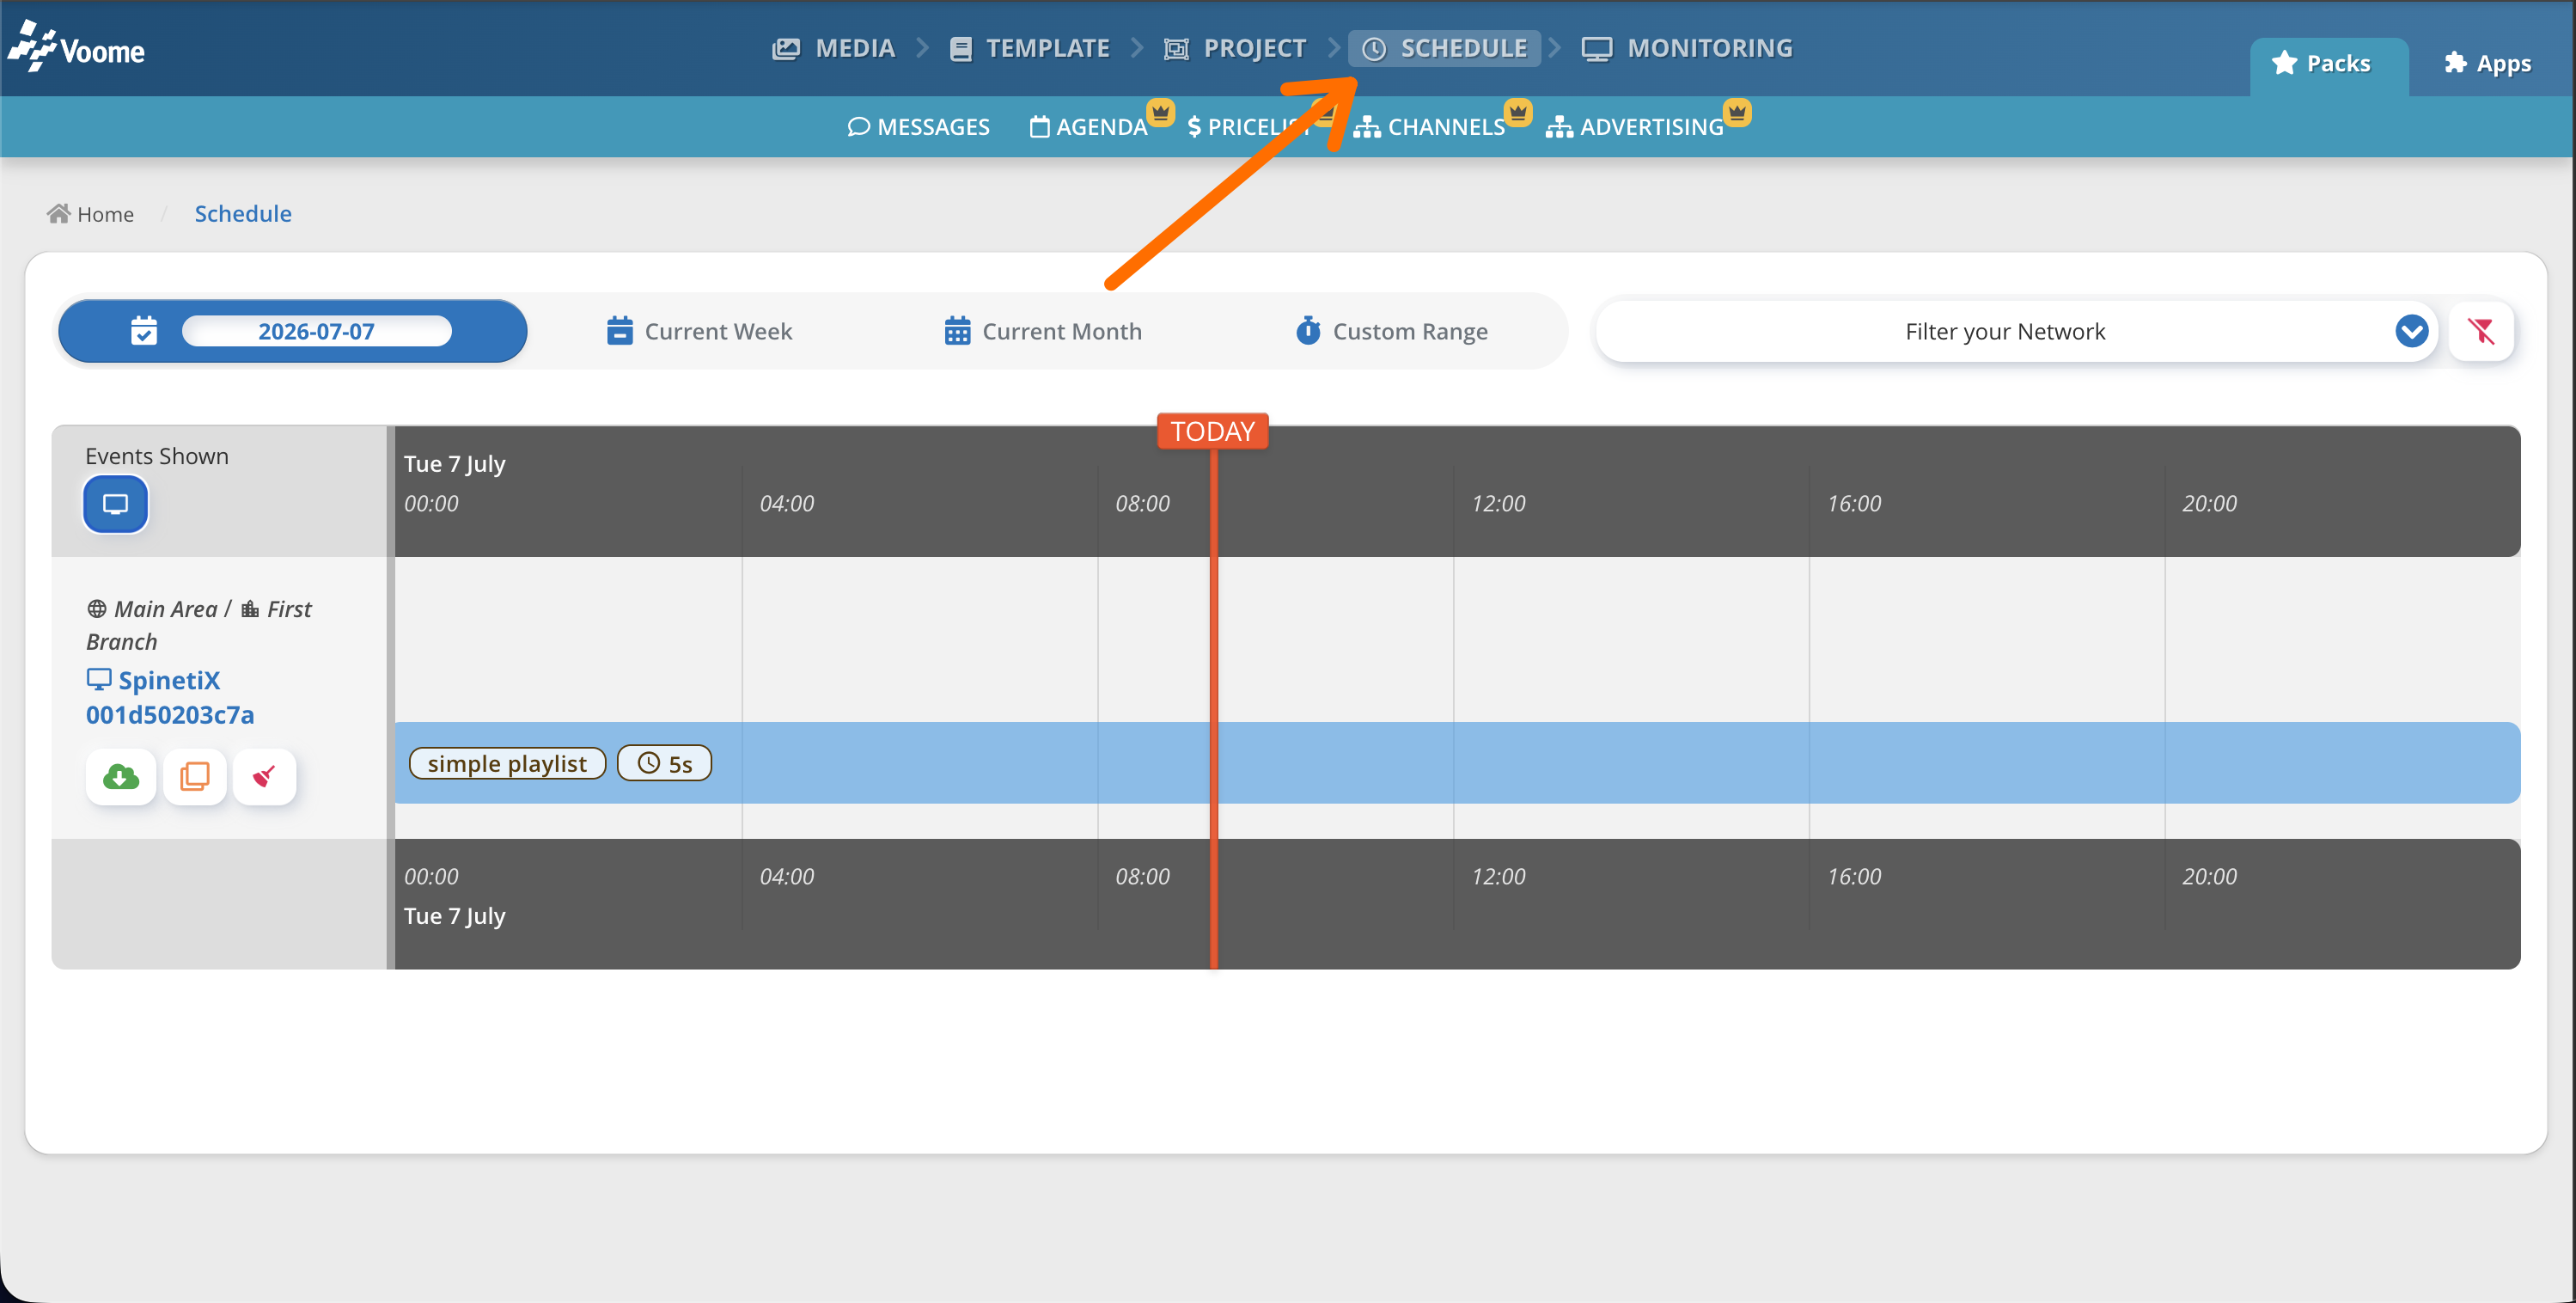
Once you have scheduled your project in the previous step, you are redirected automatically to the Schedule section page. Here you have a timeline view of which projects are scheduled across all the branches/zones visible to your group. All the available branches/zones are presented in a table (e.g. here Main Area / First Branch / Spinetix 001d5...).
🔍 The Scheduling: Filters
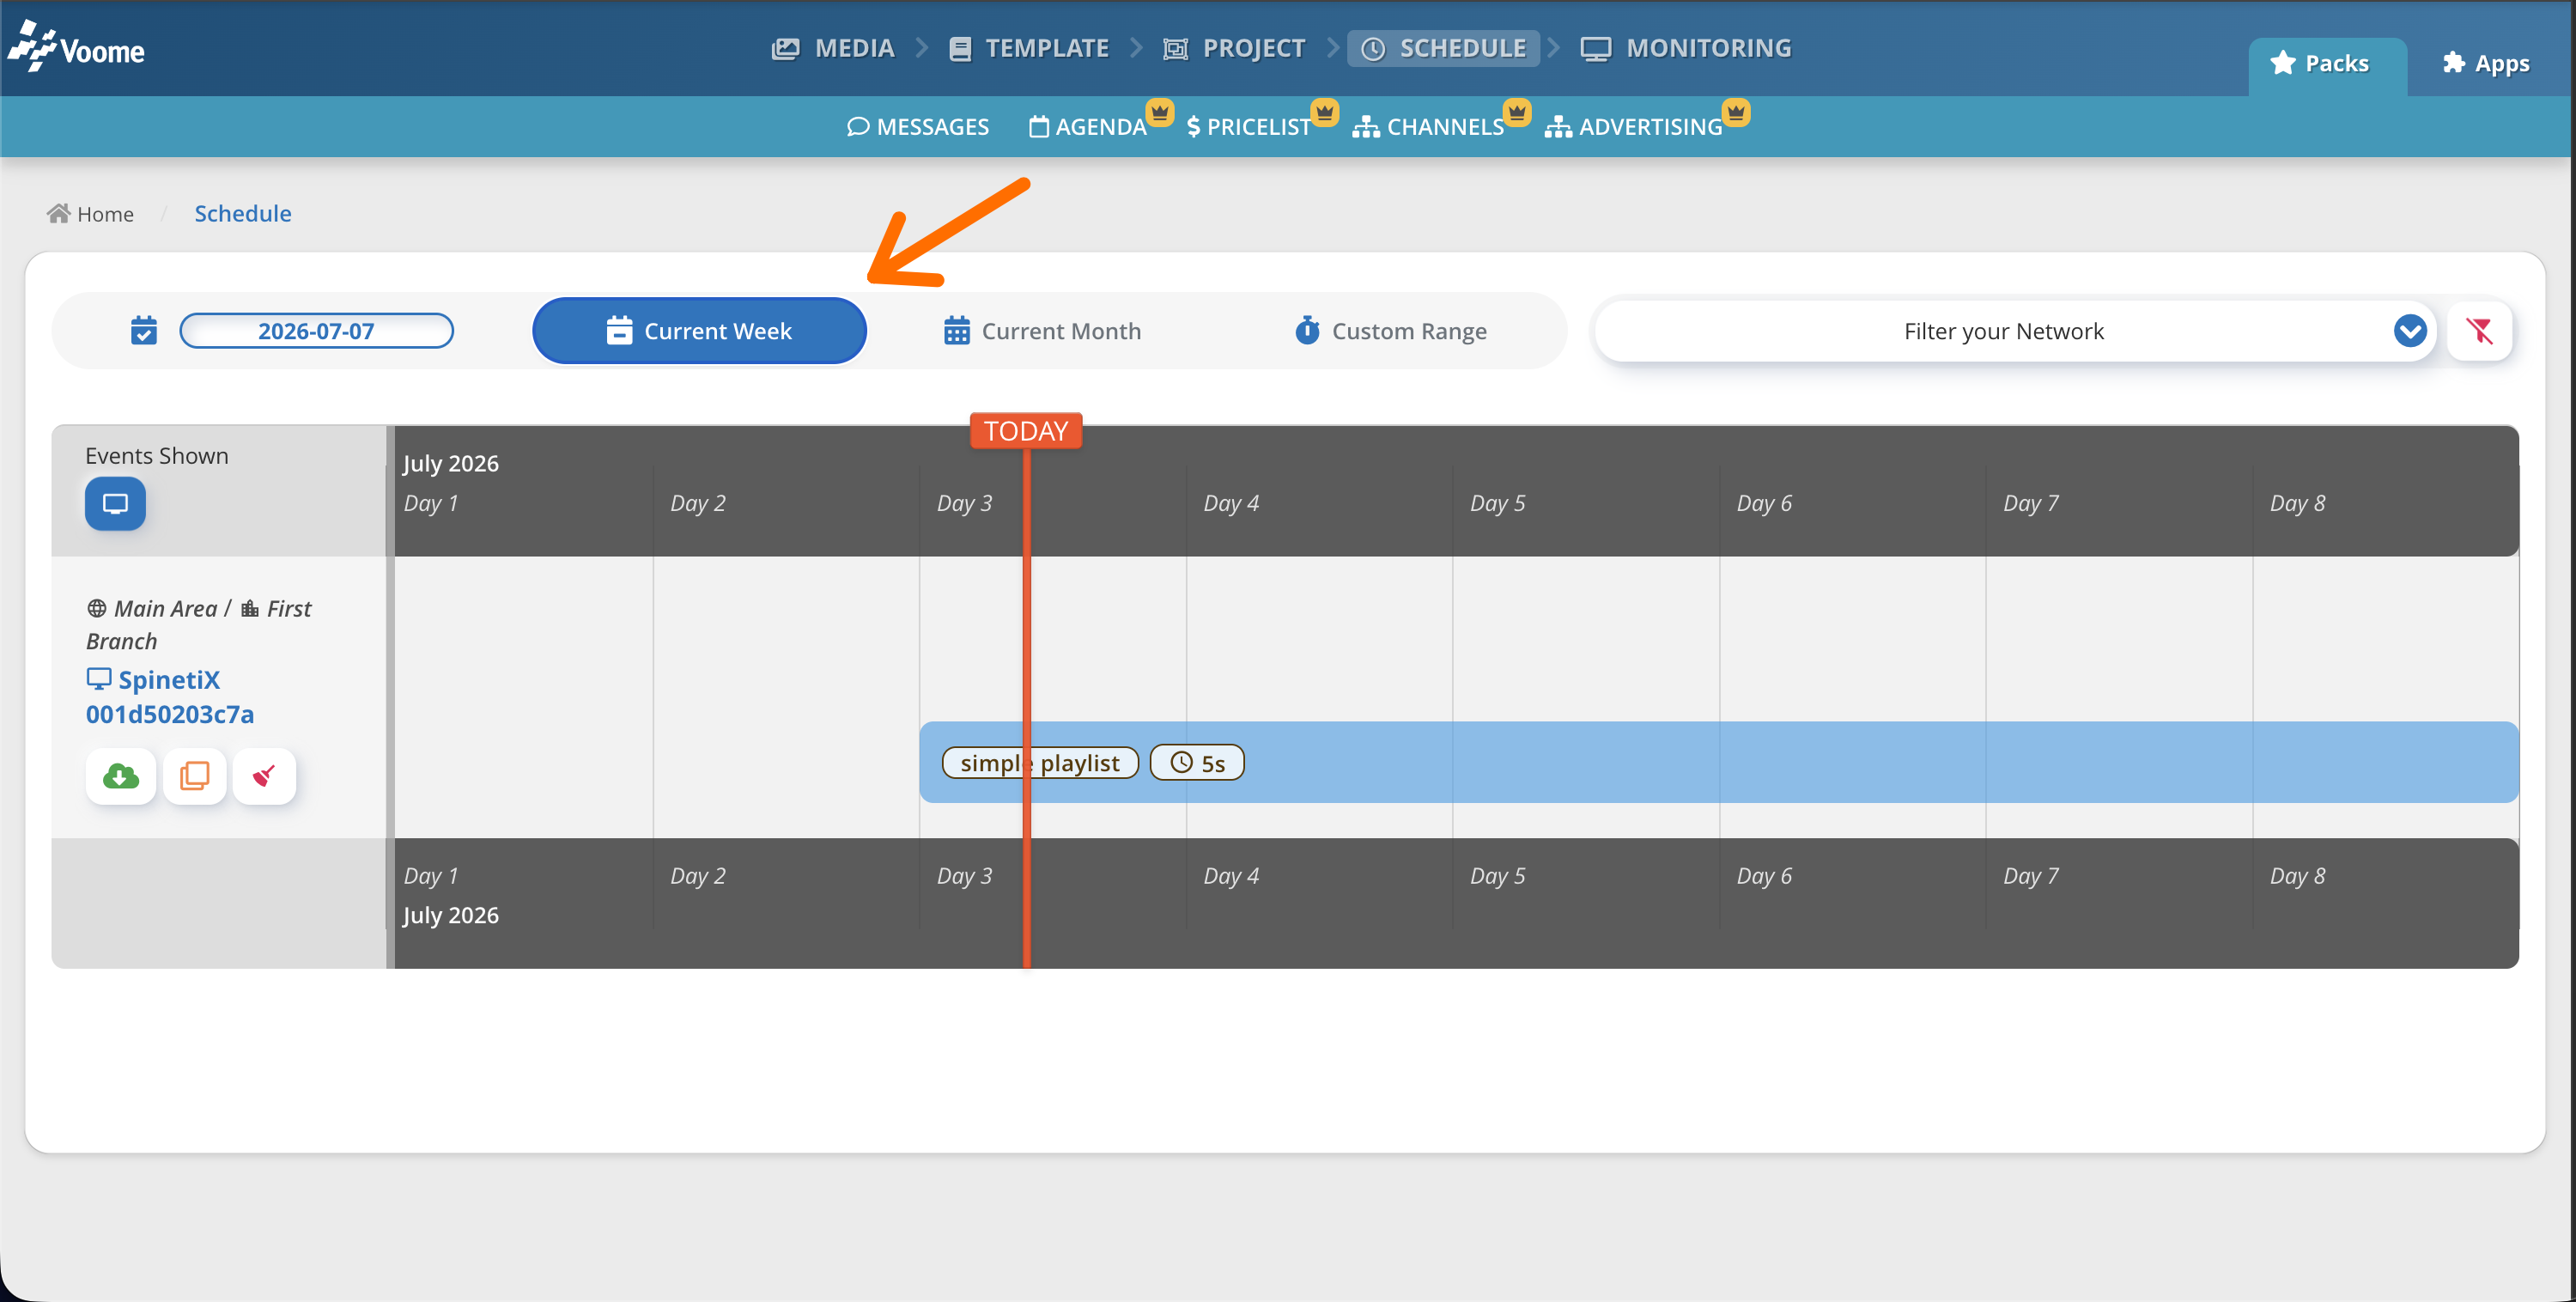
At the top of the view you can find the scheduling filters. Use them to change the visible timespan below. You can:
- Pick a day (e.g. 2026/07/07) -> from midnight to midnight
- Pick the current week -> from Sunday to the following Sunday
- Pick the current month -> from the 1st to the last day of the current month
- Pick a custom time range -> define your own dates
🏗️ The Scheduling: Row Actions
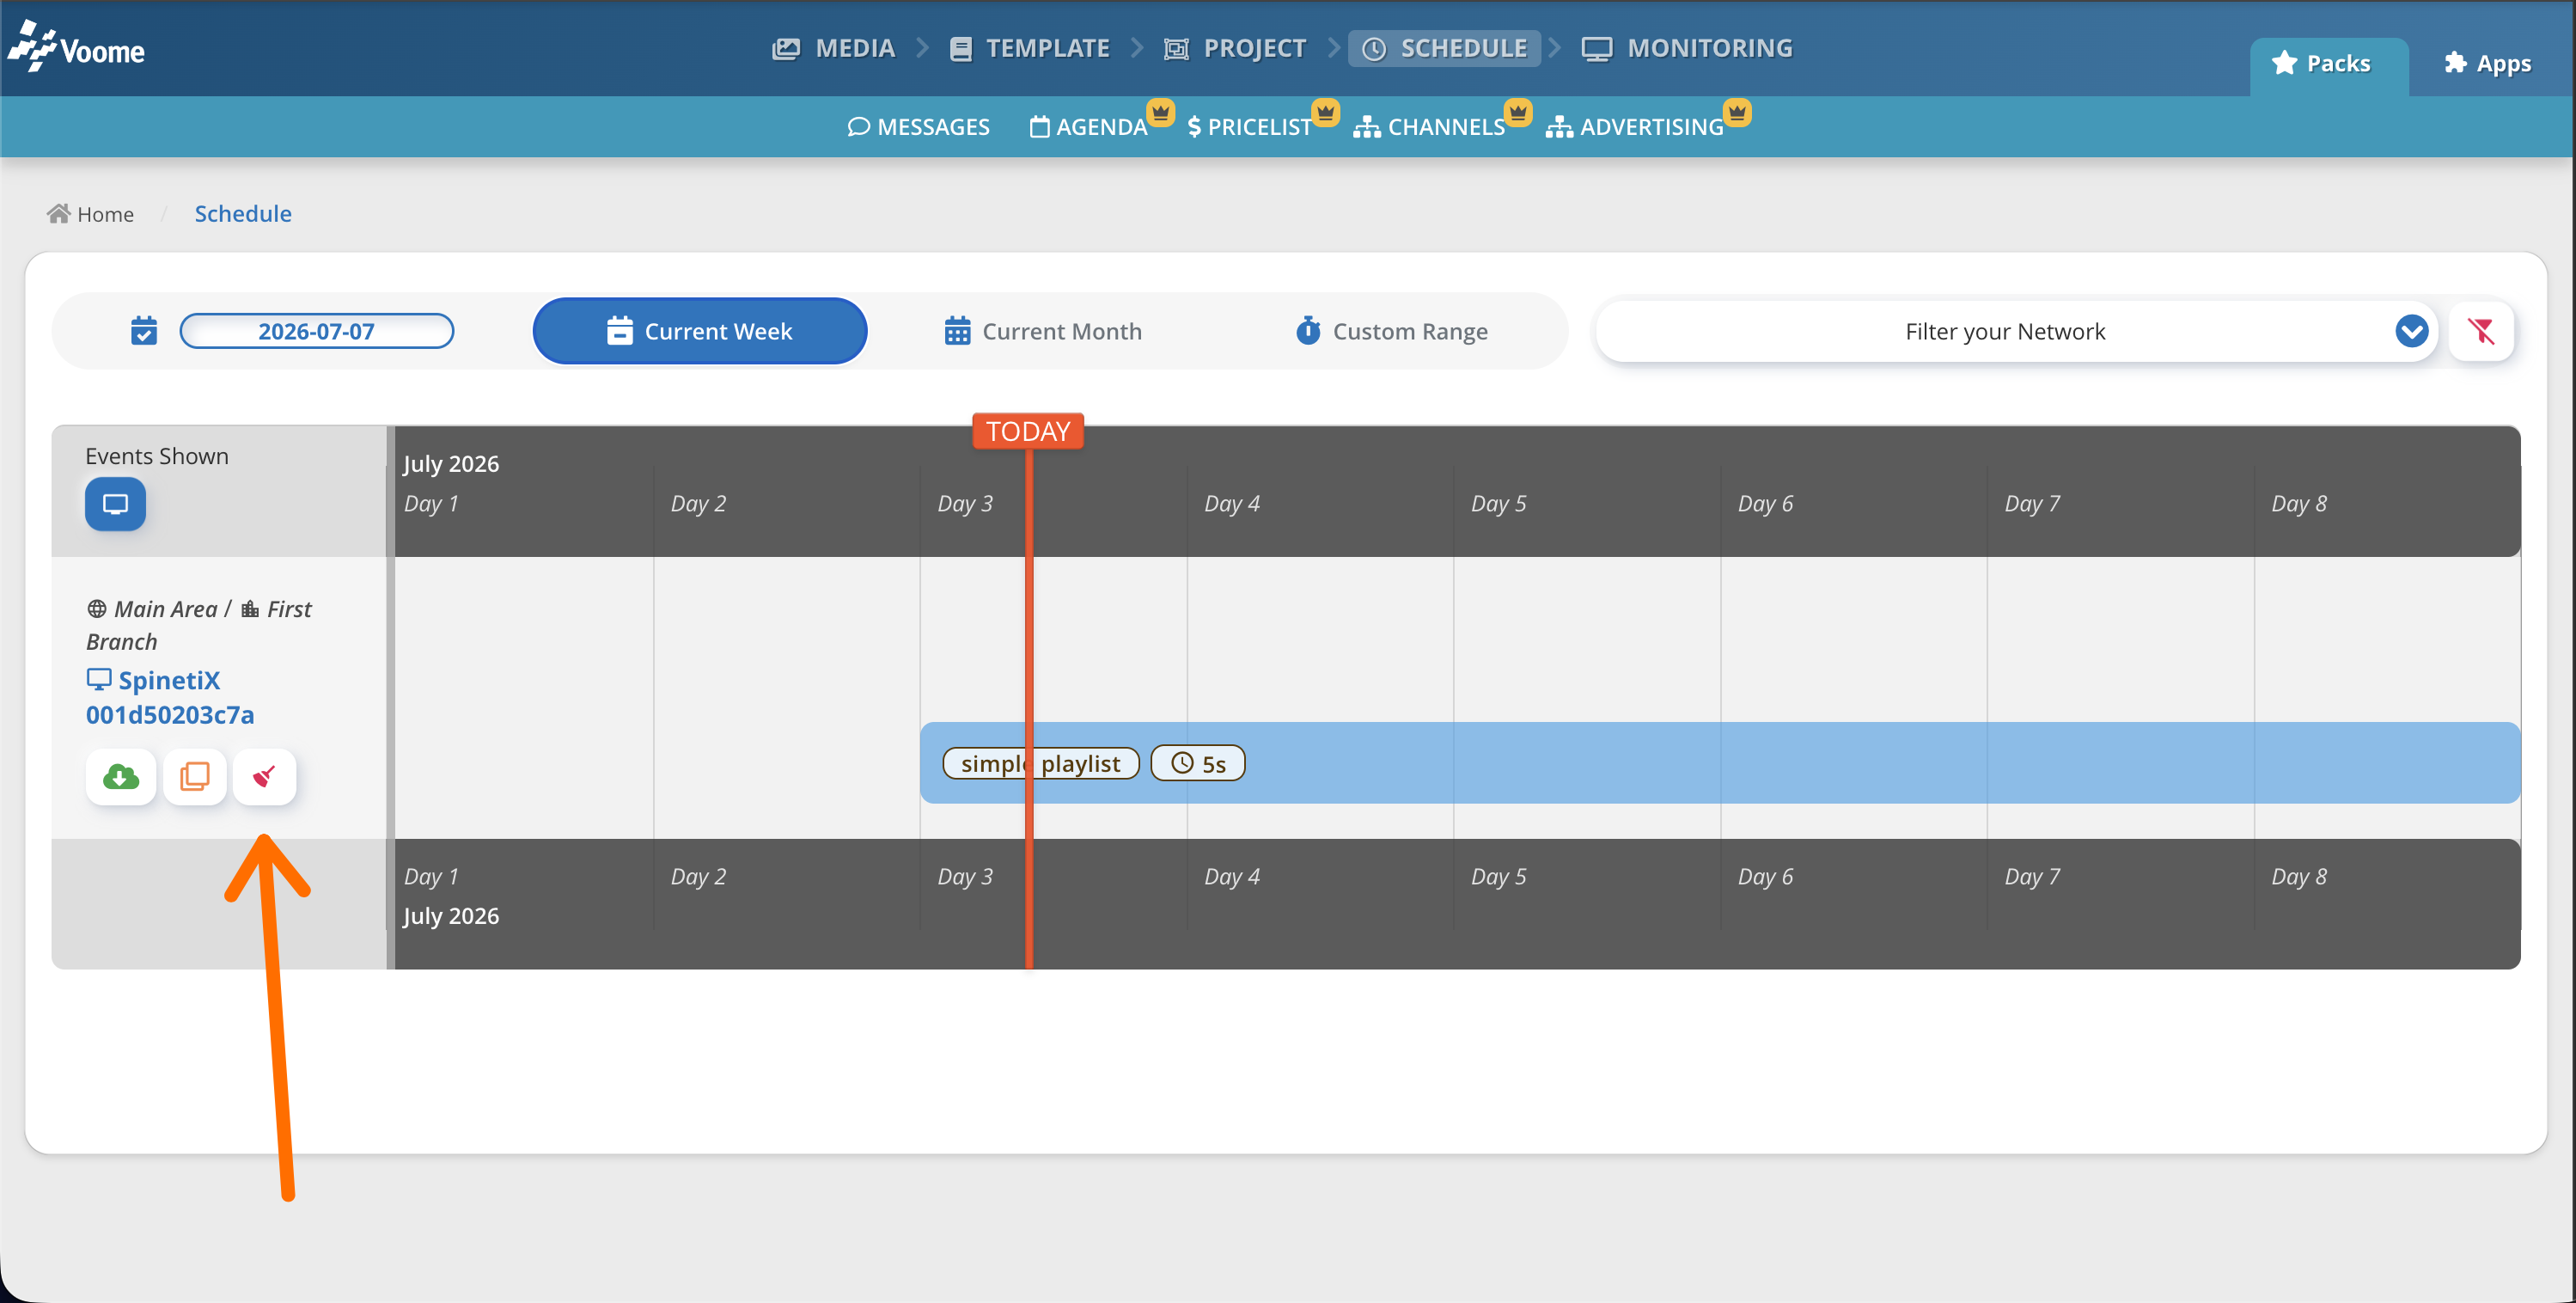
Within each row you can:
-
Publish per zone (green button): publish to every physical device within the zone (refer to Devices).
-
Duplicate (orange button): copy the entire zone's schedule, useful when you want to copy all the scheduled projects and their timing to a different zone.
-
Clean-up (red button): remove all the scheduled projects from the selected zone.
Remove scheduleRemoving a project from the Schedule section does not delete the project itself. The project still lives in the Project section, and you can schedule it again as many times as you like, across multiple zones.
🗂️ The Scheduling: Sidebar
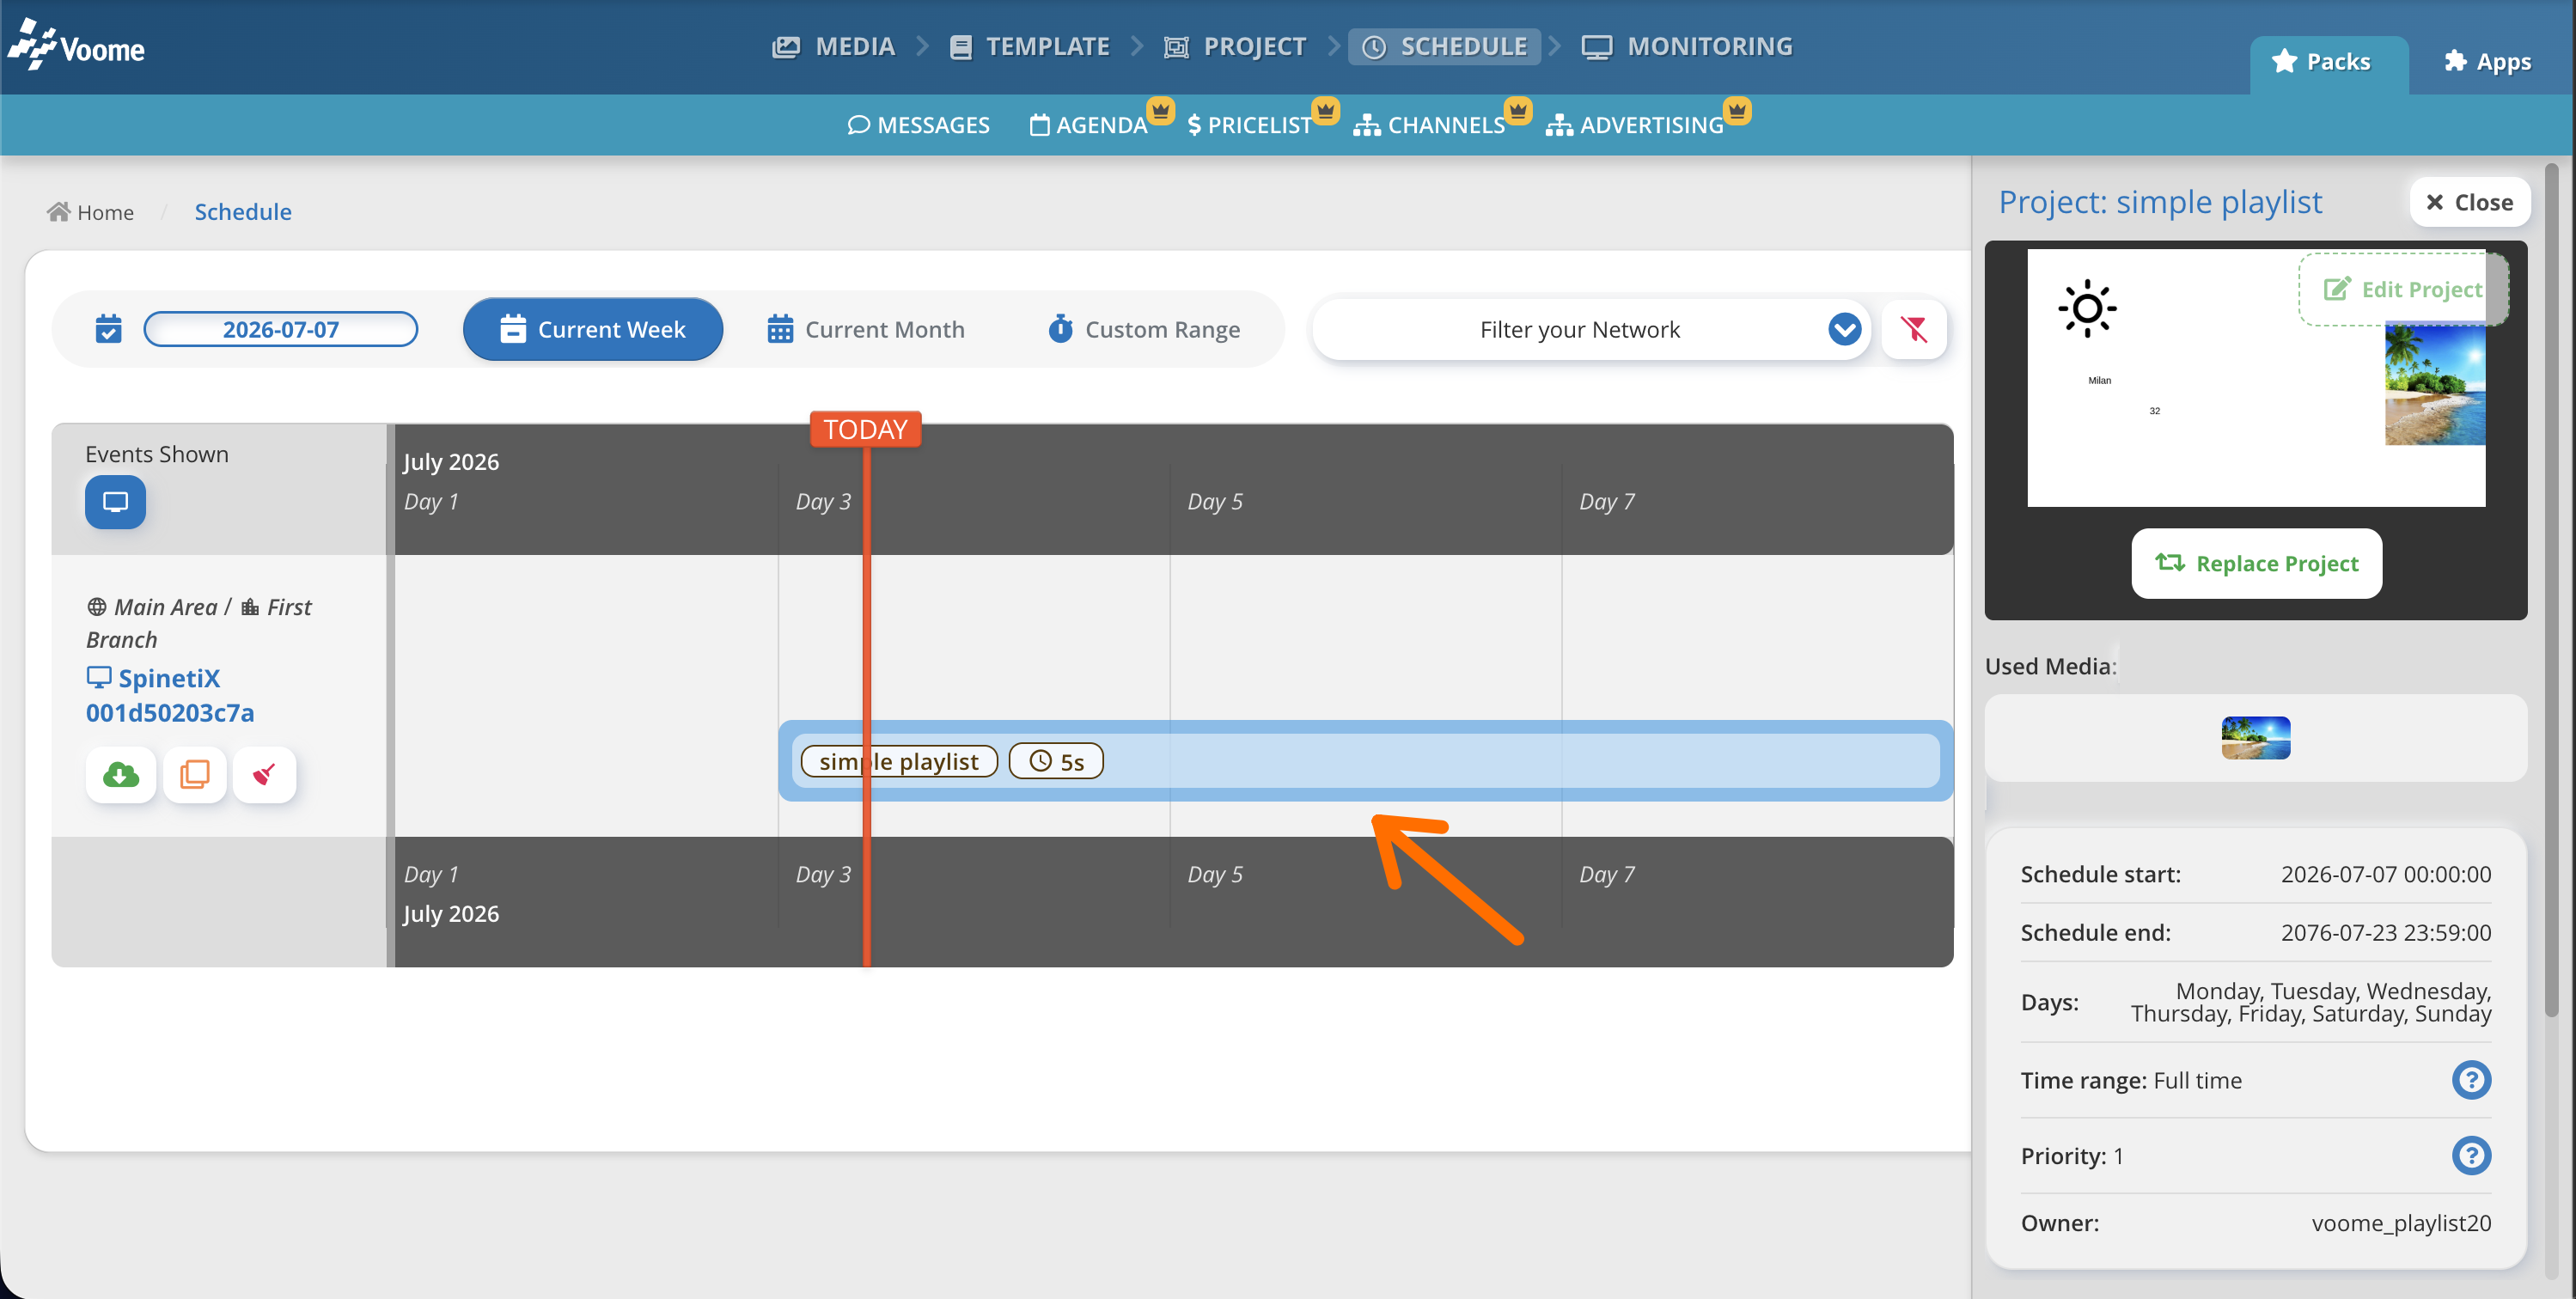
Click a scheduled project in the timeline to open the details sidebar on the right. Here you can see all the details about the project itself: a preview of the project, the media used within it, the project owner, and when the schedule starts and ends, and more.
Finally, if you scroll down, you can 👥 clone the schedule, ✏️ edit it, or 🗑️ delete that single schedule.
🔄 The Scheduling: The Cycle
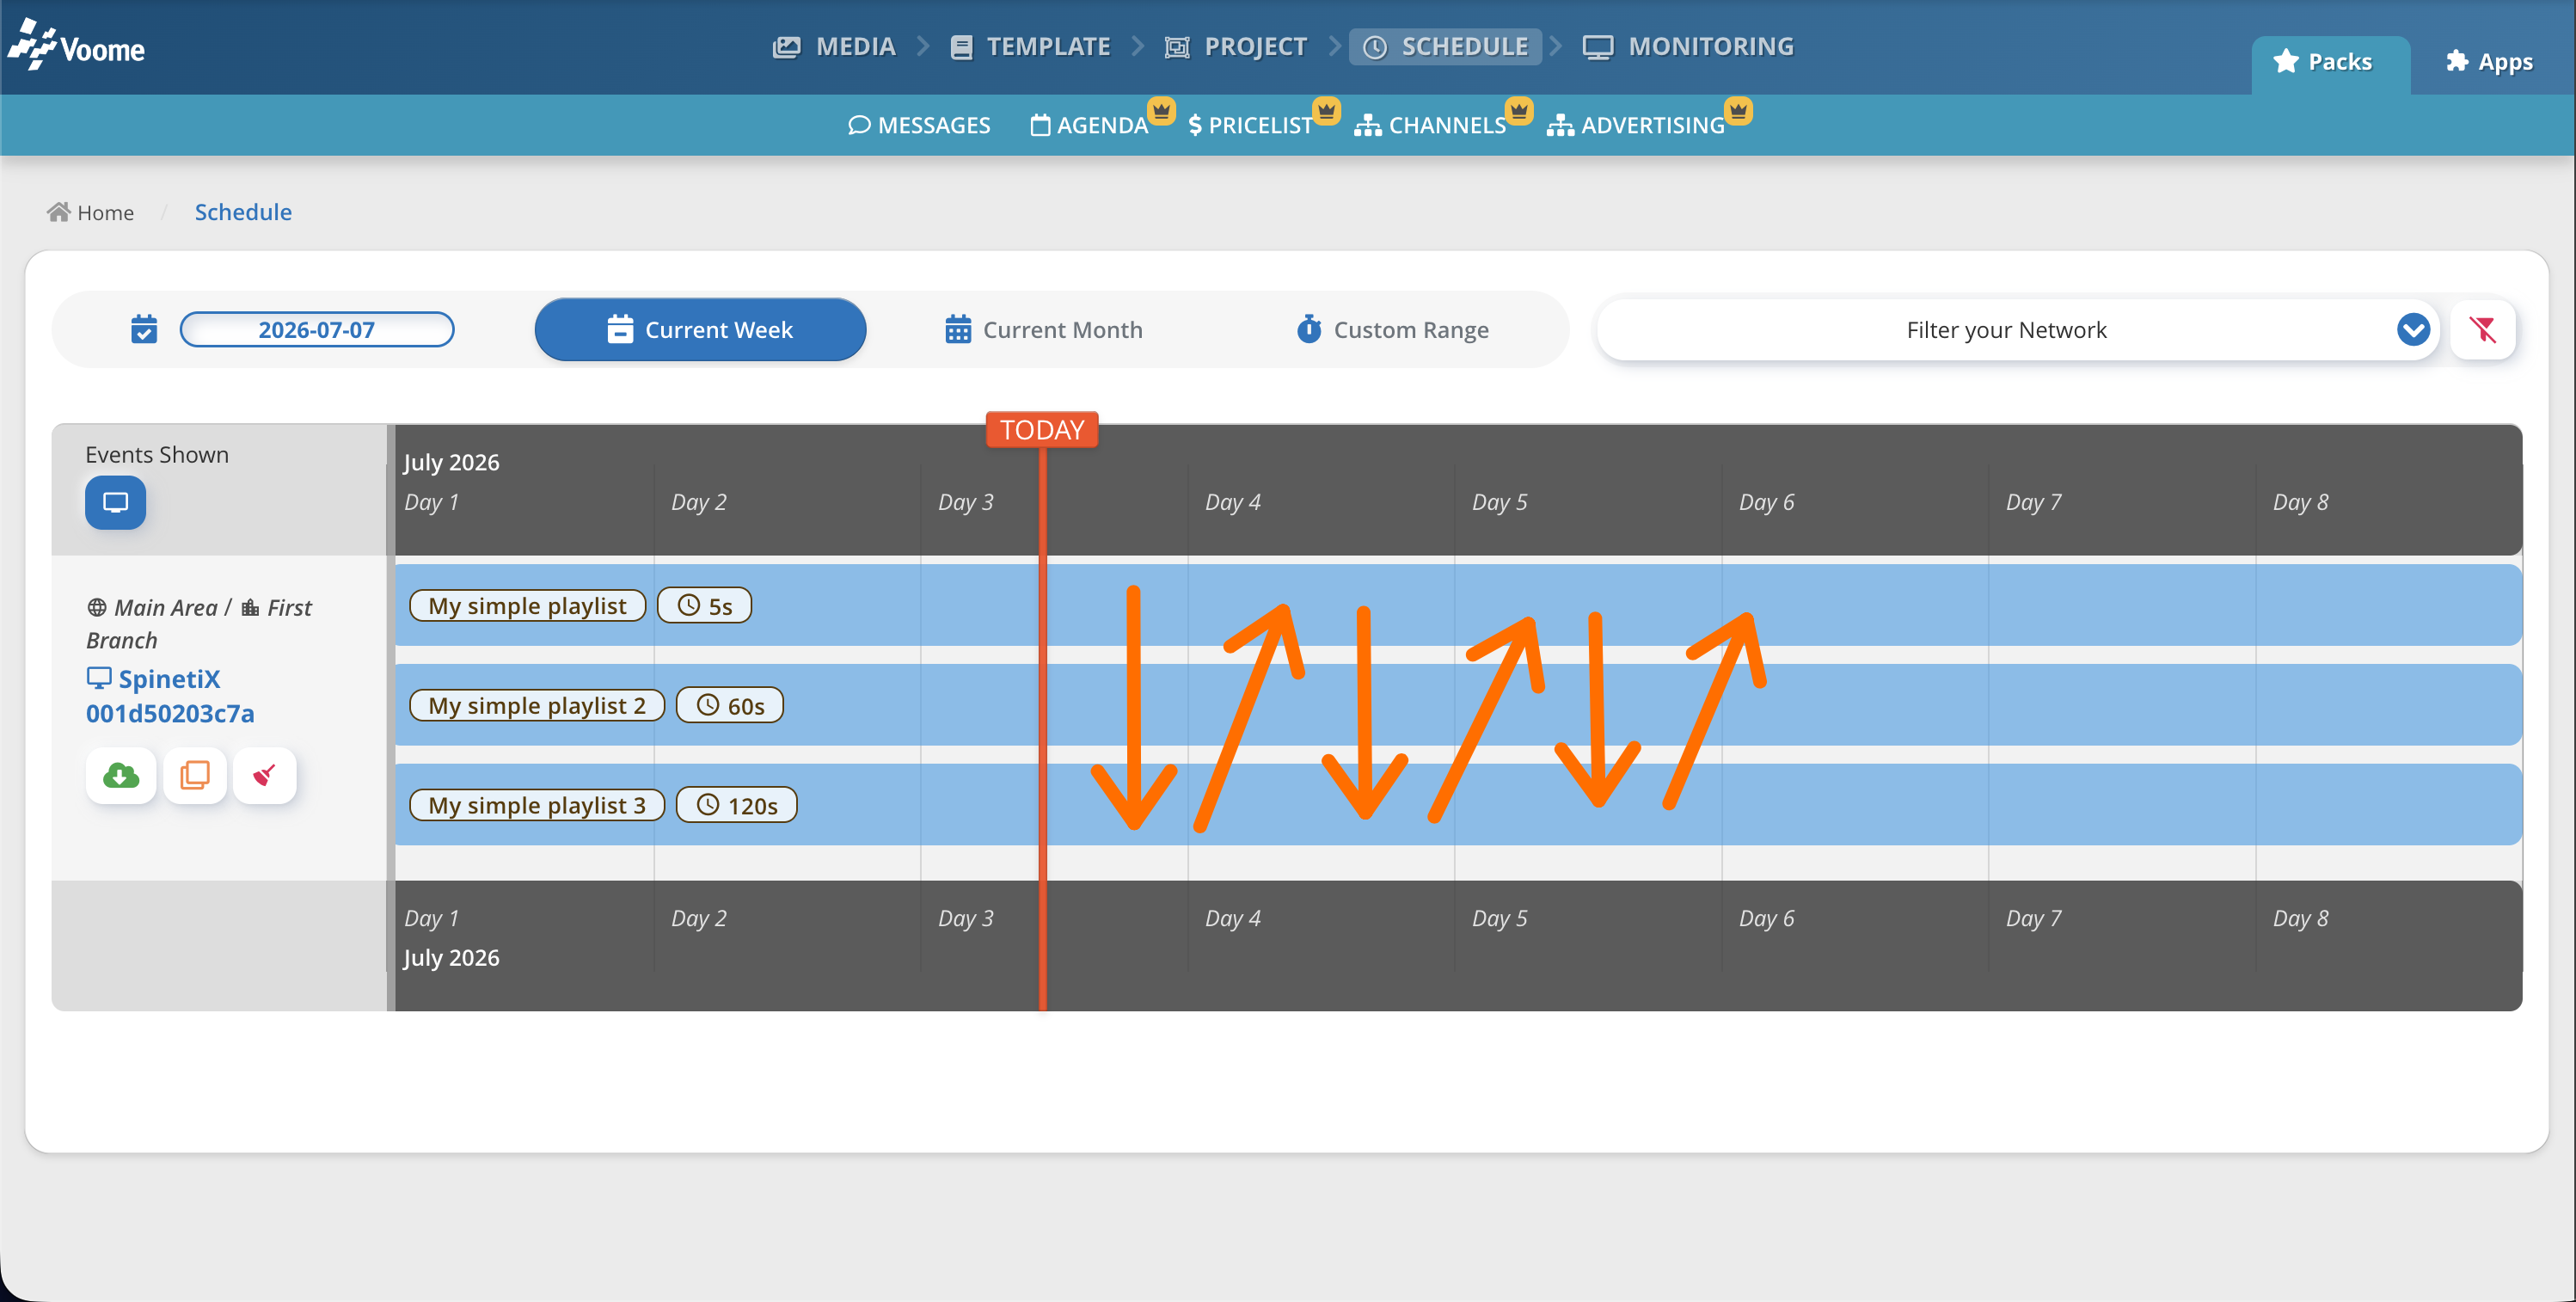
Once you schedule several projects in the same zone, you will see their respective schedules stacked on top of each other, like in the image below.
Let's examine the example below: we have three projects, each scheduled for the entire month. Once the player(s) in this zone (under Main Area / First Branch / Spinetix 001d...) receive this schedule, they start a scheduling cycle. The first project played is the one scheduled with the highest priority (or, if all projects have the same priority, it starts with the most recently scheduled one), in this case "My simple playlist" (you can tell because it sits physically at the top of the stack), and then it plays the next one.
So the current scheduling cycle is:
- My simple playlist -> lasts 5s
- My simple playlist 2 -> lasts 60s
- My simple playlist 3 -> lasts 120s
- Back to step 1
🔂 The Scheduling: Loop/Indefinite
If a scheduled project is set to loop (or has an indefinite duration), the scheduling cycle gets stuck on it: once the player reaches that project, it keeps playing it and never moves on. In the example below, even though three different projects are scheduled, only "My looped project" is shown on screen for as long as its schedule lasts. The other two projects never get a chance to play until "My looped project"'s schedule has ended.
To set/remove looped state see project | right bar | timing.
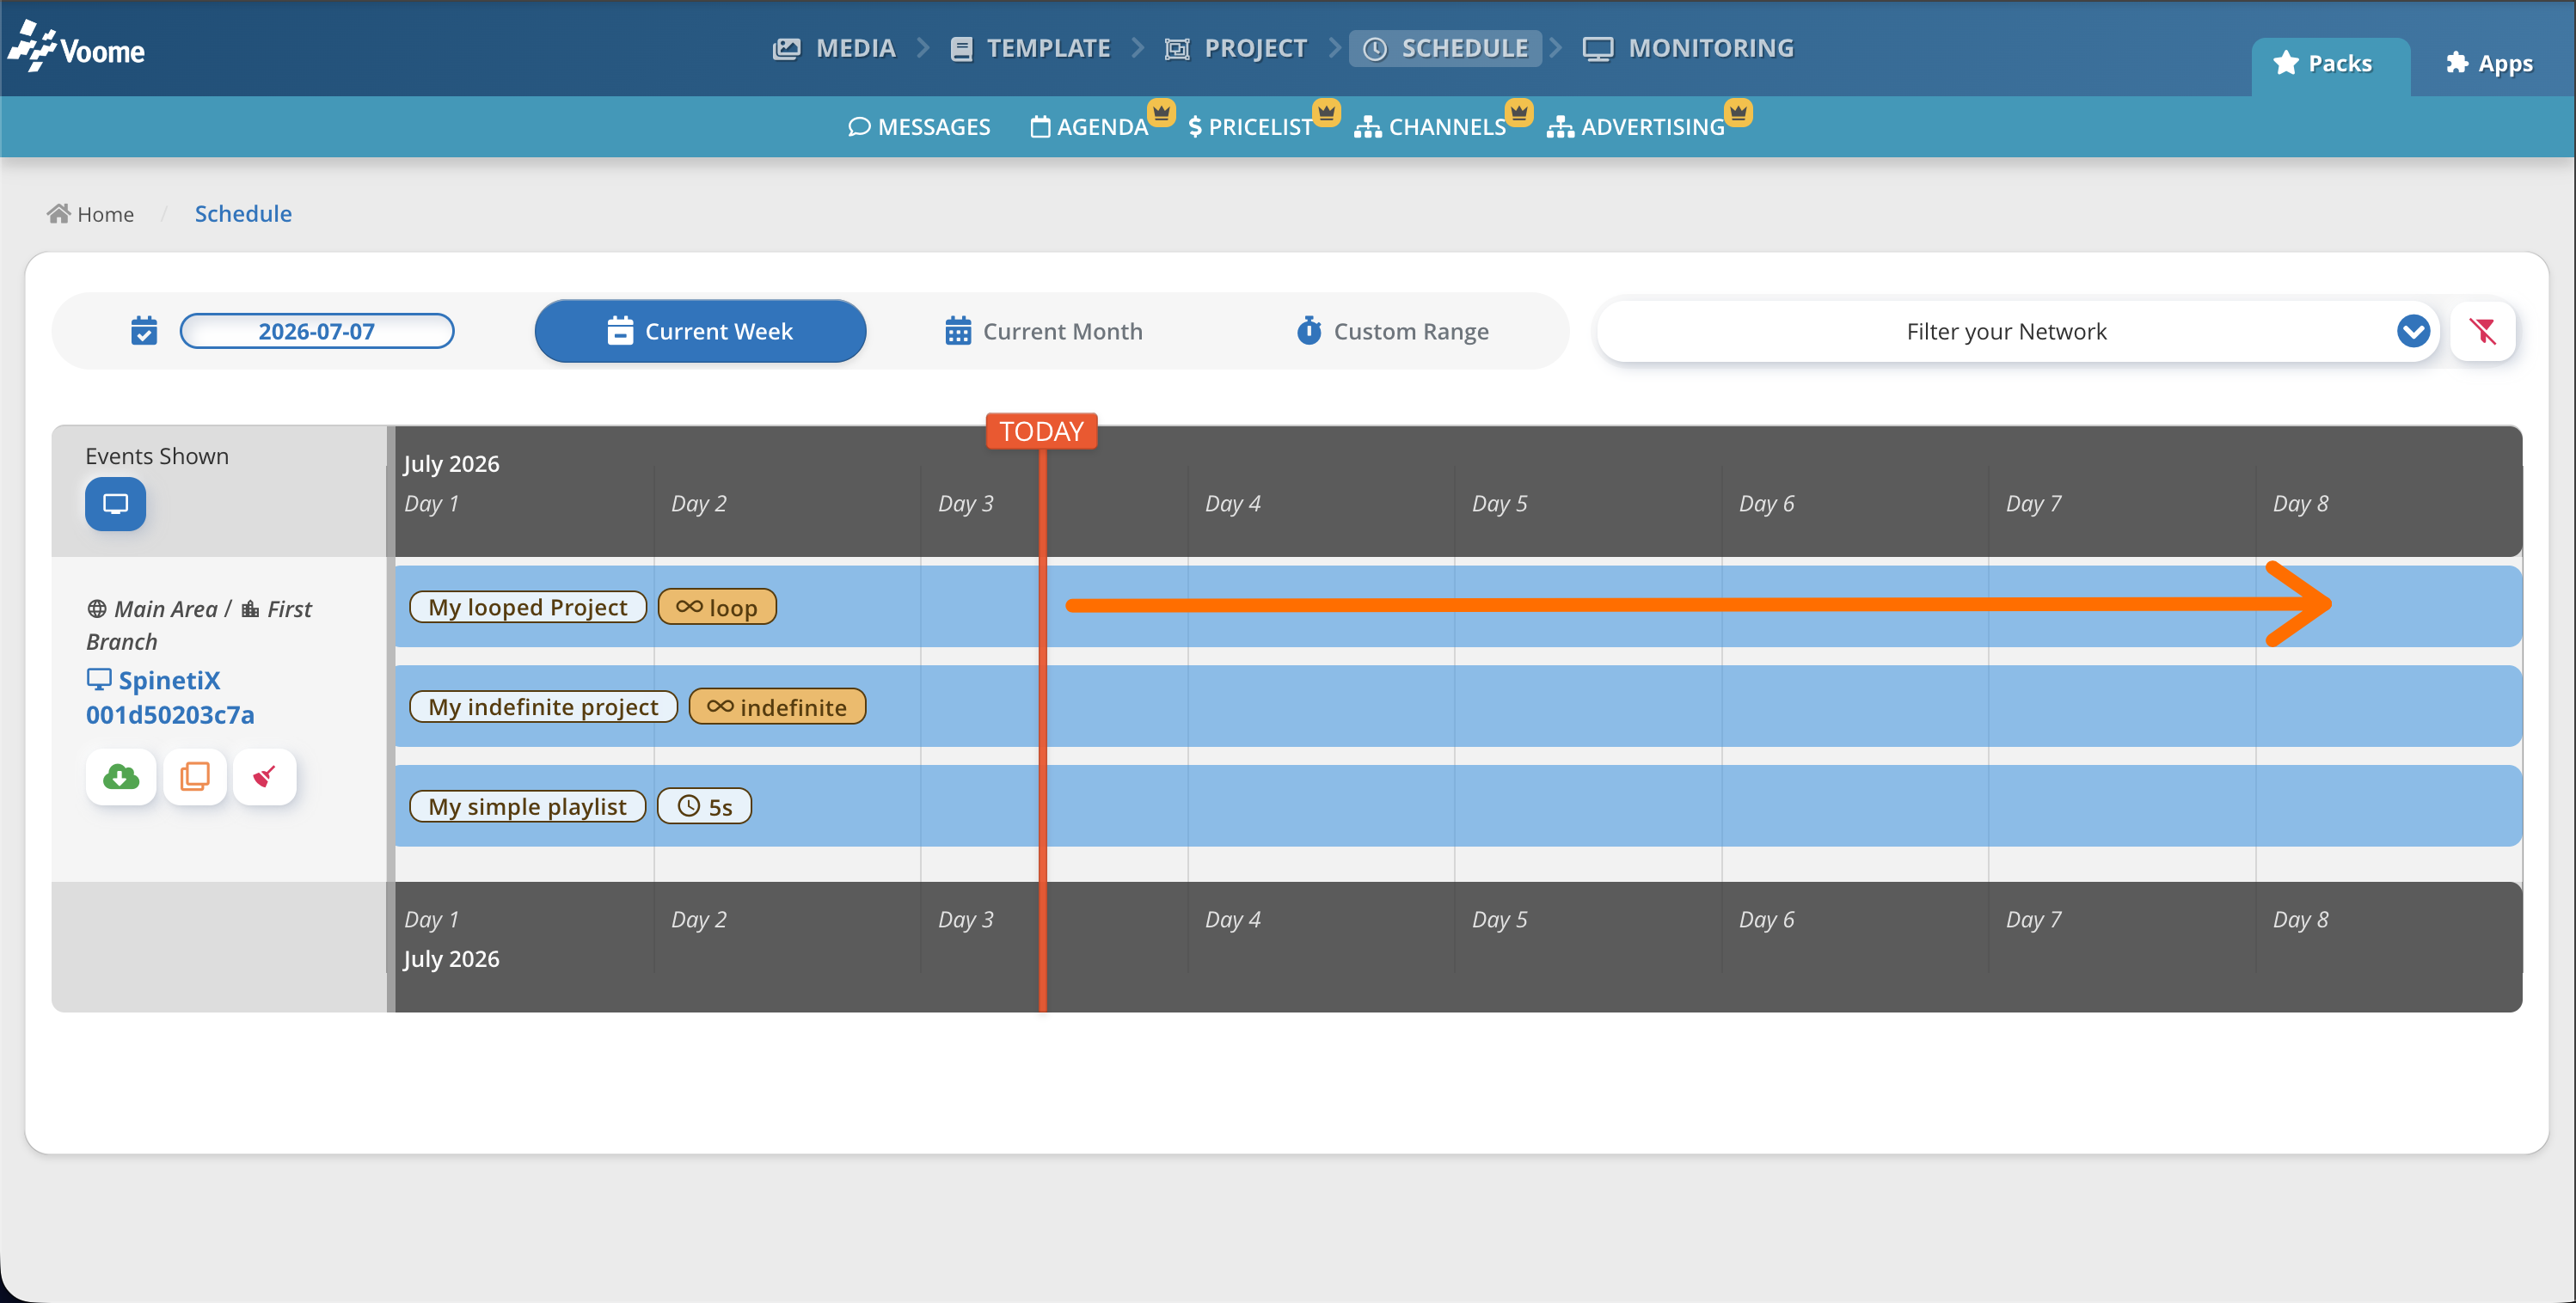
Looping a project comes in particularly handy for one-time events.
Say tomorrow is a national holiday and you want to show a fixed flyer for the whole of tomorrow. Just create a new project with the flyer, set the project's timing to loop, and schedule it with the highest priority for tomorrow. The flyer will be the only thing played tomorrow, and once it is done your regular schedule starts playing again.